- NEW DVD Series – Stone Setting with Bezels
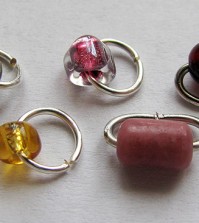
- Tube Set Charm by Kim St. Jean
- Prong Basket Pendant by Kim St. Jean
- NEW DVD Series – Stone Setting with Cold Connections
- New DVD Series – Stone Setting with Wire
- NEW DVD Series: Introduction to Stone Setting by Kim St. Jean
- Featured Tool: Bracelet Bending Plier
- NEW Dvd by Eva Sherman
- Fun, Fast Fold Forming DVD Series
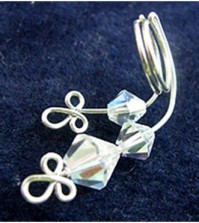
- Double Band Ear Cuff from Alex Simkin
Spring Flower Earrings
by Judy Ellis, Wire-Sculpture.com
Tip for February 28, 2014
Spring Flower Earrings Pattern by Albina Manning
The sun is shining and the weather is starting to warm, which means that April showers will soon bring May flowers. Today I thought I’d share one of our FREE Jewelry Patterns perfect for Spring, our Spring Flower Earrings pattern by Albina Manning. You can find this and other FREE patterns on our Patterns and Ideas page.
This pattern will teach you how to make a spring flower link, from a coiled spring shape. Although taught as a pair of earrings, this link can also be utilized in many other jewelry designs such as a bracelet or a necklace.
Spring Flower Earrings

Designed by Albina Manning
Skill Level: Beginner
Technique: Wire Forming
This lesson will teach you how to make a spring flower link, from a coiled spring shape. Although taught as a pair of earrings, this link can also be utilized in many other jewelry designs such as a bracelet or a necklace.
Materials
- 1 15″ piece 18-gauge round dead soft wire
- 2 ear wires
- 2 5mm jump rings
Formula: The length of wire needed will depend on the diameter of the mandrel used and the number of coils desired.
Tools
Instructions
- Straighten and then cut the one 15″ (38cm) piece of wire. (You can also choose to work directly off the coil or spool.) Begin by tightly coiling the wire around the mandrel.


- Make and complete 6 full coils around the mandrel and cut the wire.


- Remove the coil from the mandrel. Directly across from one another, cut each end flush, as shown in the photo.


- Use your fingers to begin opening the coils, working from each end toward the center, as shown with the red arrows. Both of the end cuts have to be inside the spring.


- Continue forming the spring circle, until the wire’s cut ends meet each other.


- Make sure that all of the six “petals” or individual coils are evenly distributed.


- Attach one 5mm jump ring and an ear wire to each spring flower.


- Experiment! This is a sample of a 7-petal/coil flower for inspiration.

I hope that you enjoy making and wearing these wonderful earrings!
Happy Spring!
![]()
Click to Receive Daily Tips by Email


Shirin Designs
February 28, 2014 at 8:15 am
AWWW, these are so cute. Thanks for sharing this idea.
evelyn
February 28, 2014 at 9:06 am
thank you for this beautiful pattern. i have problems with my hands but i will be able to this.
Joanie
February 28, 2014 at 9:34 am
Since I’m a newbie at wire forming, I absolutely have to try making these. Sooo cute! Thank you for sharing
Moonstone Mary
February 28, 2014 at 11:19 am
These are very cute and simple. They would be lovely with a crystal or leaf charm dangling from bottom loop. Or you could hook a series together with jumprings.
Judi Morningstar
March 2, 2014 at 10:21 pm
These are really cute. I’d like to try them in colored wire. Also, wondering if there’d be a way to fasten a crystal or bead to the center on each side.
Thanks for sharing,