


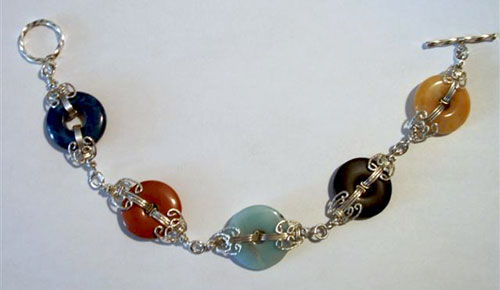
Bite-Size Bagel Bracelet
Designed by Jill Gentry © 2012
Skill Level: Intermediate
Technique: Traditional
I am not sure where this idea came from. I had several pretty, smaller donut beads that I wanted to connect in some way and I just began "playing." The result was a pretty cool link that I decided to make into a bracelet. I hope you like this pattern as much as I do!
Materials
- 22-gauge square soft wire, 13" for each "bagel bite link"
- 21-gauge half round half hard wire, 4" for every 2 links made
- 4-5 20mm donut beads
- 5-8 5mm ID 18-gauge or 20-gauge jump rings
- 1 toggle clasp of choice
Tools
- Flat nose pliers
- Chain nose pliers
- Round nose pliers
- Wire cutters
- Automatic wire twister
- Ruler
- Tape
- Fine point marker
Formula: Each finished donut link is approximately 1 1/2" long. Add the length of your favorite clasp and the jump rings to determine how many donuts you will need for your desired finished bracelet.
Instructions
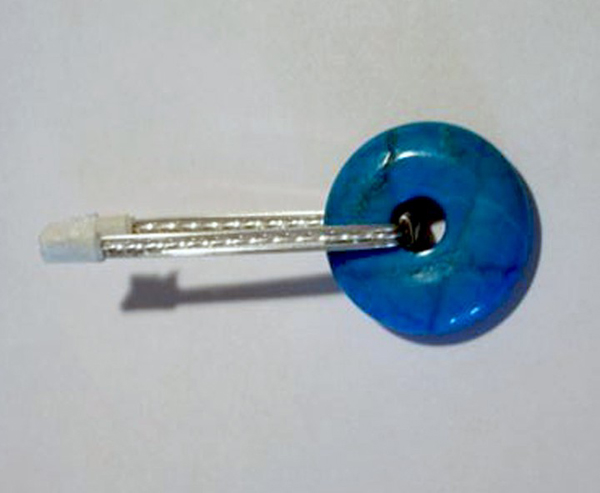
- For each "bagel bite link": straighten measure and cut three pieces of 22-gauge wire each 3" long. Twist one of these 3" wires. Bundle all three wires, with the twisted one in the middle, taping near each end.
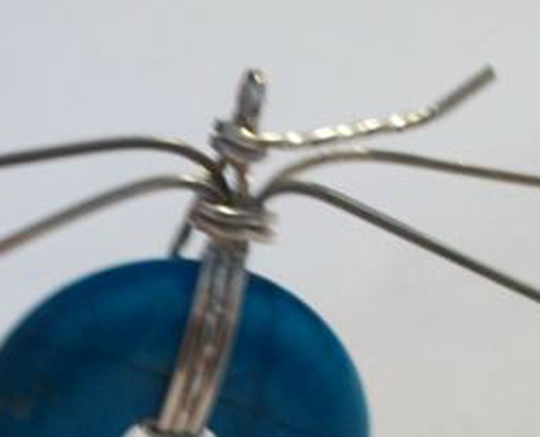
Measure and cut one 4" piece of 21-gauge half-round wire. Measure and mark the center of the bundle at 1 1/2". Use the 21-gauge half-round wire to make 3 wraps across the center of the bundle (covering the center mark) and trim the end, saving the wire for another wrap.
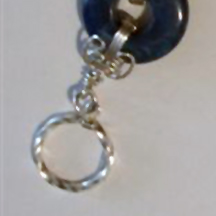
Use flat nose pliers to hold the wrap just made and bend the wire bundle up on each side of the flat nose pliers, forming a square U shape. Slip the donut bead into the U shape, so that the wraps are centered inside the bead.

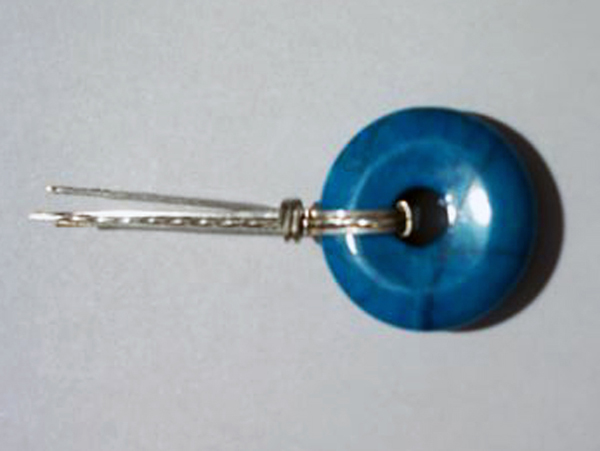
- Where the wires come to the top/outside of the donut, use flat nose pliers to squeeze the two sides of the bundle together tightly, forming the soft wire around the top edge of the bead.
Straighten, measure and cut one 4" piece of 22-gauge square wire and use it to wrap the two sides of the wire bundle together, beginning at the top of the bead and working away, 2 times to show. Trim the 22-gauge wrap wire, saving the remainder for the next link. Remove the tape.
- Hold the donut with the front facing you (wrap wire ends are on the back). Pull all four side wires down, leaving the two twisted wires.

- Immediately above the wraps, bend the back twisted wire toward the back of the bead and use chain nose pliers to bend the front twisted wire toward you. Use round nose pliers on the front twisted wire to form a loop with a bit of a stem, heading toward the back of the bead, do not cut this wire! Use the twisted wire from the back to wrap around the loop, working from the base of the loop up, 2 times to show.
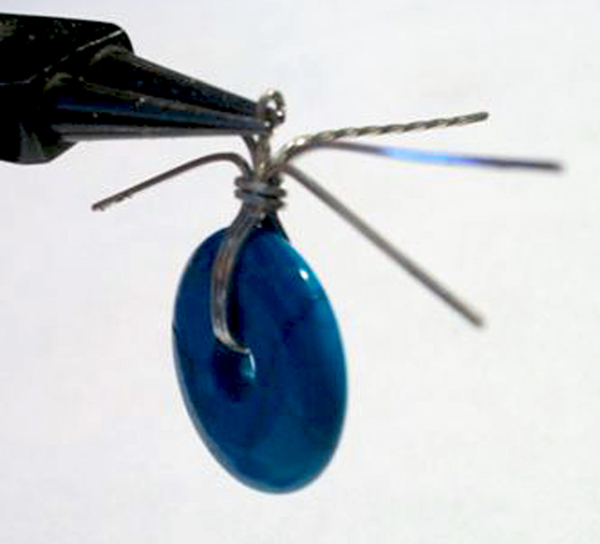
- Trim the wrap wire to 1/4" long and make a rosette, placing it on top of the wrap on the front of the piece. Bring the loop wire end once around the base of the loop, trim and tuck.
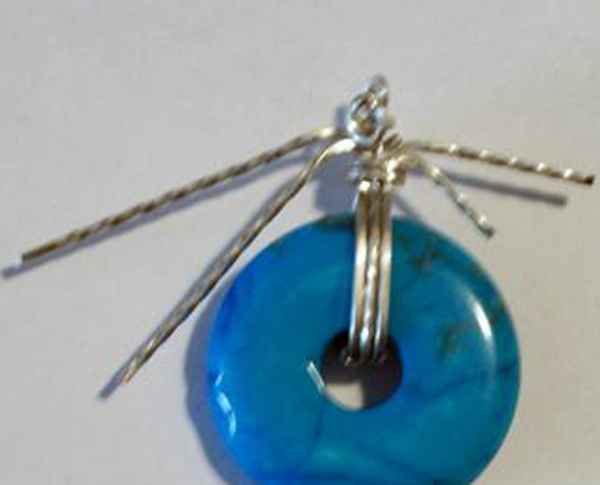
- Use the pin vise to twist the remaining four side wires. Trim the lower wires to 1/4" and the upper wires to 1/2". Use needle chain nose pliers to form tiny, tight loops at the bottom of each newly twisted wire and curve them to your desired decoration.
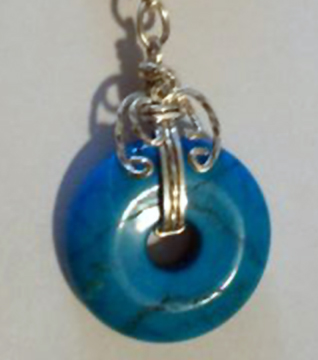
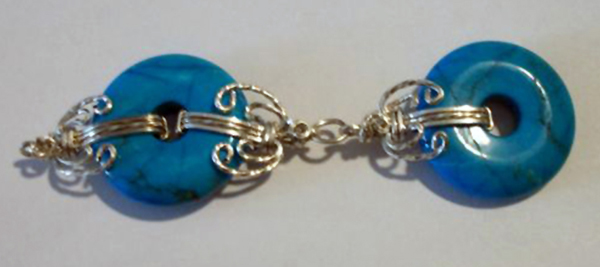
- Repeat Steps 1 through 6 to create the wire link needed on the opposite side of the same bead, forming a complete link with two connection zones. Connect the finished links together using jump rings and attach your favorite toggle clasp.
 Free Wire Jewelry Patterns
Did you find this pattern through a link from a friend? This Free Wire Jewelry Pattern is just one of dozens of free wire jewelry patterns we send via email. Get patterns like this one straight to your inbox - click here!
![]()
The premier place for all your jewelry making needs. The best in wire, tools, cabochons, gemstone beads and more. As well as a superior resource for educational support to help build your jewelry making skills and techniques.
Connect With Us

® 2007 - 2026 Wirejewelry.com Powered by ClaimTheWeb Cart