


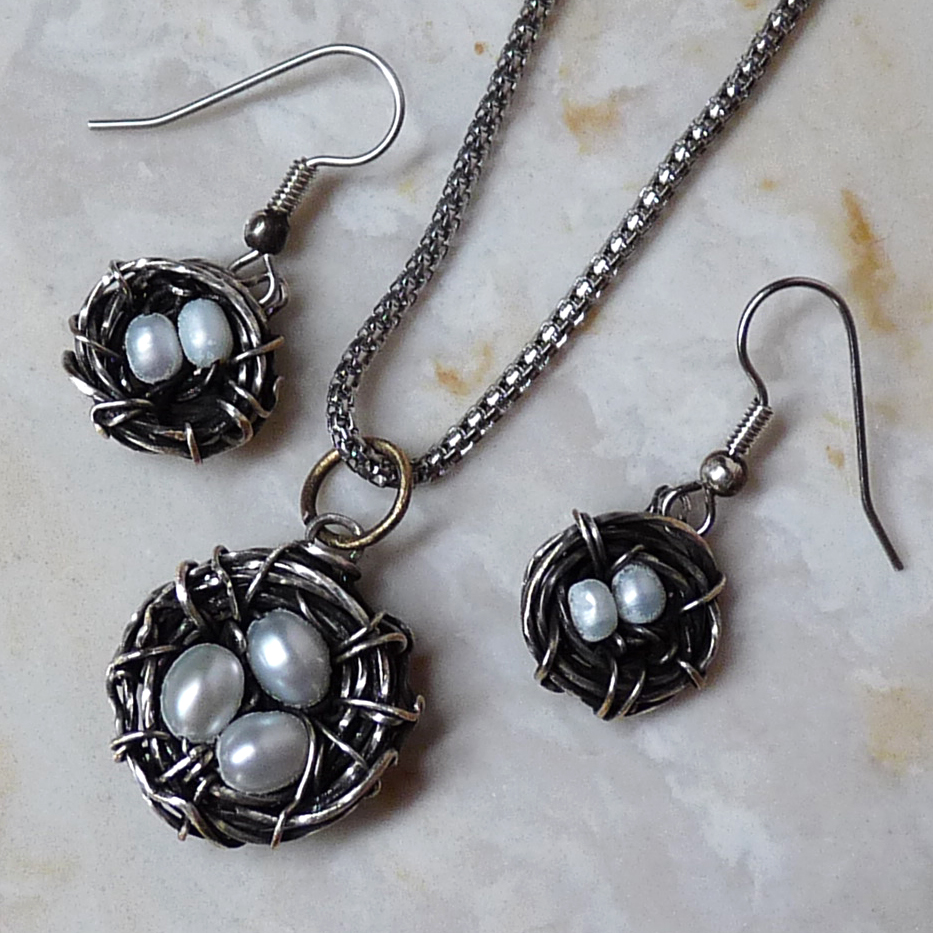
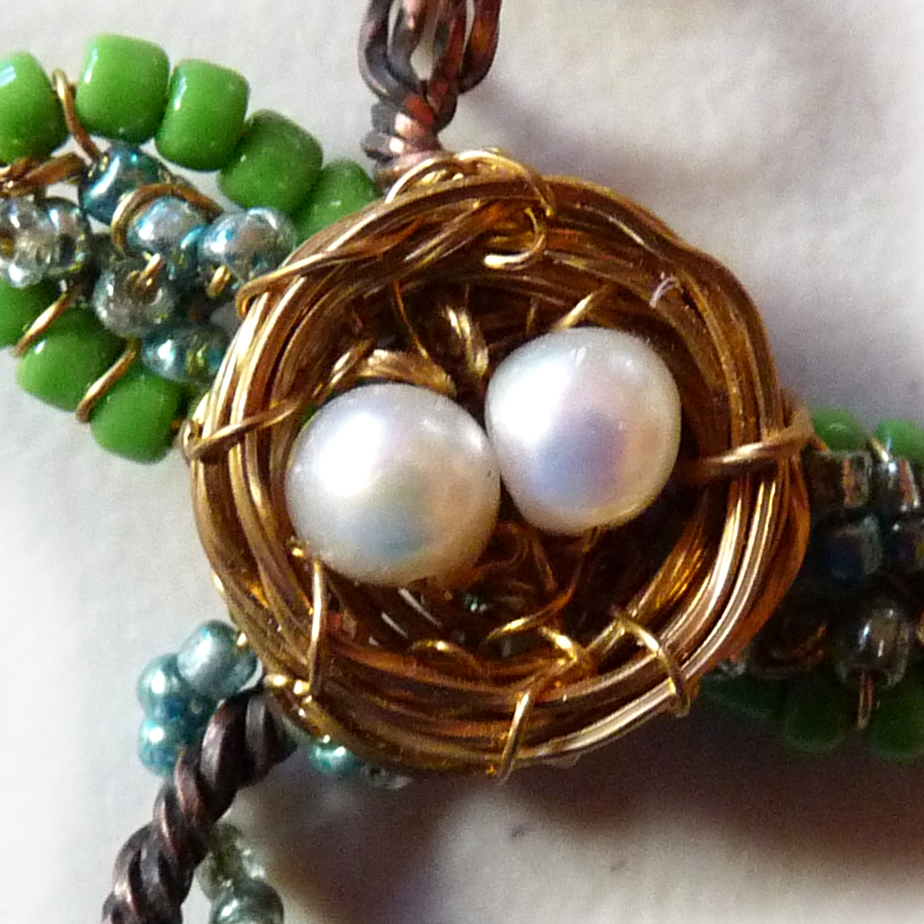
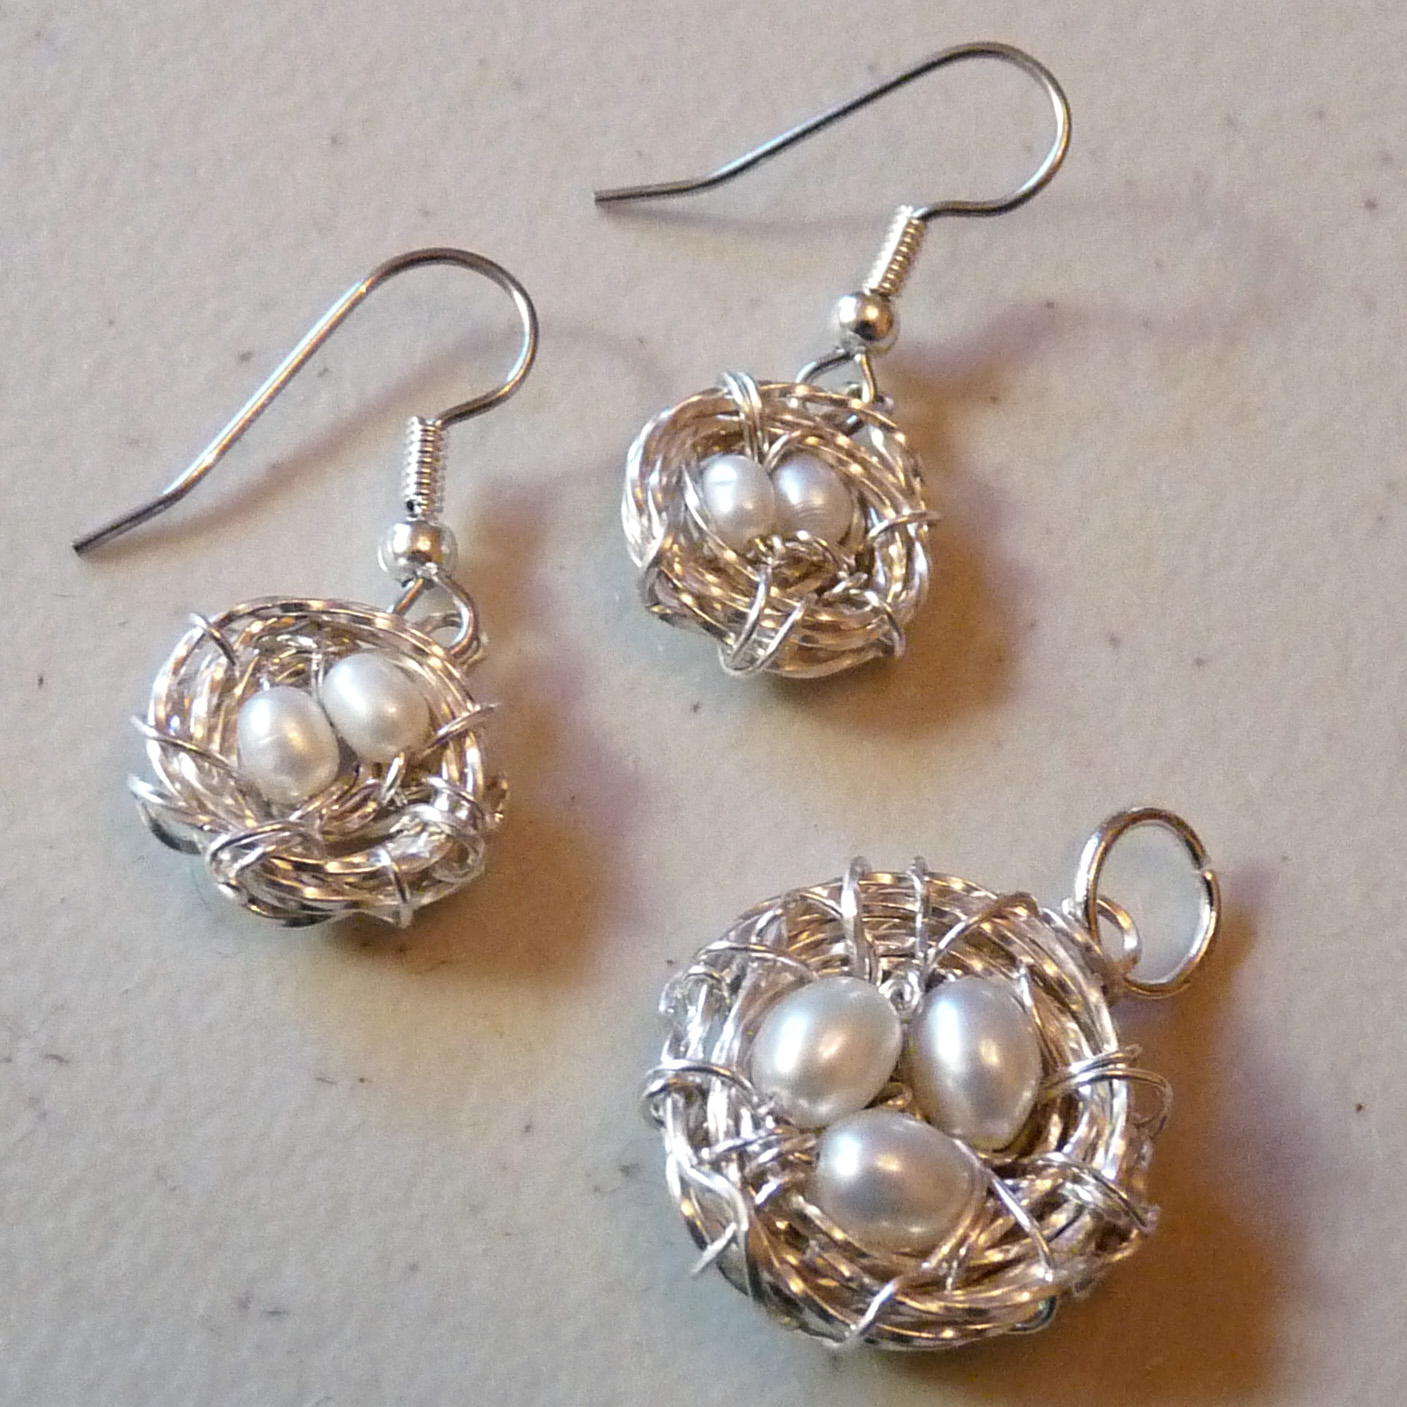
Bird's Nest Pendant & Matching Earrings

Designed by Rhonda Chase © 2013
Skill Level: Beginner to intermediate
Technique: Wire bending, twisting and wrapping. Adding jump rings, pearls and patina.
Personal Note from Rhonda: I've seen a number of bird's nest jewelry designs, but they're usually a little light for my taste. My design is very sturdy and has a good weight. Like a real bird's nest, they should be messy and organic. This means that these little nests are always unique. They can be customized with different metals and different "eggs" for a variety of looks. And they make beautiful gifts, especially for moms.
Materials
Pendant: Rhonda used silver filled wire.
- 3, 6mm freshwater rice pearls
- 3', 22 gauge silver square wire
- 2', 24 gauge silver round wire
- 1, 8 mm jump ring
Earrings: The earrings are made exactly the same way as the pendant using the nest instructions below. The only difference is the size. Here is the materials list with wire lengths to make matching earrings:
- 4, 4mm freshwater rice pearls
- 2' cut in half, 22 gauge silver square wire
- 2' cut in half, 24 gauge silver round wire
- 2, silver earwires
Tools
Instructions:
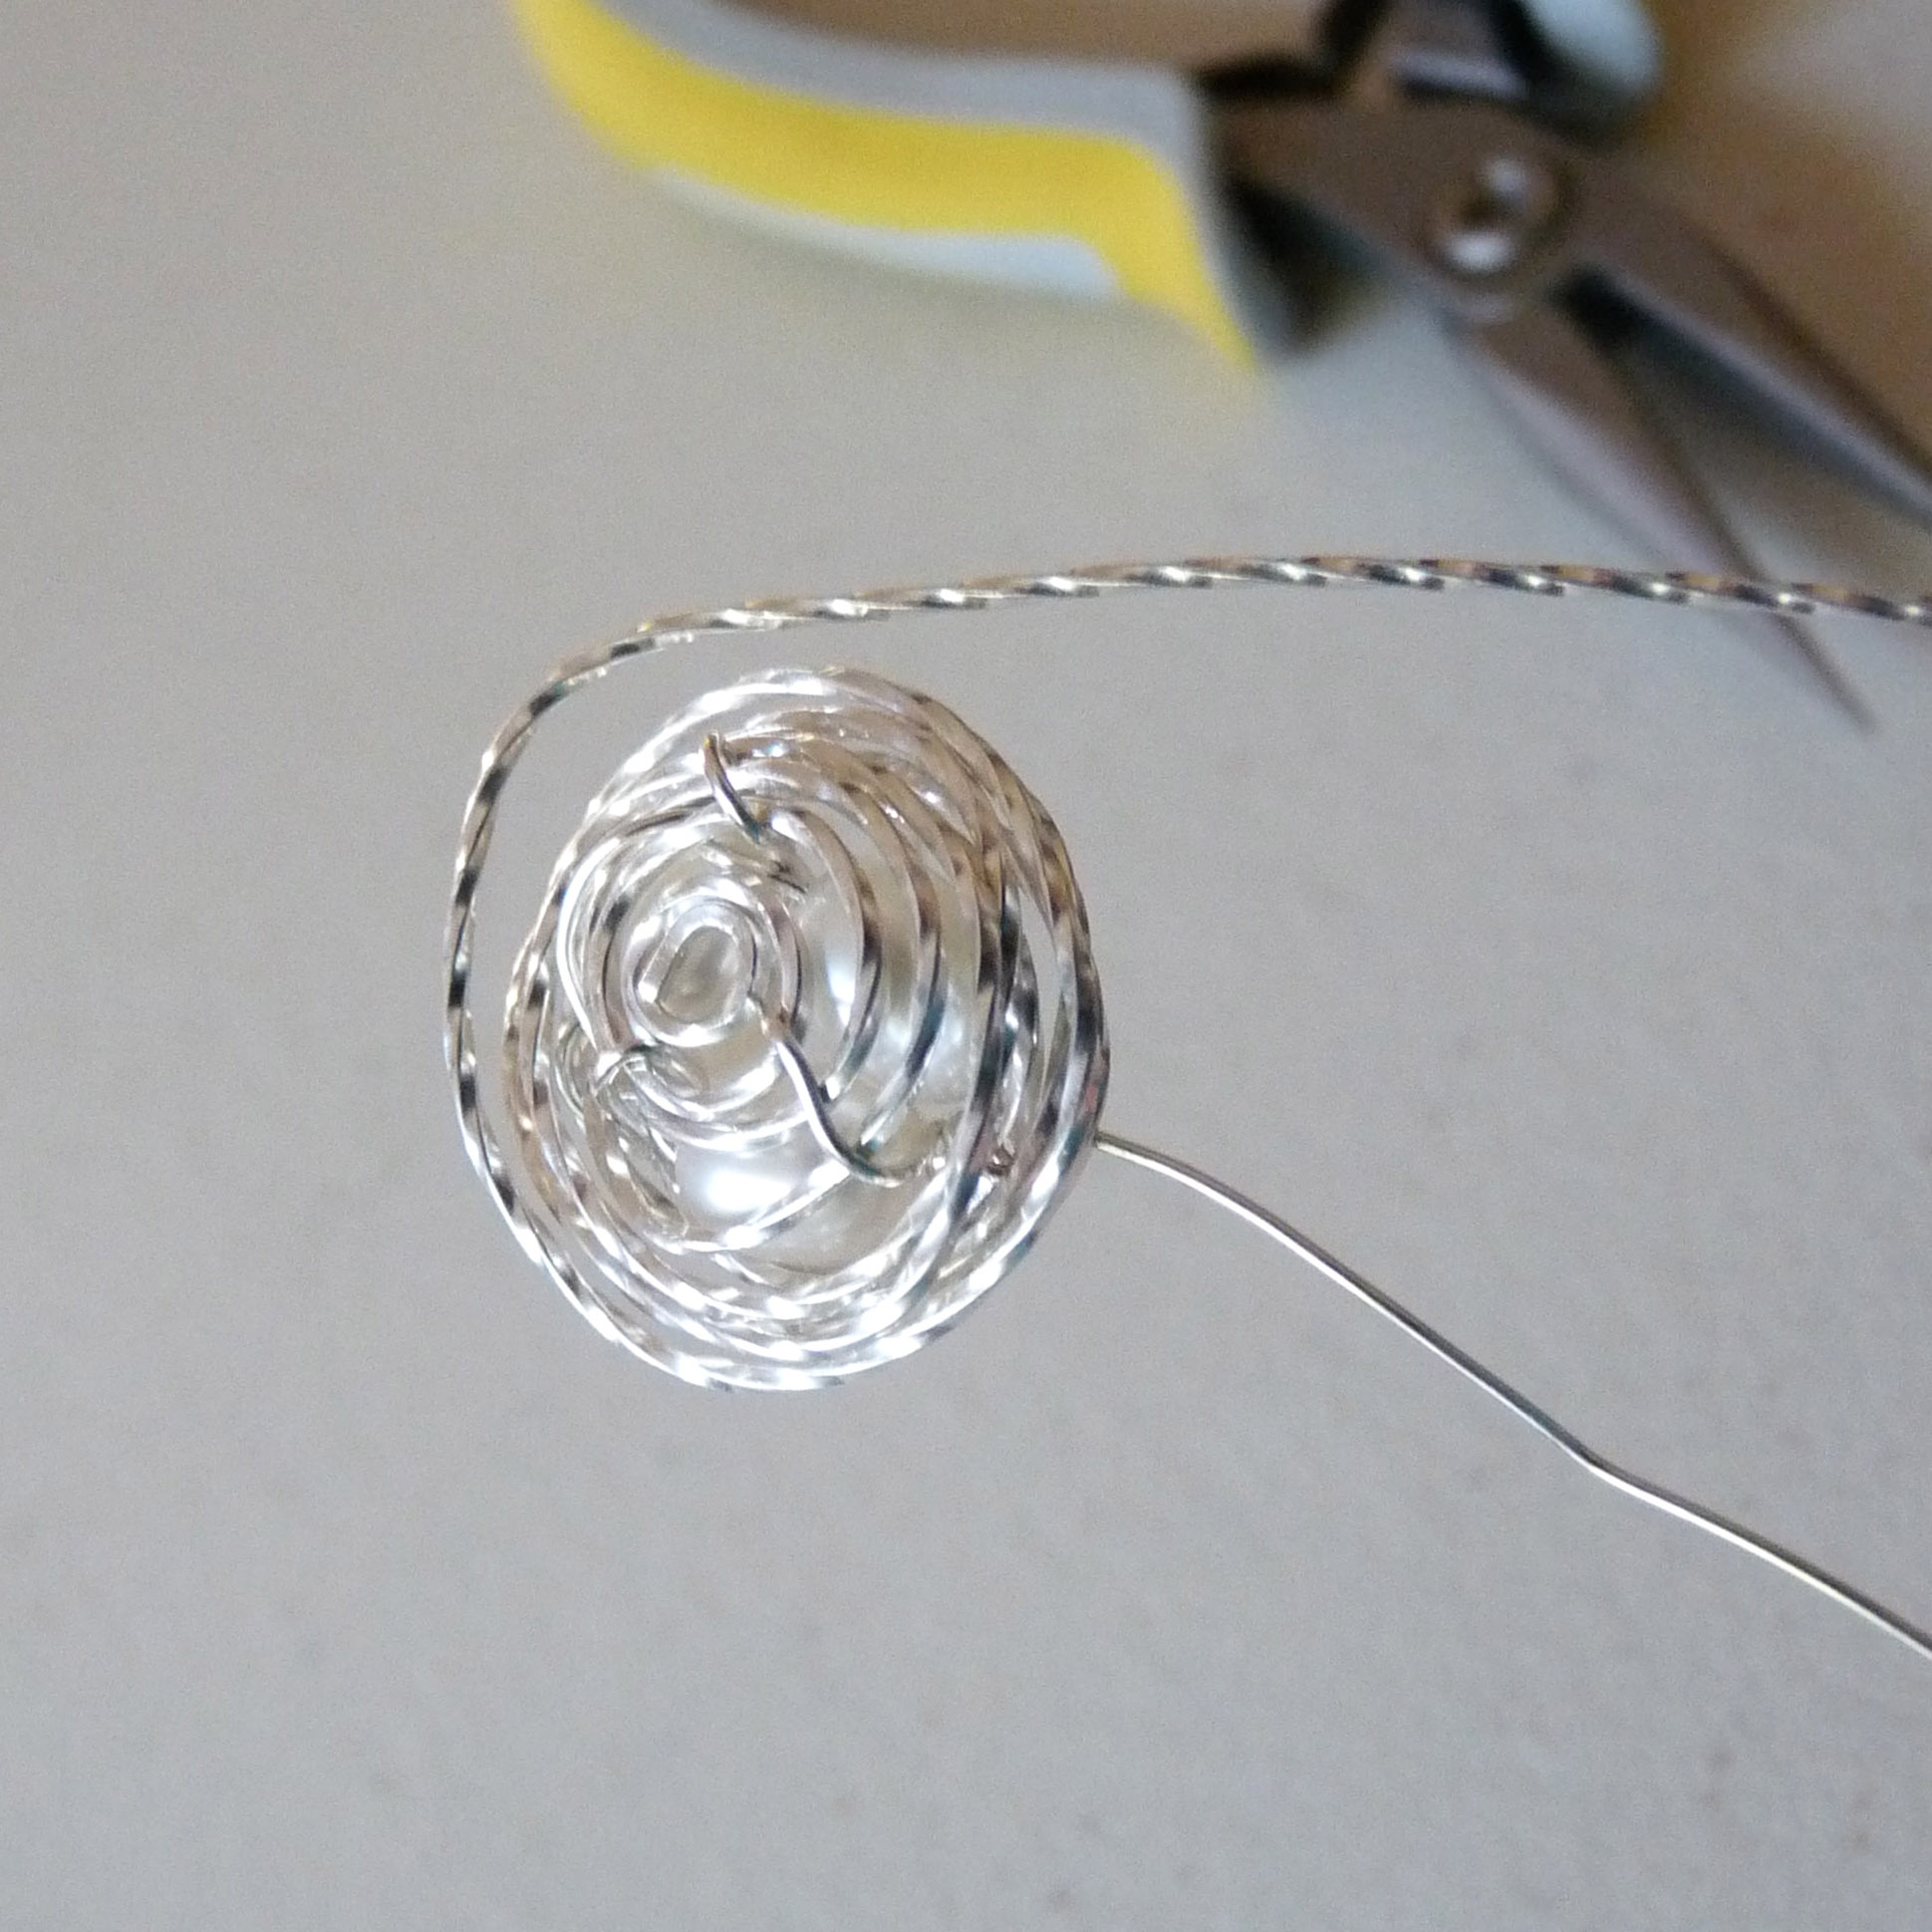
- Twist the square wire with a drill or electric wire twister and set aside. Here are a few simple instructions for twisting your wire:
a) Open the jaws.
b) Set an end of the wire the gap and close the jaws, trapping the wire. Make it tight.
c) Hold the other end of the wire with flat pliers with one hand and hold the twister with the other hand.
d) Start the drill at a slow speed and gradually increase. Any speed is fine as long as everything seems tight and under control. I like to go just slow enough to see the wire twisting so I can check for spots that are getting overly twisty.
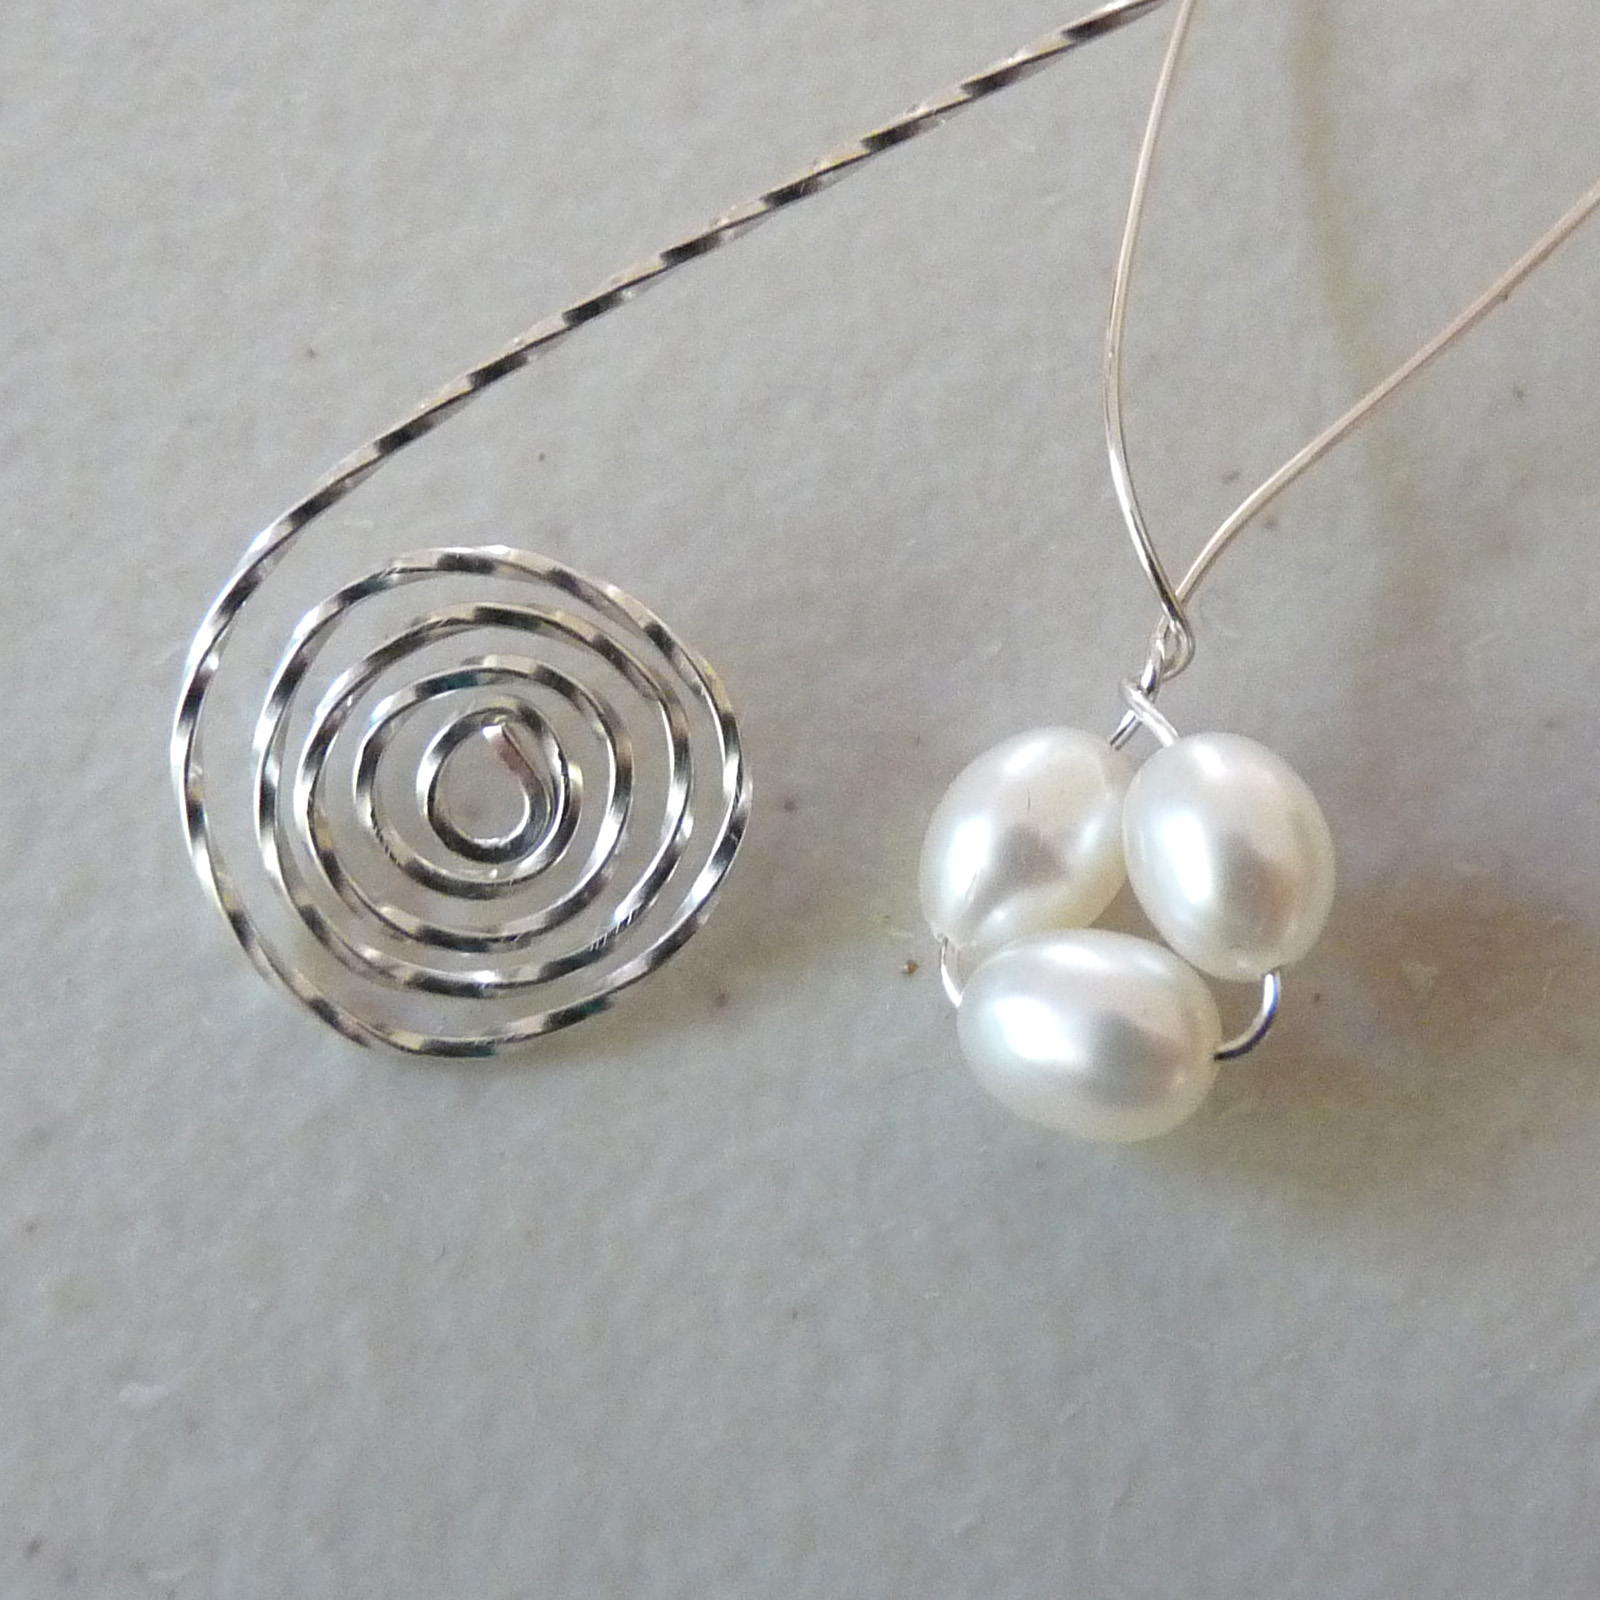
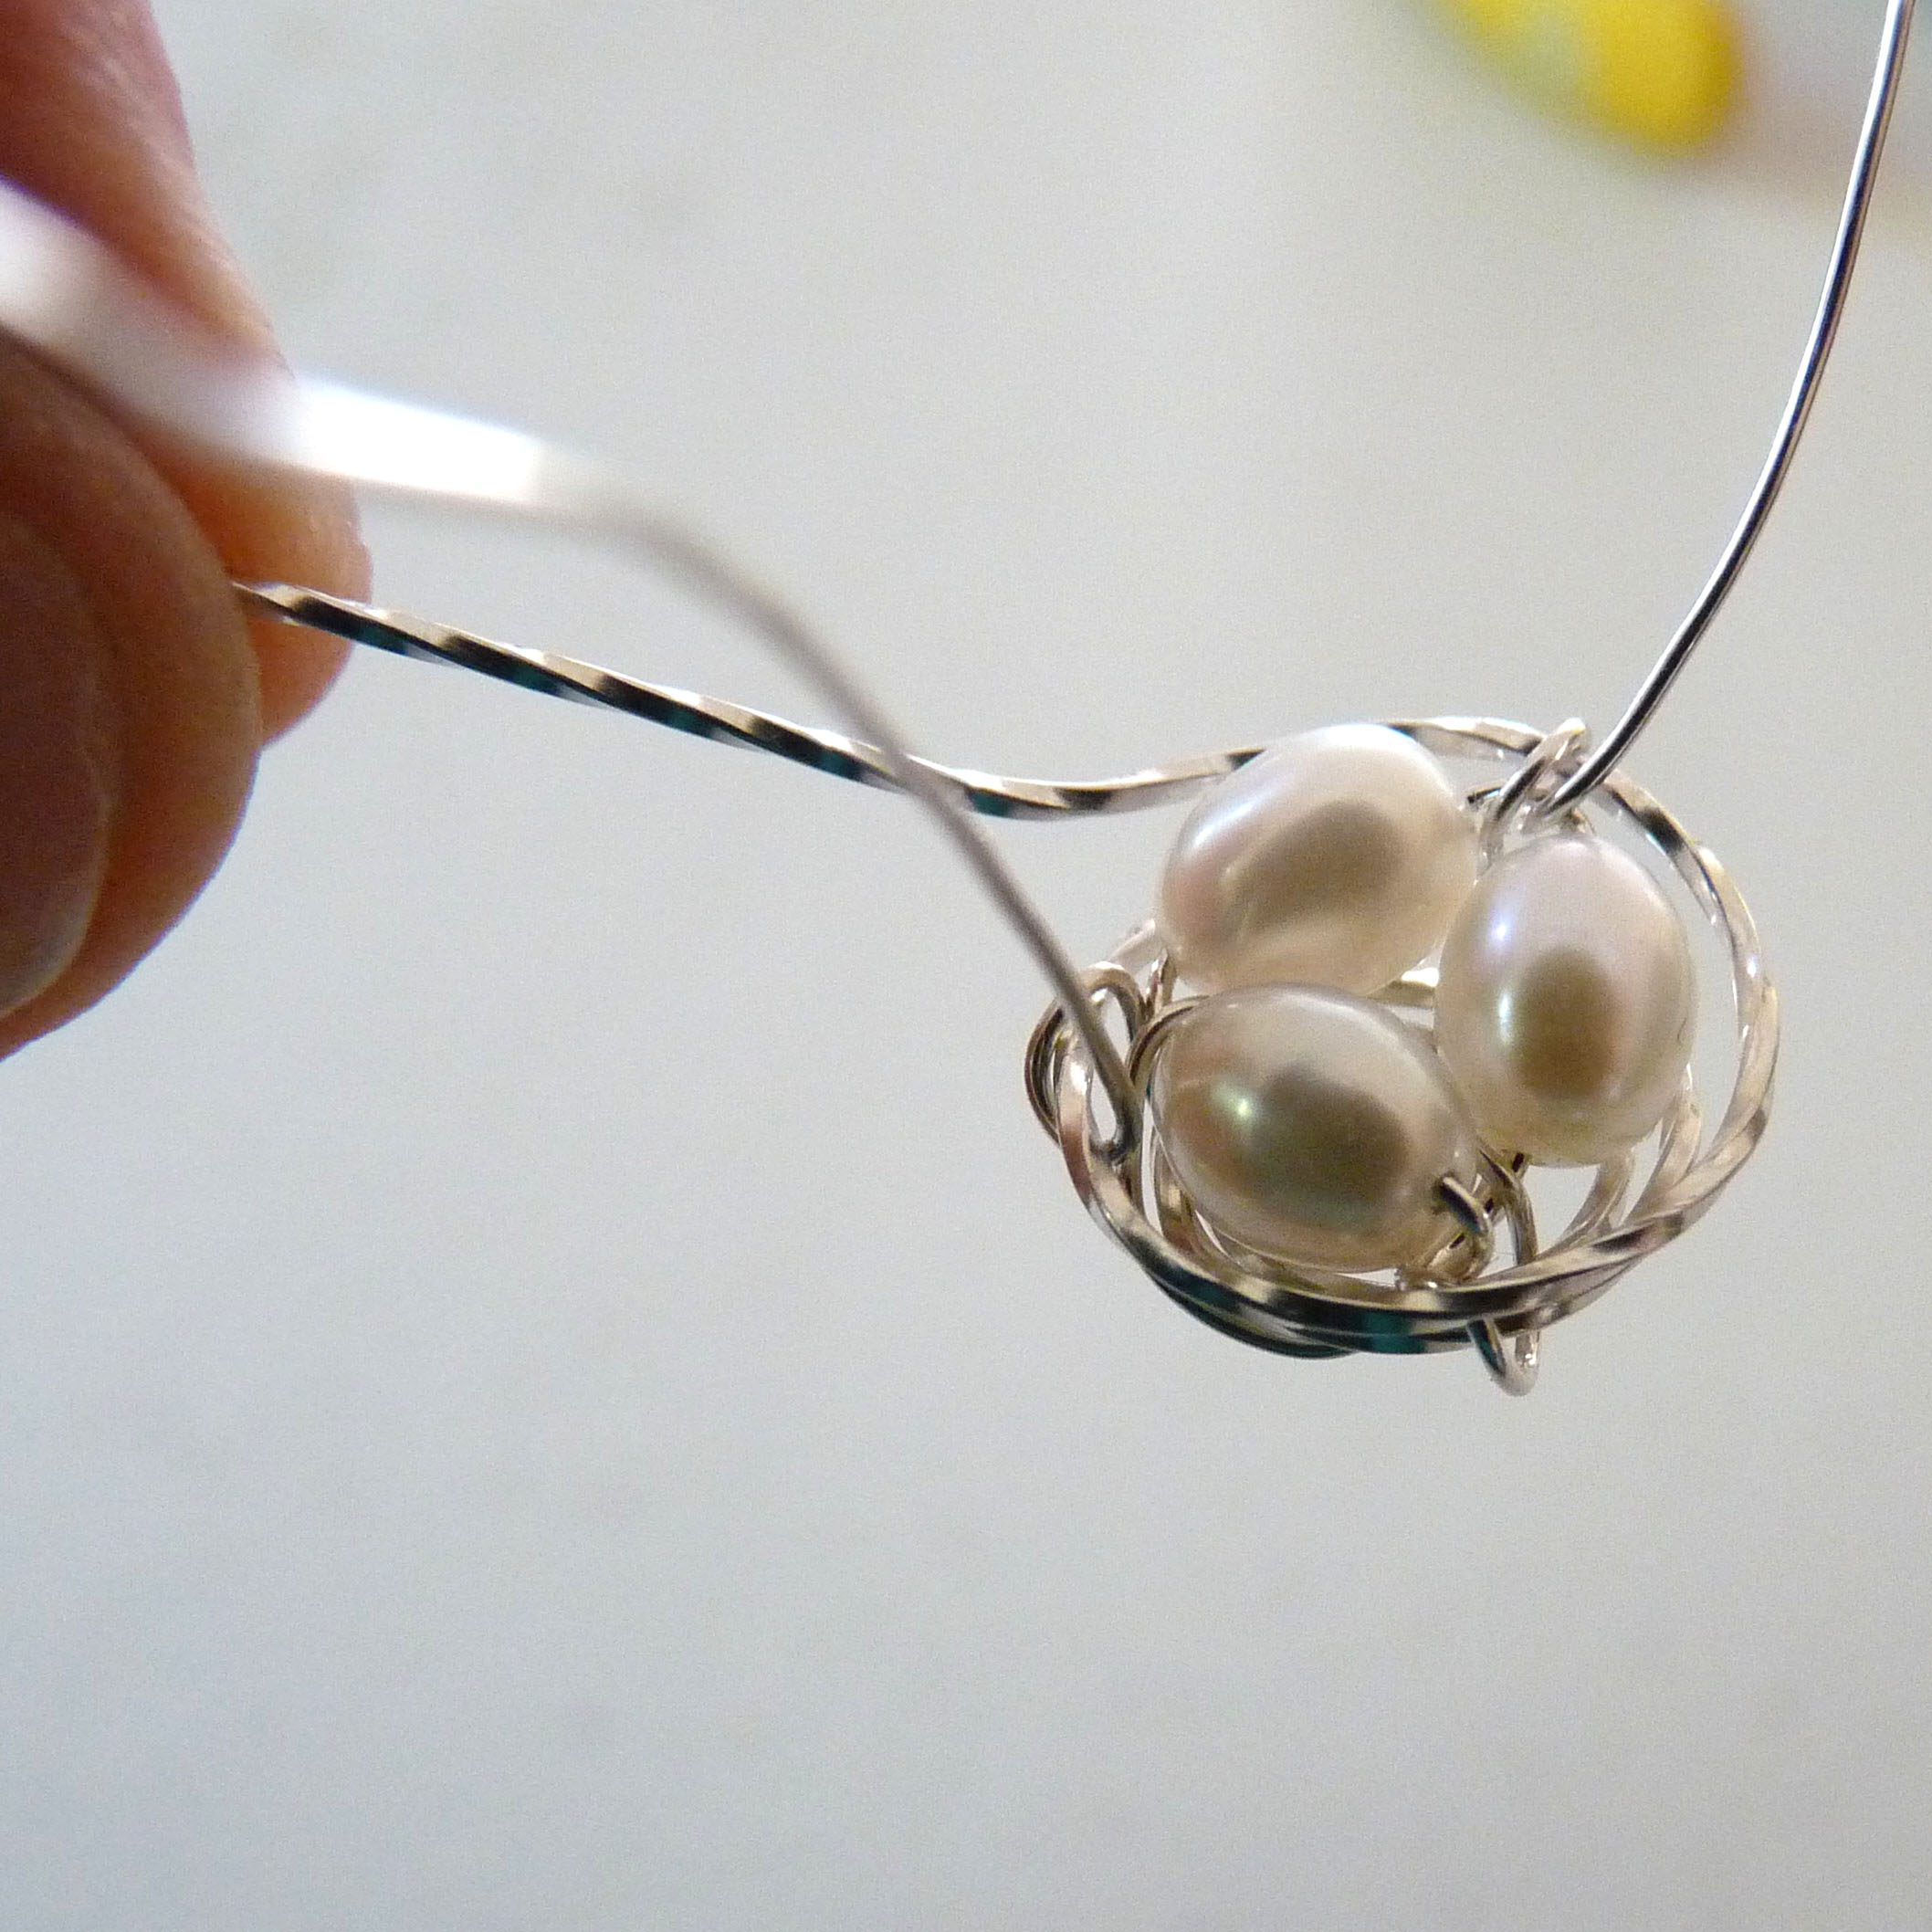
e) Stop when you like the look and remove your twisted, straightened wire. - String 2 or 3 medium pearls on 9" of round wire and form a circle about 2/3 of the way down the wire. Twist the wire gently a couple of times with your fingers (too tight and you may break the wire) to secure. Leave ends free and set aside. This is the egg cluster.
- Using flat nosed pliers, LOOSELY spiral the square twisted wire until the spiral is wider than the egg cluster. You must leave gaps in the spiral to pull the binding wire through later.

- Affix the egg cluster to the center of the spiral with the round wire ends. Don't worry about careful centering or being neat, that comes later. Start using the round wire ends to bind the twisted spirals together. I usually do this in a haphazard way perpendicular to the twisted spiral wires.
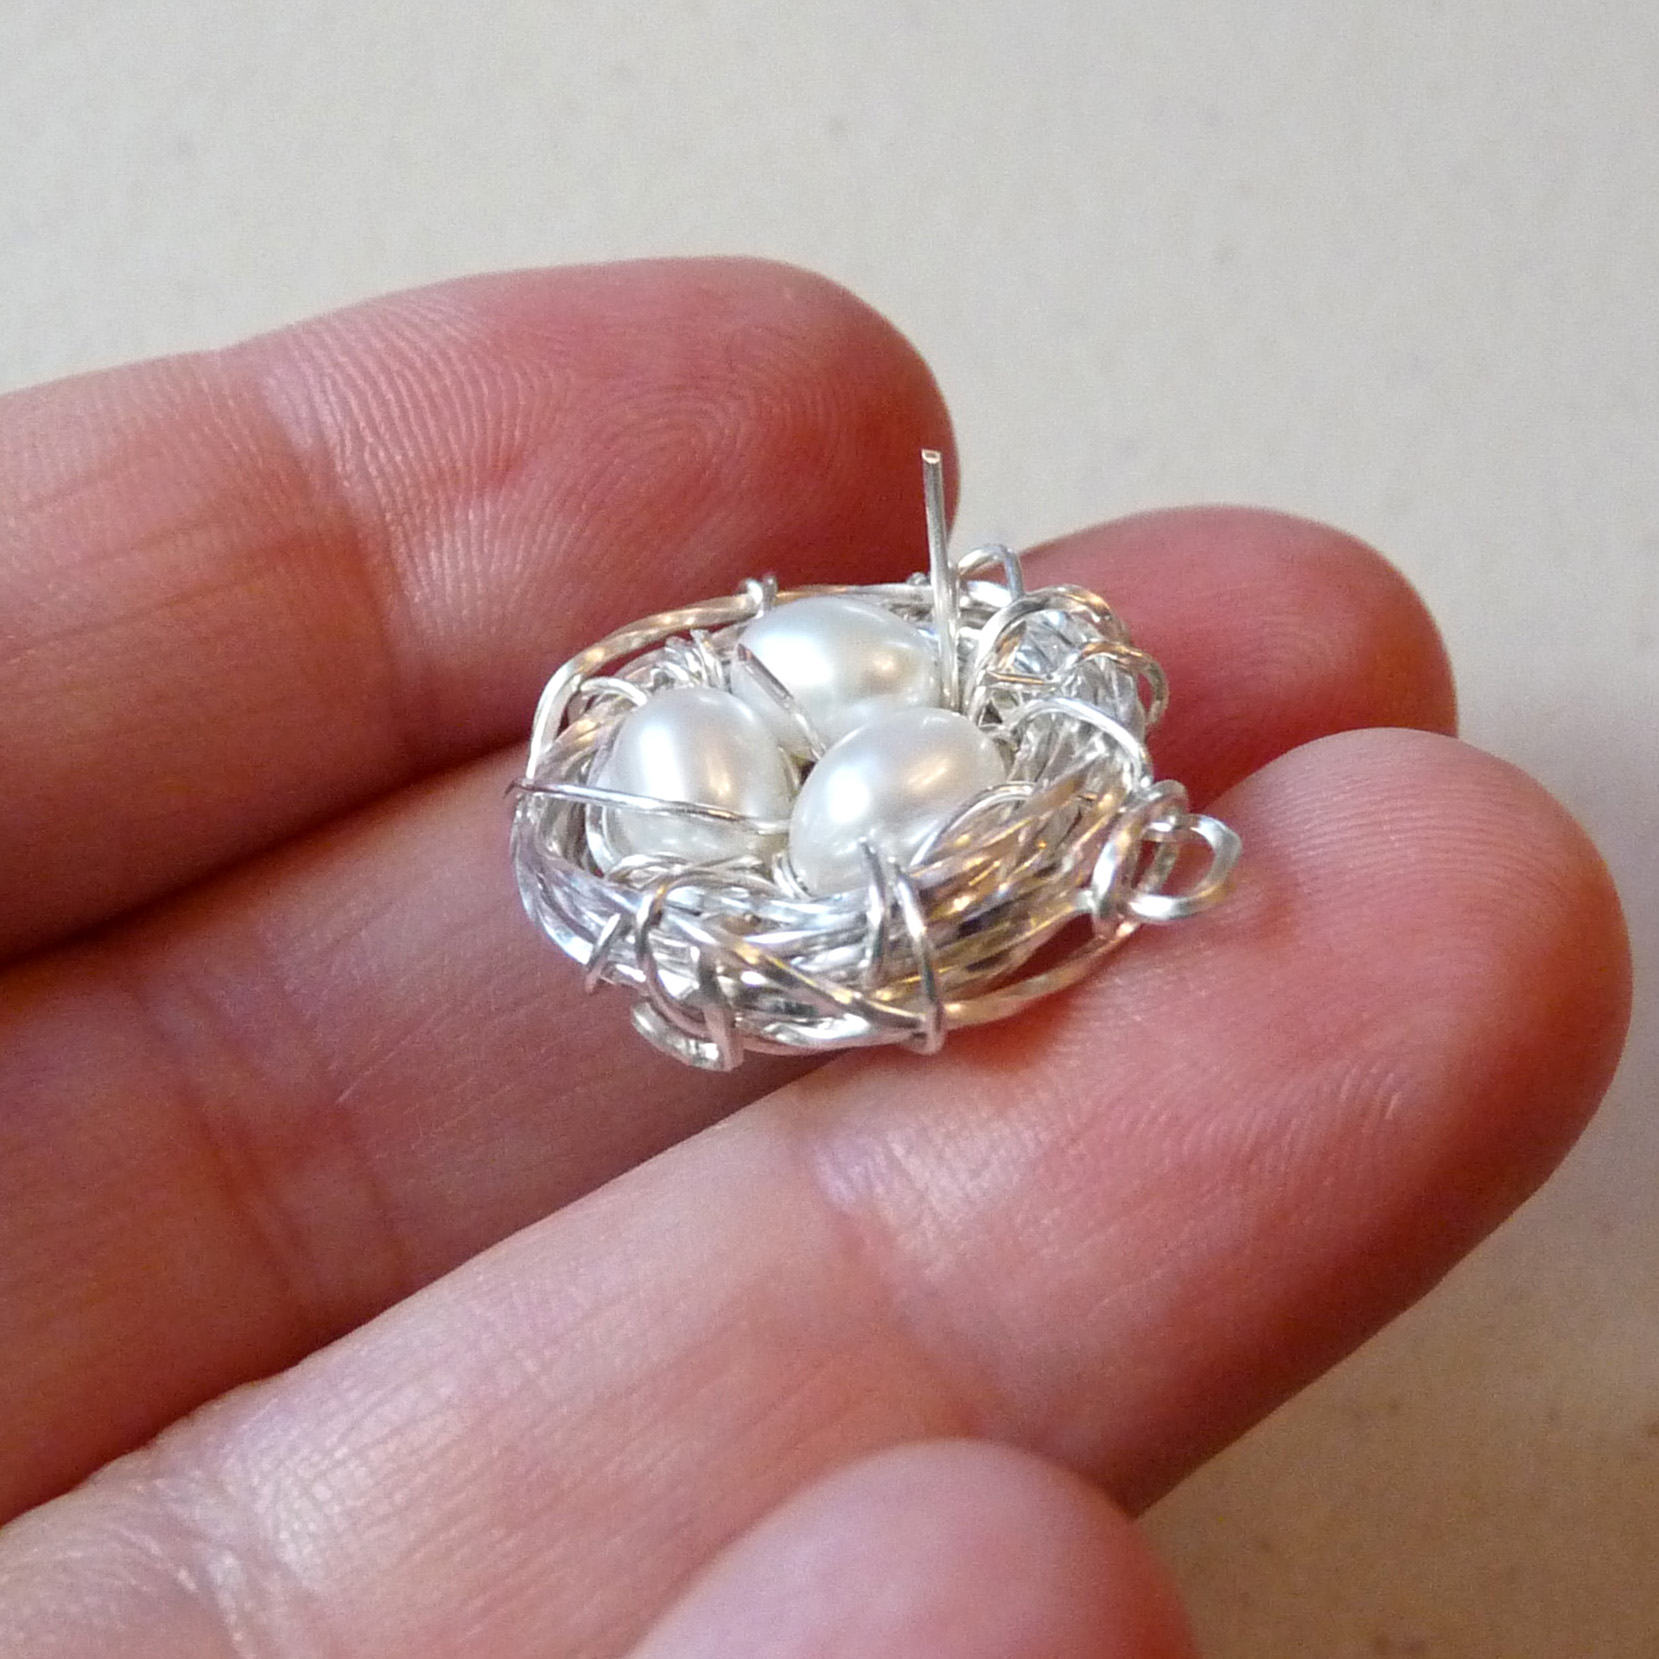
- When the egg cluster feels secure, wind more of the twisted wire up and around the eggs into a nest shape. It's easiest to do this with your fingers. The height and thickness is up to you. Leave gaps. Again, don't be neat.
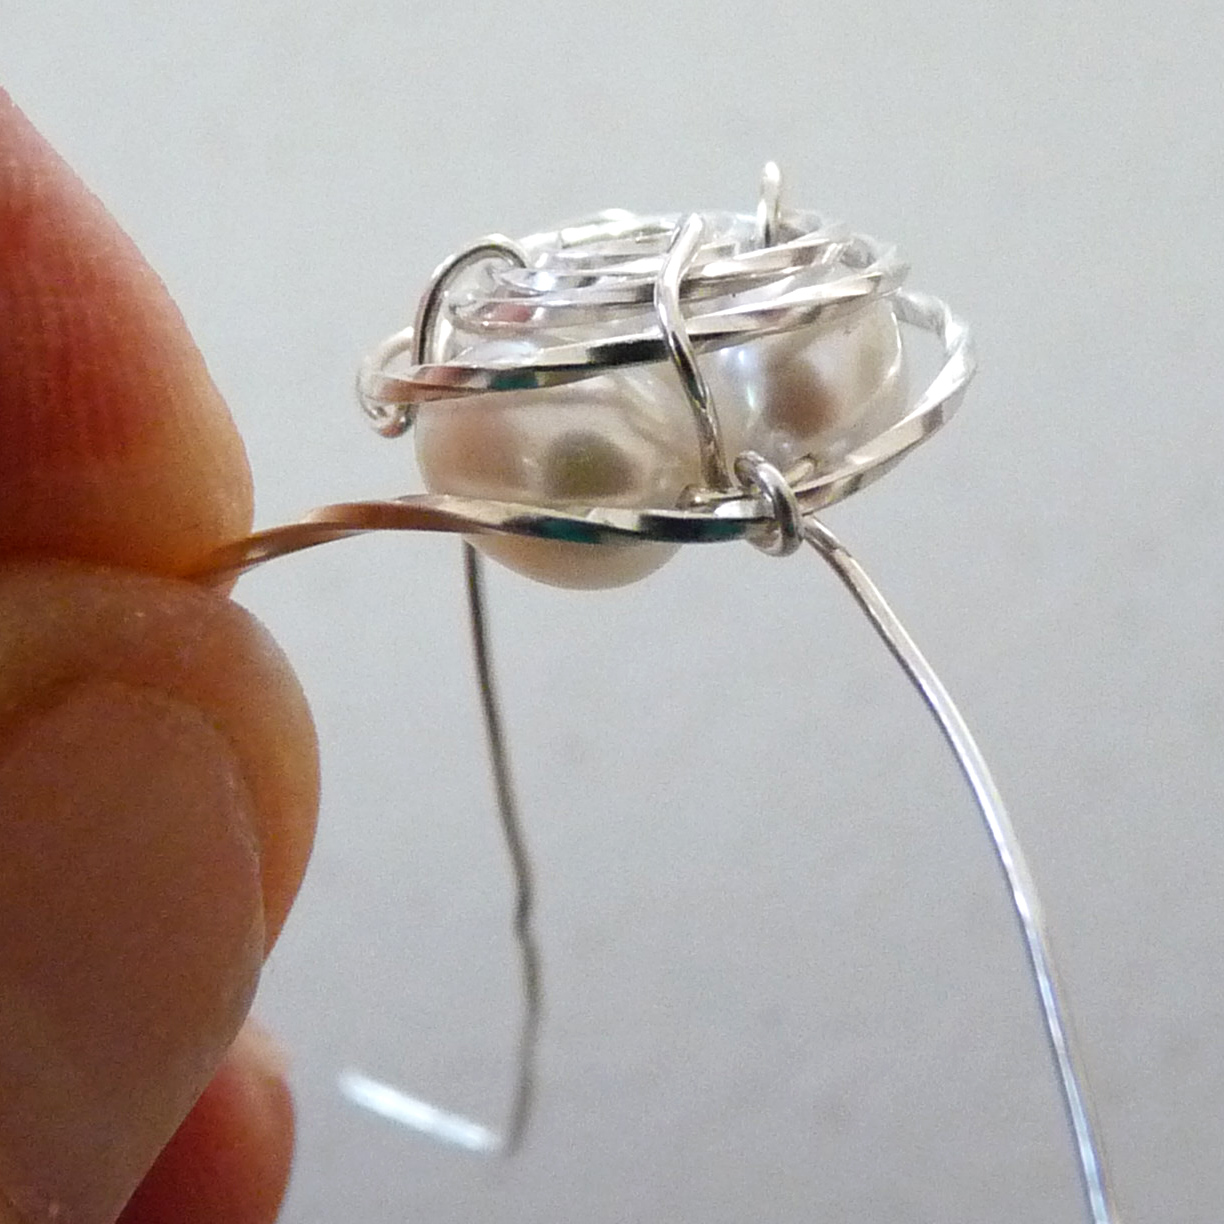
- Bind nest together with more round wire, moving in and out through gaps. You can adjust the egg cluster position at this point, if you need to. The weaving will lock it into place.
- Look at your nest and decide where you want the top. When you have the orientation, pull out a loop of twisted wire with round nosed pliers and gently shape the loop into a half circle. You can keep weaving and binding until you can't weave anymore or stop when you feel your nest is done.
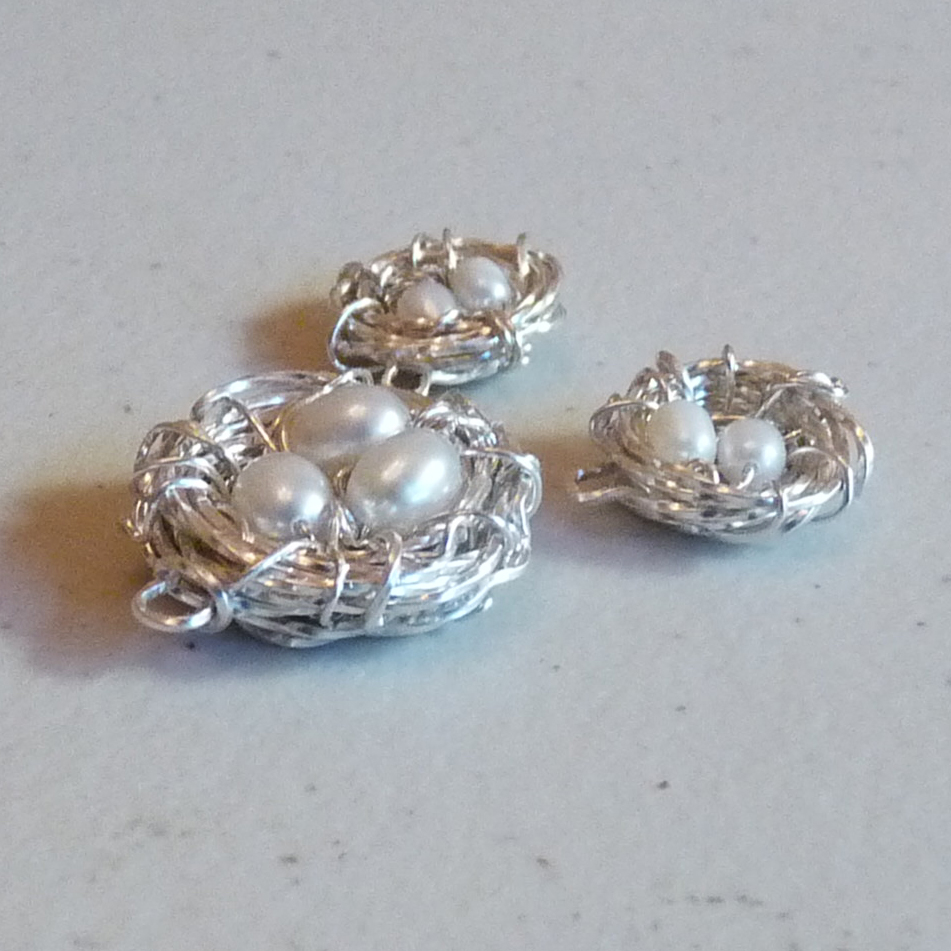
- End your weaving with the wire ends facing up and cut them short, about 5 to 6mm. Use chain nose pliers to bend the ends over and tuck them securely into the nest.
- Compress and shape the nest by gently squeezing with chain nose and round nose pliers, but be careful to avoid the pearls. Tighten any loose wires.
- Add findings to the wire loops from step 8.
- Optional: Patina, buff and polish. Adding a patina will really bring out the detail of the weaving and show off your wire work.

-
Congratulations! You have made your first Bird's Nest Pendant and Earrings.
Your nest will get tighter and it will be more difficult to pull the 24gauge wire through. Use chain nose pliers to help you. Take care not to scratch the pearls. Cut more round wire for binding if you need.
You can pull the wires as tight as you want now and guide the wires into a nest shape that you like. The nest should be fairly dense. Most of the gaps will be filled in.


 Free Wire Jewelry Patterns
Did you find this pattern through a link from a friend? This Free Wire Jewelry Pattern is just one of dozens of free wire jewelry patterns we send via email. Get patterns like this one straight to your inbox - click here!
![]()
The premier place for all your jewelry making needs. The best in wire, tools, cabochons, gemstone beads and more. As well as a superior resource for educational support to help build your jewelry making skills and techniques.
Connect With Us

® 2007 - 2026 Wirejewelry.com Powered by ClaimTheWeb Cart