


Birdhouse Pendant

Designed by Judy Larson © 2015
Introduction
Soldering experience is necessary to make this pendant.
Skill Level: Intermediate
Materials:
- 24 gauge sheet metal--- use the two large circles and one bail templates 22 inches of 20 gauge round dead soft wire.
- Two 6-8mm bead caps
- One purchased bail or make your own (shown)
- The pendant bezel is made from a 5/8" length of 1/2" ID copper pipe (not tubing)
There are sufficient rings to make a 9" bracelet, including the toggle.
Tools:
- Ring mandrel for your preferred method of cutting out sheet metal shapes<
- Mini TruStrike Sharp Designer Hammer
- Mini TruStrike Embossing Hammer
- Bench block
- 1.25mm Hole Punch Tools
- Solder for your preferred method of soldering
- Round nose pliers
- Flat nose pliers
- Chain nose pliers
- Flush cutter
- Pipe cutter
- Ultra fine point permanent marker
- File
- Pickle and pickle pot
- Alcohol Tumbler with steel shot Liver of sulfur
- 0000 steel wool
Instructions:
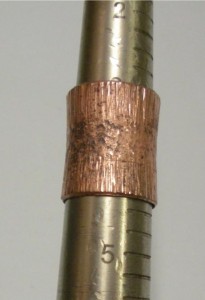
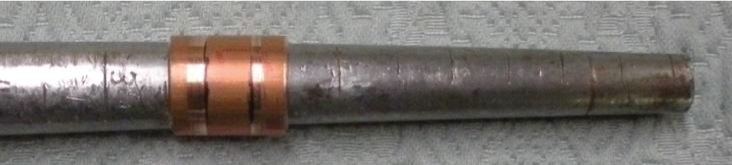
- Use a pipe cutter to cut one 3/4/" long piece of 1/2" ID pipe for the pendant.
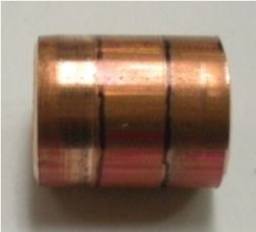
- Hint: You may find it easier to texture the pipe tube if you anneal it first. Use an ultra fine point permanent to divide the 5/8" length of the pipe into thirds.
- Slide the pipe onto a ring mandrel.

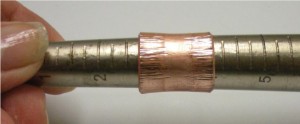
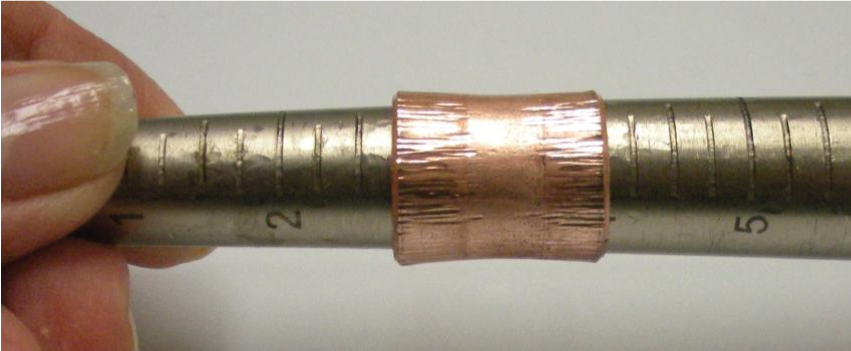
- Keep pushing the tube down the mandrel as you use the narrower side of the Mini TruStrike Sharp Designer Hammer to texture both ends of the pipe. There are many ways to hold the tube on the mandrel. Find one that is comfortable for you. Make sure that you turn the pipe tube around frequently on the ring mandrel. You will notice that the tube ends will flare out a bit, which is what you are aiming for. Texture until each end is a size 4 on the ring mandrel.
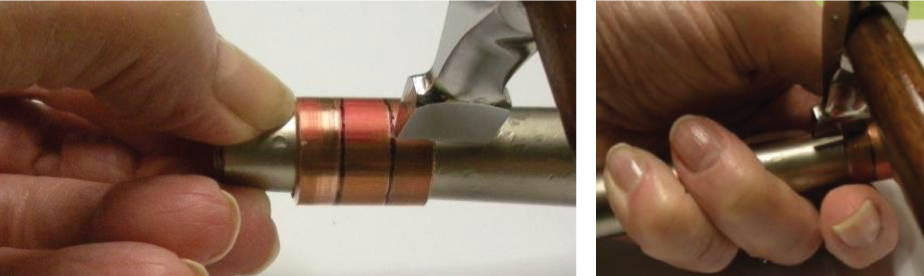
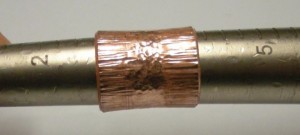
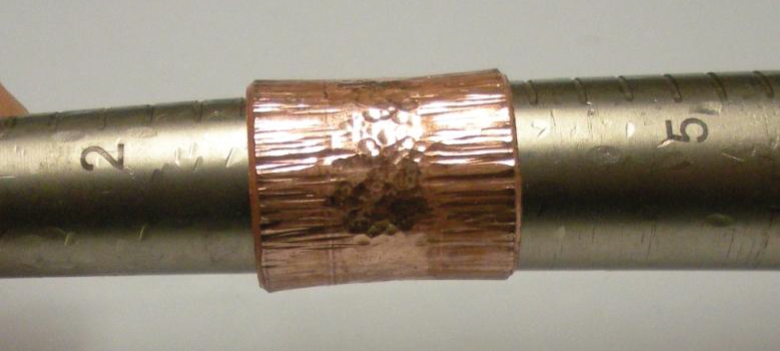
- Use the larger side of the Mini TruStrike Embossing Hammer to texture the center of the pipe, keeping in mind that you still want both ends to flare out a bit.
- Remove the tube from the ring mandrel and anneal it.
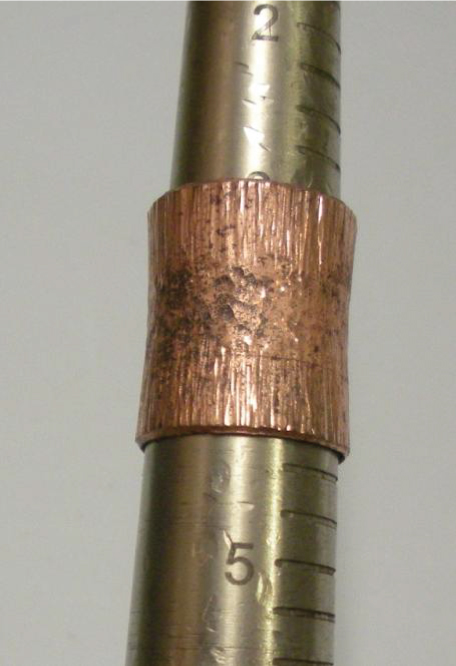
- Slide the tube back on the ring mandrel. Use the narrower side of the Mini TruStrike Sharp Designer Hammer to texture both ends of the tube again. Make sure that you turn the tube around frequently on the ring mandrel. Texture until each end is between a size 4 1/4 and 4 1/2 on the mandrel.
- Drag each tube end over a file to flatten the ends. After you do this, you can then file the ends and a slight angle to fit into the cupped ends. The fit does not need to be perfect.
- Pickle the piece to remove the fire scale.
- Copy the one bail and two large circle templates. Click here for the Jewelry Component Templates
- Transfer the designs to your sheet metal.
- Cut the circles out.
- File any sharp edges.
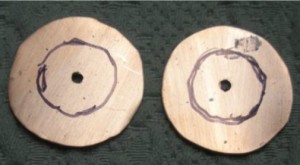
- Use a 1.25mm hole punch to make holes in the center of each piece
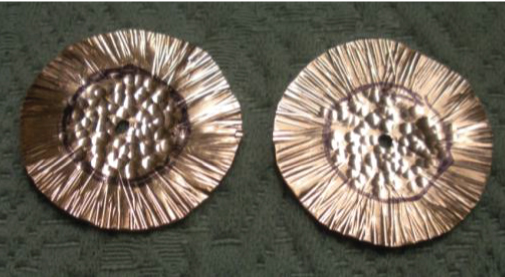
- Use an ultra fine point permanent marker to draw a circle on each piece as shown.
- Place each circle on a bench block. Use the narrower side of the Mini TruStrike Sharp Designer Hammer to texture the outer edge on each circle. Use the larger side of the Mini TruStrike Embossing Hammer to texture the center area on each circle.
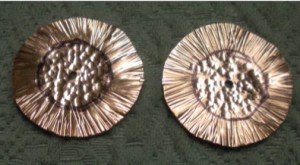
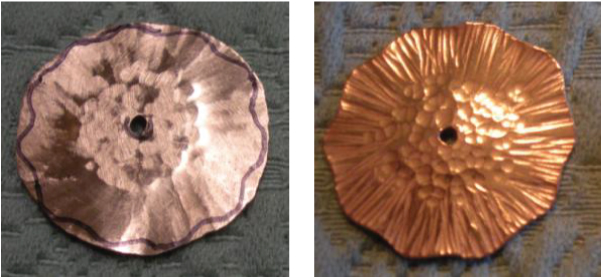
- Use an ultra fine point permanent marker to draw a wavy line around the edge of each circle. Use your metal shears to cut around the circle on the wavy line.
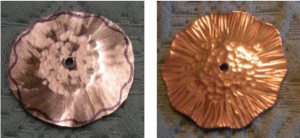
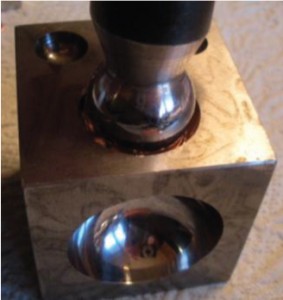
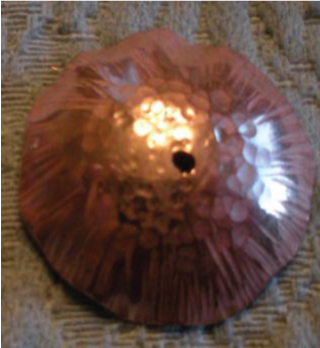
- Use the Dapping Punch Set to dome each circle, textured side facing down. To preserve the texture, consider placing a piece of felt between the circle and the dapping block well. Start with the largest well and work your way down to a size that fits the textured pipe section to your liking. Note: Use a dap several sizes smaller than the block well so that the edges of the circles will be slightly rippled when you are finished.
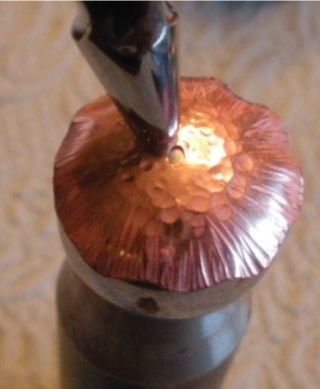
- If too much of the dimple texture is no longer visible, place the domed circle on a dap and lightly add a bit of texture with the larger side of the Mini TruStrike Embossing Hammer.


- Remove any remaining marker lines from the tube and end caps with an alcohol soaked pad.
- Once you have the fit you desire, connect the end caps to the pipe where the few points touch using your preferred soldering method. Note: You could glue the end caps on, if desired, but they may not hold as well.
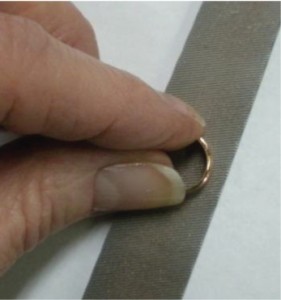
- Ball the end of the 5" piece of 20 gauge wire to make a long headpin.
- Pickle and tumble the soldered "birdhouse" section and the headpin.
- Thread the components onto the balled headpin in this order: bead cap, soldered piece, bead cap. Make a wire wrapped loop at the top. Trim the wire end off. You could leave the wrap wire end long and make it into a tendril on the roof.
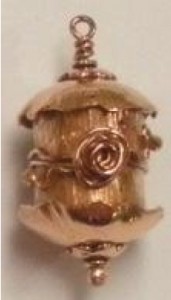
- Use the remaining 20 gauge wire to construct a rosette ring around the center of the pipe. There are many tutorials online showing how to do this. Place the center of the wire in the center front of the pipe. Wrap each wire end around the back of the pipe and then back to the front. Make your rosette to the size you desire. Note: You have enough wire to make 3 wraps, 2 are shown.
- Cut the wire ends to a length of 1 1/4" beyond the edge of the rosette. Ball the wire ends. You could leave the wire ends long and wrap as tendrils up over the roof and/or down over the bottom.
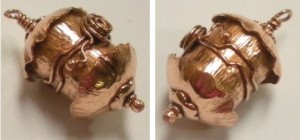
- Use a round nose pliers to tweak and bend the "ring shank" wires on the back to tighten the rosette. Bend the balled wire ends in a pleasing manner.
- Pickle the piece to remove fire scale.
- Tumble the piece in steel shot to shine it up or use 0000 steel wool to polish it.
- Attach the bail to the pendant.
- You can leave your pendant bright and shiny or use liver of sulfur to patina it. Buff with 0000 steel wool to bring out the dimension of your texturing. Below, left to right, birdhouses from: Kathi Nelson, Carol Ericslon, Deb Carlson, Judy Larson.
Congratulations! Your pendant is ready to wear!


 Free Wire Jewelry Patterns
Did you find this pattern through a link from a friend? This Free Wire Jewelry Pattern is just one of dozens of free wire jewelry patterns we send via email. Get patterns like this one straight to your inbox - click here!
![]()
The premier place for all your jewelry making needs. The best in wire, tools, cabochons, gemstone beads and more. As well as a superior resource for educational support to help build your jewelry making skills and techniques.
Connect With Us

® 2007 - 2026 Wirejewelry.com Powered by ClaimTheWeb Cart