


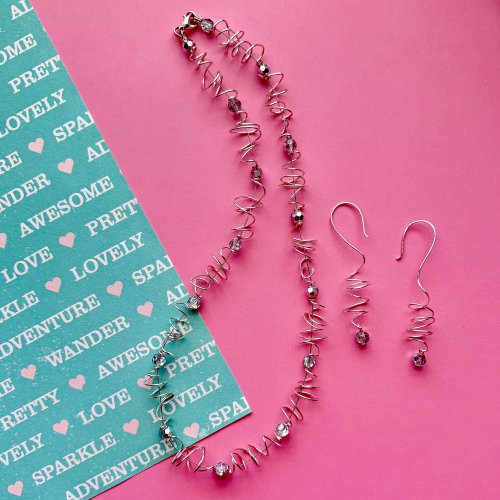


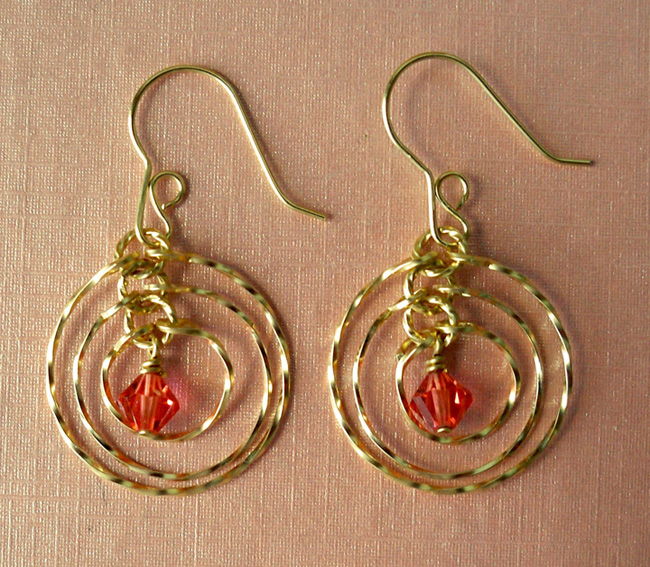
Tri-Circle Earrings
Designed by Gene Sheridan © 2011
Skill Level: Beginner/All
Technique: Involved Components
Nearly all women enjoy having a pair of earrings that are versatile enough to wear every day. Using lightly twisted wires to "orbit" your favorite beads, gives these earrings an added sparkle. Make them using pearls or your favorite crystal beads. Warning: making these earrings can be addicting!
Materials
- 21-gauge square half hard wire, 16-1/2"
- Two 6mm or 8mm beads or pearls
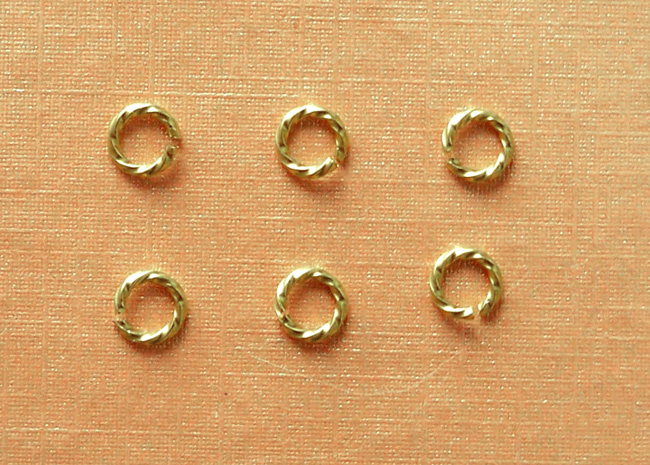
- Six 18-gauge, 3mm ID jump rings (twisted or plain)
- Two 21- or 22-gauge 1-1/2" head pins
- 1 pair ear wires
Tools
- Flat nose pliers
- Chain nose pliers
- Round nose pliers
- Wire cutters
- Automatic wire twister or pin vise
- Ring mandrel or ring stick (for shaping)
- Ruler
Instructions
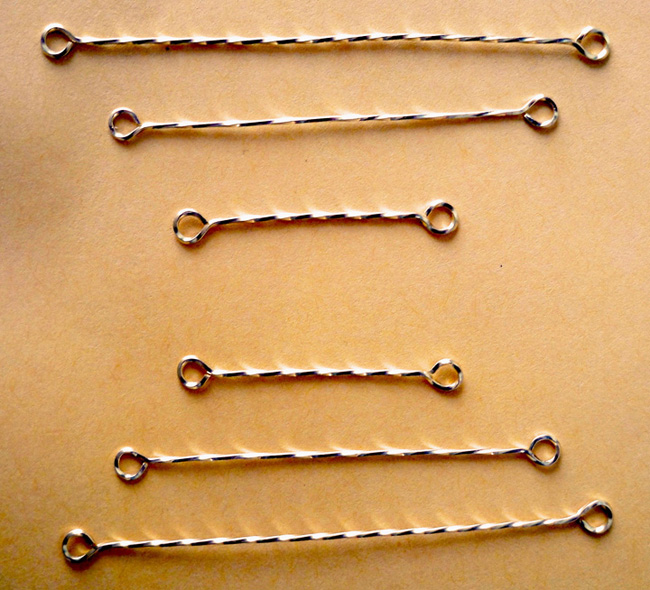
- Clean, measure and cut one 16-1/2 inch piece of 21-gauge square half hard wire. Use a pin vise or an automatic wire twister to put a "slight" twist in the entire length of wire. From each untwisted end, trim off 1/8 inch. From the twisted wire length, measure and cut two of each of the following lengths: 3-3/8 inches, 2-3/4 inches, and 2 inches. Separate one of each length into two piles, one pile for each earring.


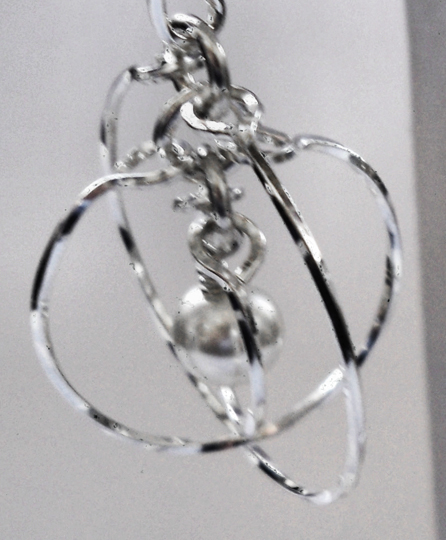
- At each end of each twisted wire, use round nose pliers to create an "eye"; so both eyes on the same piece are made on the same plane as shown.
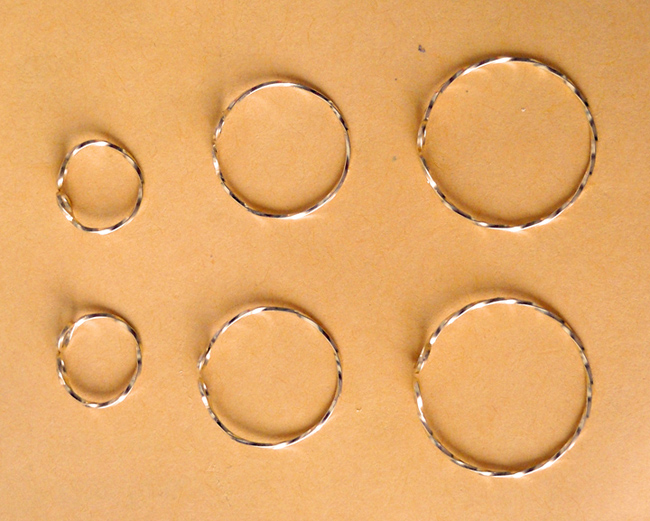
- Keeping the eyes flat, individually bend each twisted wire into a complete circle by using a ring mandrel at the sizes of: 1, 5 and 9 respectively with different lengths of wire. The eyes on each completed circle should face one another.
- Open the six 18-gauge 3mm ID jump rings. Using your bead choice and headpins, make two single bead charms, each with a wrapped loop top.
- Assemble the earrings: begin by slipping 1 headpin charm onto 1 open jump ring. Next, slide the jump ring through both eyes of the smallest twisted circle, so the charm is hanging inside the circle. Firmly close the jump ring. Repeat process to begin the second earring.
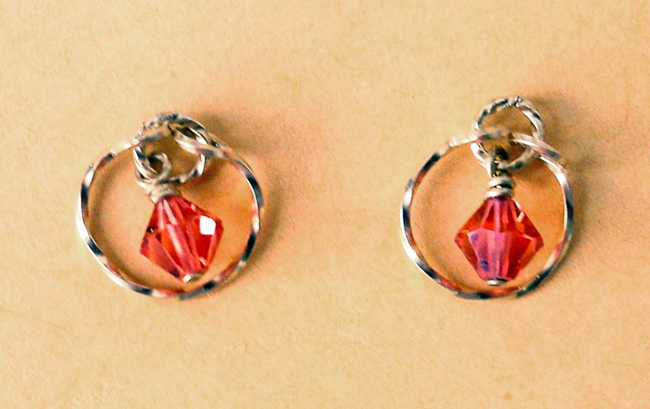
- Slip a second jump ring, first through the first jump ring and then through both eyes of the middle-sized twisted circle. Firmly close this jump ring and repeat the process for the second earring.
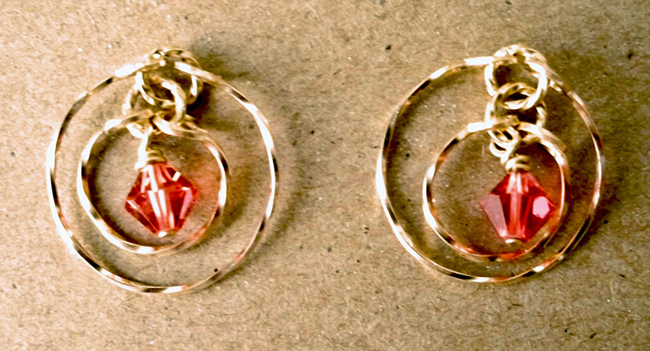

- Finally, slide the third jump ring through the second jump ring and the eyes of the largest twisted circle. Firmly close this last jump ring and add an ear wire. Repeat for the second earring and enjoy!

As seen from the top, using a pearl charm:
 Free Wire Jewelry Patterns
Did you find this pattern through a link from a friend? This Free Wire Jewelry Pattern is just one of dozens of free wire jewelry patterns we send via email. Get patterns like this one straight to your inbox - click here!
![]()
The premier place for all your jewelry making needs. The best in wire, tools, cabochons, gemstone beads and more. As well as a superior resource for educational support to help build your jewelry making skills and techniques.
Connect With Us

® 2007 - 2026 Wirejewelry.com Powered by ClaimTheWeb Cart