


Bulava Pendant

Designed by Albina Manning © 2013
Skill Level: Beginner
Technique: Twisting and coiling wire, making simple loops
Materials
- 16-gauge half hard round wire, 6"*
- 26-gauge dead soft round wire, 42"*
- 12 mm round beads
- 4 mm metal beads
* Amount of wire depends on the size of the pendant. |
Tools
- Wire cutters
- Bail making pliers
- Flat nose pliers
- Cylindrical object such as a marker with a diameter bigger than a bead**
** You can use any size of the round bead, make sure that diameter of your cylindrical device is at least the same as bead�s size.
Instructions
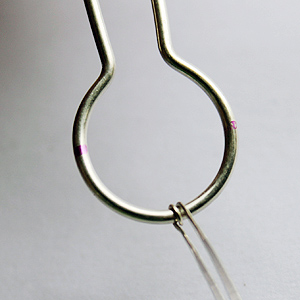
- Straighten, clean, and then cut 6" piece of round, half hard wire. Place the cylindrical object in the middle of the wire and wrap the wire around once forming a circle, so both ends lay on one line as shown.


- Using flat nose pliers grab one wire end just by the "intersection" and bend at an 90 degree angle

- Repeat step 2 with the other end of the wire, but make a bend 4mm (1/6") away from the bend.

- Make sure that both ends run parallel and they are the same length (if not, just cut the longest end to even both ends). Note: the metal bead has to fit between two parallel wires as shown.

- Fold a piece of 26ga round dead soft wire in half. Place it in the center of the circle's bottom and start coiling. Note: you can mark the round frame on 3 and 9 o'clock (pink mark on the photo), but mine were quickly rubbed off.
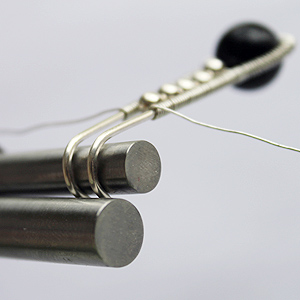
- Coil the left side to the 9 o'clock mark and the right side to 3 o'clock. Notice that on the left the wire comes over the frame, and the right- under the frame.

- Slide a 12mm bead on one end of 26ga wire, pass the second wire through the bead, so the both wires are on the opposite sides.
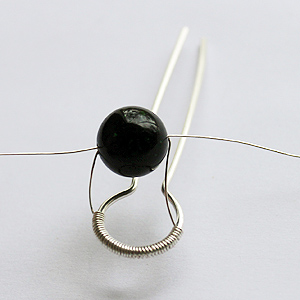
- Tighten the wires. On the left I brought the wire inside the frame and under the frame, on the right the wire goes over the frame.

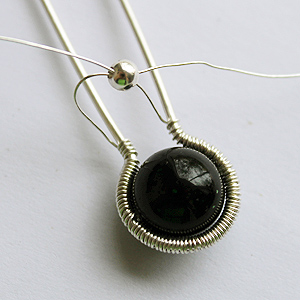
- Continue coiling until you cover whole circle frame and plus 4-5 coils on the straight wires.
- String a 4mm metal bead in the same manner as 12mm bead (steps 7, 8).
- Make about 6-7 coils on both sides of the frame. Amount of coils depends on the size of the metal bead. The length of this coiled part has to be equal the bead's size.
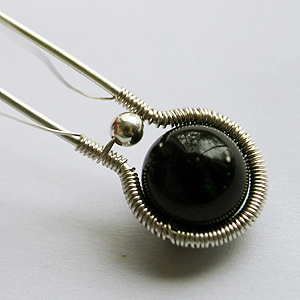
- Add the second metal bead. After adding the bead, tighten the wire ends.
- Make 6-7 coils on both sides of the frame.
- Continue adding the beads and coiling until you have 1" (25mm) of the frame wires left. Make sure that you finish with 6-7 coils, not just a bead.

- Using bail making pliers, roll both frame wire ends to form a bail. It has to have "P" shape.
If you like "P" shape of the bail, leave it like it is.
- If you want to have the loops of the bail centered, use flat nose pliers and bend the wire to center. (They use this method to make a simple loop). *You probably noticed that on this photo the bail does not have closed loops. This may happened when you have not enough bare frame wire left for the bail. To fix this problem, use round nose pliers to close the loops one by one.

- If necessary, add more coils. Trim the wire, tack the wire ends with chain nose pliers if they are sticking out.

 Free Wire Jewelry Patterns
Did you find this pattern through a link from a friend? This Free Wire Jewelry Pattern is just one of dozens of free wire jewelry patterns we send via email. Get patterns like this one straight to your inbox - click here!
![]()
The premier place for all your jewelry making needs. The best in wire, tools, cabochons, gemstone beads and more. As well as a superior resource for educational support to help build your jewelry making skills and techniques.
Connect With Us

® 2007 - 2026 Wirejewelry.com Powered by ClaimTheWeb Cart