


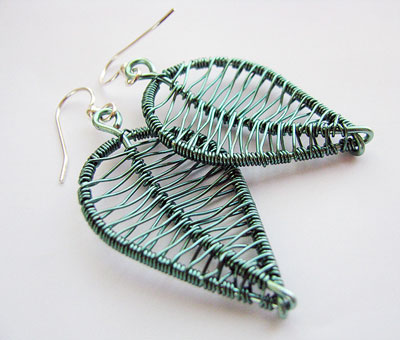
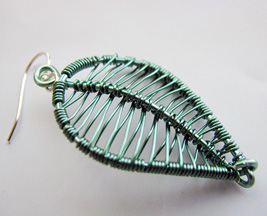
Birch Leaf Earrings
Designed by Albina Manning © 2011
Skill Level: Advanced Intermediate
Technique: Round wire, forming and weaving
Craft wire can be easy to work with, and it's fun to work in colors! The following pattern is to show you how to make earrings that remind me of leaves from a birch tree (one of my favorite trees). Of course, if you change the shape of the base-wire frame, you could make leaves to resemble almost any type of flower or tree leaf you would like. I used sea foam green-toned wire, but you could use any color you would like.
Materials
- The measurements below will make two 1 ½ (4cm) long leaves:
- 18-gauge round dead soft craft wire, 1 foot (30 cm)
- 26-gauge round dead soft craft wire, 8 foot (2.4 meters)
- 1 pair ear wires
Tools
- Chain nose pliers
- Round nose pliers
- Wire cutters
- Round dowel, mandrel, or found item that is 18mm in diameter
Instructions
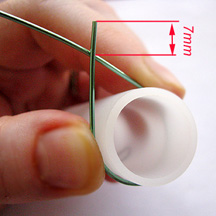
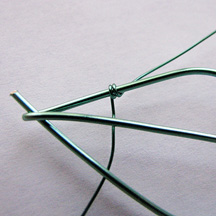
- To make a frame, begin by straightening one 6" (15cm) length of 18-gauge wire. About one third of the way up from one end, curve the wire around the dowel so where the wire crosses itself it forms a leaf shape with a 7mm tail overlapping the longer end.

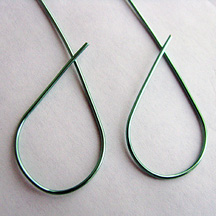
- To make a matching pair of leaves, repeat Step 1 with the remaining 18-gauge wire and set this second frame aside.
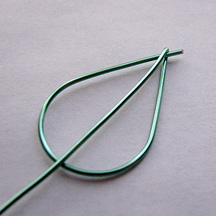
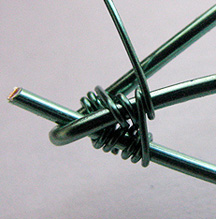
- Where the wires overlap, use chain nose pliers to grab the long wire and begin bending it closely over the shorter tail. Before crimping the bend tight, make sure this longer wire is in the center of the leaf shape, forming the midrib (the central vein in a leaf).
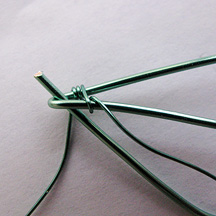
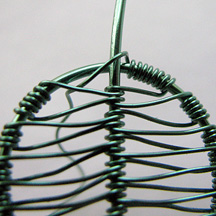
- Cut one 4-foot (1.2m) length of 26-gauge wire. This will now be called the wrapping wire. Leaving a 1" (25mm) tail, wrap this wire twice around the frame as shown.
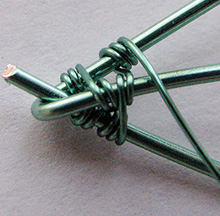
- Push the wraps just made toward the "corner" of the frame. Now bring the wrapping wire over and under the midrib wire wrapping once, forming the first "vein."
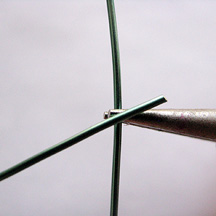
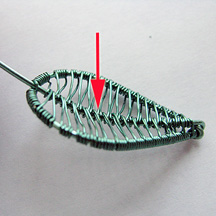
- Return to the short tail remaining on the wrapping wire, and wrap this tail around the opposite frame twice. Trim the wire close to the frame (red arrow).
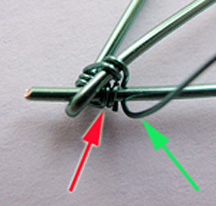
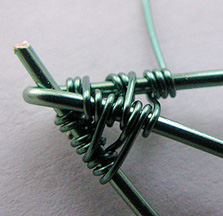
- Now bring the longer wrapping wire under the frame wire (green arrow) forming the second vein and wrap twice.
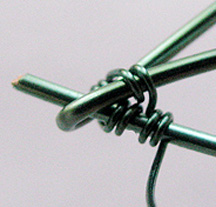
- Continuing to use the wrapping wire, wrap it around the midrib wire once (as described in Step 5).
- Next, wrap the wrapping wire twice around the frame and then repeat Steps 7 and 8 on the opposite side. And then wrap the wire around the frame three times.
- Continue wrapping in segments of 3, until you almost reach the end of the midrib. Now, make 5 wraps on each side.
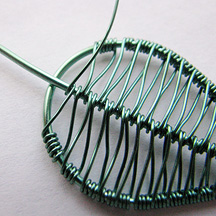
- Finish the wrapping by making 8 to 10 wraps on the frame and then wrap the wrapping wire over the midrib wire. Continue wrapping until you reach the last vein. Trim and tuck the end of the wrapping wire.

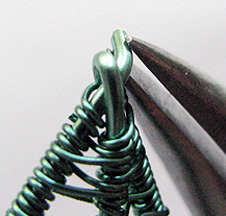
- To finish the tip of the leaf, use chain nose pliers to carefully bend the 7mm tail under the "corner" as shown.

- This step is optional: Using your thumb, press gently on the midrib to form a curve.
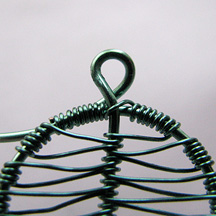
- To complete this earring, use round nose pliers to form a small connection loop in the last wire end and attach your favorite ear wire.
Now repeat Steps 3 through 14 to make the second earring.
 Free Wire Jewelry Patterns
Did you find this pattern through a link from a friend? This Free Wire Jewelry Pattern is just one of dozens of free wire jewelry patterns we send via email. Get patterns like this one straight to your inbox - click here!
![]()
The premier place for all your jewelry making needs. The best in wire, tools, cabochons, gemstone beads and more. As well as a superior resource for educational support to help build your jewelry making skills and techniques.
Connect With Us

® 2007 - 2024 Wirejewelry.com Powered by ClaimTheWeb Cart