


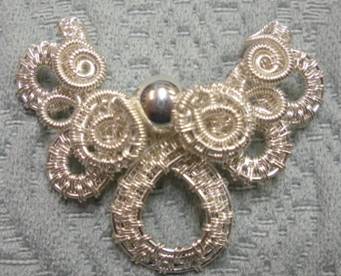
Necklace Component
Designed by Judy Larson © 2016
Level: Beginner to Advanced
Note: Step by step directions to make the weaves used in this tutorial are not included but should be self-explanatory through the photos if you have wire weaving experience. Finished component measure 1-5/8" across, 1-1/8" up and down and 3/8" thick.
Materials:
- 60" of 22 gauge round dead soft wire
- 10 feet of 28 gauge round dead soft wire
- One 6mm bead-the hole needs to be large enough to pass two 22 gauge wires through
Tools:
Directions:
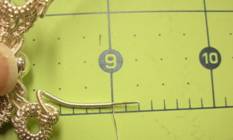
Step 1: Straighten and cut four 15" pieces of 22 gauge round wire. These wires will be the core wires. Straighten and cut one 10 foot piece of 28 gauge round wire. This will be the weaving wire.
Step 2: Set the 15" wires side by side. Mark the center. Mark the center of the weaving wire. Hint: You may find it easier to begin weaving by taping one end of all the core wires together and by placing a piece of tape at the center of the weaving wire.
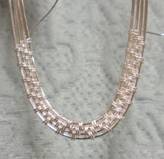
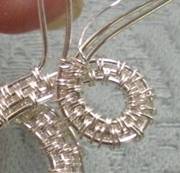
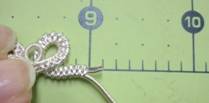
Step 3: Start weaving in the center of the core wires with the center of the weaving wire. Make a zig-zag pattern of 16 rotations of ![]() ‘s. Two rotations going to the right of center are shown in the first photo. The second photo shows the full 8 rotations to the right of center. The third photo shows all 16 rotations: 8 to the right and 8 to the left of center.
‘s. Two rotations going to the right of center are shown in the first photo. The second photo shows the full 8 rotations to the right of center. The third photo shows all 16 rotations: 8 to the right and 8 to the left of center.


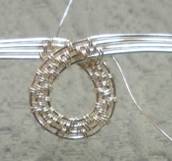
Step 4: With the points of the ![]() ‘s facing out, curve the woven section into a circle, completely crossing the woven ends. You may find a 12mm mandrel helpful. You may also find that when you are done you need to flatten the circle using a soft jaw pliers.
‘s facing out, curve the woven section into a circle, completely crossing the woven ends. You may find a 12mm mandrel helpful. You may also find that when you are done you need to flatten the circle using a soft jaw pliers.
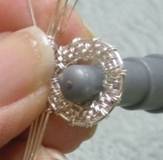
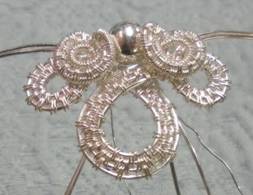
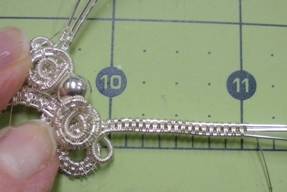
Step 5: Pull the top core wire on each side slightly upward and away from the lower three core wires. Do a one inch length of a 2x2 weave on the lower three wires on both sides.


Step 6: Curve each of the 2x2 woven sections into a circle as shown. You may find a 2-3mm mandrel helpful. You may also find that when you are done you need to flatten the circles using a soft jaw pliers.

Step 7: Wrap the inner wire on both sides to a length of 1/2″.

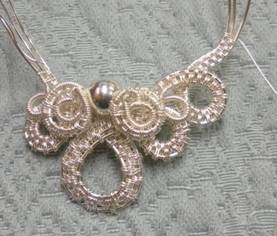
Step 8: Curl each wrapped wire into a circle as shown.

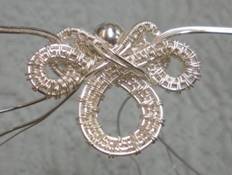
Step 9: Leaving the weaving wire outside the bead on each side, pull the core wire ends through the 6mm bead, pulling the left wire to the right and the right wire to the left tightly, being careful to not pull the coiled section through the bead.


Step 10: Bundle the wire coming out of the bead with the top wire of the lower three core wires. Do a one inch section of a 3x2 weave on both sides of center. The 3 part of the 3x2 weave should be on the outer wire. Before starting the weave, you may decide to use the weaving wire to cover some of the core wire before they fit together nicely for the 3x2 weave.


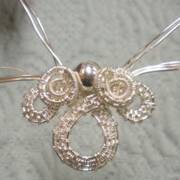
Step 11: Curve each of the 3x2 weave wires against the side of the bead and around the small wrapped coil made in Step 8.

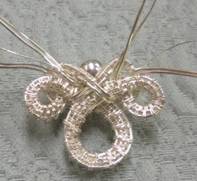
Step 12: Pull the 3x2 weave wires to the back and downward. Back and front view shown.

Step 13: Cross the core wires on the back. Leaving the weaving wires on the back, bring the wires to the front between the center and side woven circles.
Step 14: Push the core wire ends from the front through to the back side under the bead, hiding the wires under the woven wires next to the bead. The wires should come out on the back on either side of the crossed over wires. Back and front shown.
Step 15: Choose the shortest of the wires on each side to wrap to the front and then to the back in the same manner as Steps 13-14. Trim the wire off, leaving a long enough tail to tuck out of the way so it can not scratch the wearer.
Step 16: Straighten the remaining core wires on each side, pulling them outward and slightly up.

Step 17: Wrap the outer core wire on each side to a length of 1/2".

Step 18: Make a small loop on each side with the wrapped wire. Tuck the loop slightly under the larger section next to the bead.

Step 19: On each side, bundle the three wires together. Do a one inch length of a 2x2 weave on the wires.
Step 20: Curve each of the 2x2 woven sections into a circle as shown. You may find a 2-3mm mandrel helpful. You may also find that when you are done you need to flatten the circles using a soft jaw pliers.
Step 21: Wrap the inner wire on each side to a length of one inch.

Step 22: Trim the outer two wires on each side to a length of 1/8".
Step 23: Use your round nose pliers to make a loop towards the back of the piece with the two wires you just trimmed.

Step 24: Trim the core wire on the coil wrapped wire 1/4" beyond the end of the coil wrap.
Step 25: Following the contour of the connecting loop made in Step 24, bring the coil wrapped wire around to the front. Use the tips of your round nose pliers to make a very small loop to start a spiral with the coil wrapped wire. Leave the weaving wire on the back side, make a spiral to fit on top of the woven base beneath it.

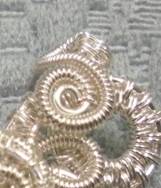
Step 26: Use the weaving wire to attach the swirl on each side to the base beneath it, hiding the end before trimming it off.
Congratulations! You've made your first Necklace Component.
 Free Wire Jewelry Patterns
Did you find this pattern through a link from a friend? This Free Wire Jewelry Pattern is just one of dozens of free wire jewelry patterns we send via email. Get patterns like this one straight to your inbox - click here!
![]()
The premier place for all your jewelry making needs. The best in wire, tools, cabochons, gemstone beads and more. As well as a superior resource for educational support to help build your jewelry making skills and techniques.
Connect With Us

® 2007 - 2026 Wirejewelry.com Powered by ClaimTheWeb Cart