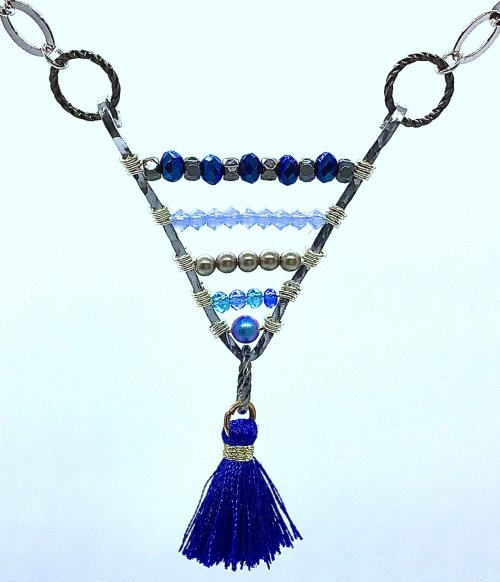
Coiled Rosette Link

Designed by Judy Larson
Skill Level: Intermediate
Technique: Coiling, forming links
These links are stunning additions to any project. Make multiples and hook them together for a bracelet. Add a bead drop to one side and make earrings.
If you go for bold jewelry, make the large link (1-1/4 x 7/8"), but if you want a more classic look, make the smaller link (1-1/16" x 5/8").
If you can't decide, go for the medium link (1-1/8" x 3/4").
And imagine what these links would look like if they were made with two different colors of wire!
Materials
- 18-gauge dead soft round wire for large link
- 20-gauge dead soft round wire for large, medium, and small links
- 22-gauge dead soft round wire for medium link
- 24-gauge dead soft round wire for small link
Please see steps 1 and 2 to decide your link sizes and wire needed. - Clasp (instructions given in this tutorial to make a matching clasp)
Tools
- Flat nose pliers
- Chain nose pliers
- 3-step pliers, or size 0 or 000 knitting needles (see step 1)
- Flush cutter
- 5/16" and 1/4" mandrels for links; 7/16" and 3/8" mandrels for the clasp
- Wire Twister
- Bench Block and Chasing Hammer for clasp
- Ultra fine point Sharpie marker
- Ruler
Instructions
Note: It is important to read through the directions before starting. The first portion of this tutorial is for the link only.
Step 1
Make two coils, one of each size wire, for each link you need.
| Coil Size | Coil On | Coil Length | Wire Used - one coil for each size |
|---|---|---|---|
| Large | 1st Step of 3-step Pliers | 2-1/4" | 18-gauge wire, approx. 23" 20-gauge wire, approx. 26" |
| Medium | Sz 0 knitting needle | 2" | 20-gauge wire, approx. 22" 22-gauge wire, approx. 25" |
| Small | Sz 000 knitting needle | 1-3/4" | 20-gauge wire, approx. 17" 24-gauge wire, approx. 23" |


Step 2
Straighten and cut two pieces of 20 gauge wire for each link:
Large-5-1/2" Medium-5-1/4" Small-5". These wires will be referred to as core wires.
Center a coil on each core wire.
Center the coil on a mandrel: Large-5/16" Medium-1/4" Small-1/4".
Wrap the coil and core wire around the mandrel as shown.
Note: It is VERY important that all the coils are wrapped in the same direction.


Step 3
Use the two different size coil wire components made above for this step. Slide the larger wire coil core wire into the center of the smaller wire coil. Note the placement of the other three core wires in relation to each other.
When you finish sliding one piece onto the other (almost like putting a key on a key ring), the two coiled sides will nestle best together only one way.
Below, right: It is very important that the core wire coming out of the top of the left coil component meets up with the core wire coming out of the bottom of the right component.
The end of the top coil on the left is on the very top of the link and the end of the bottom right coil is on the very bottom of the link, not coming out of the center.


Step 4
Holding the two coiled ends as close together as possible on one side of the link, hand twist the cores wires counterclockwise together a few times.
Turn the unit around and repeat with the other side.
You may not get the coils to meet on this side, but if the distance from the end of the coil to the cross over point of the core wires is the same, it will be fine to twist the wires together there.


Step 5
Finish twisting the core wires tightly together with a wire twister. Be careful to not over-twist as you could break the core wires.


Step 6
Make an eye with the twisted wire on each side of the rosette using step 1 of the 3-step pliers. Trim the twisted wire tail off where the wires cross.
Note: If you are going to link the rosettes together, one eye should go side to side and one up and down.
Just make sure that the way the eyes face on each link is the same so that the same size coil will be on the same side for all the links.
The last rosette may need a large eye to accommodate a large spring ring closure.
If the links become a bit misshapen, just put a smaller mandrel though the center to make a more rounded rosette.


Make an eye with the twisted wire on each side of the rosette using step 1 of the 3-step pliers. Trim the twisted wire tail off where the wires cross.
Note: If you are going to link the rosettes together, one eye should go side to side and one up and down. Just make sure that the way the eyes face on each link is the same so that the same size coil will be on the same side for all the links.
The last rosette may need a large eye to accommodate a large spring ring closure.
If the links become a bit misshapen, just put a smaller mandrel though the center to make a more rounded rosette.


To make a bangle component: Cut the core wires 12" long and follow the directions to make a rosette. You will end up with a piece about 9" long, shown below.
Center this component on top of and between four square wires and wire wrap together to make a bangle.
Note: If your twisted core wires are too thick in comparison to your square wires, you may need to hammer them a bit to flatten them out.

Making the Toggle Clasp

It is difficult to find closures that match colored wire.
This toggle can easily be made to match your rosette links.
Step 1
Make the "O" ring: Make one coil for the size toggle you want.
| Size | Coil Wire Gauge | Coil Length | Coil Mandrel | Core Wire Gauge | Core Length |
|---|---|---|---|---|---|
| Large | 18-gauge Dead Soft | 1-1/2" | Step 1 of 3-step pliers | 20-gauge Dead Soft or Half Hard | 4" |
| Small or Medium | 20-gauge Dead Soft | 1-1/4" | 00 knitting needle | 20-gauge Dead Soft or Half Hard | 4" |
Step 2
Center the coil on the core wire. Wrap the coil and core wire around the mandrel: Large-7/16" Small-Medium-3/8". Hand twist the core wires together a few times.


Step 3
Finish twisting the core wires tightly together with a wire twister. Be careful to not over-twist because that could break the core wires.

Step 4
Make an eye with the twisted wire using step 1 of the 3-step pliers. Trim the twisted wire tail off where the wires cross.
Hint: The eye can be side to side or up and down depending on which you need to attach it to what you are making.

Note: It is important that a "T" bar is long enough that it will not slip out of the "O" ring. The loop at each end of this toggle "T" bar hangs over the edge of the "O" ring.
If you do not have a very small tip on your round nose pliers, you should add 1/8" to the length you cut the 16-gauge wire.

Step 5
Make the "T" bar: Straighten and cut 1-3/4" of 16 gauge wire for size Large or 1-1/2" of 16 gauge wire for size Small-Medium.
Grasp the center of the wire with step 1 of the 3-step pliers.
Bend the wire tips up so they meet each other. It is important that they are even. Cross the wires over each other.


Step 6
Grasp one of the "T" bar and curl the wire up. Curl the other end down.


Step 7
Hammer each end to strengthen the "T" bar.

Step 8
Make jump rings with 16 gauge round wire on step 2 of your 3-step pliers. You will need 3 for size Large and 2 for size Small-Medium.

Step 9
Attach 3 jump rings to the large "T" bar or 2 jump rings to the Small-Medium "T" bar.


