Calla Lilly Earrings
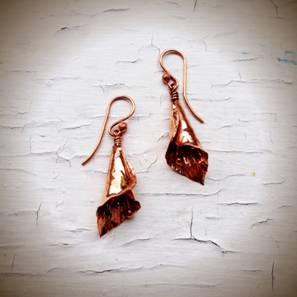
Designed by Judy Larson © 2014
I made these earrings to honor my Grandmother Lilly
Skill Level: Intermediate
Materials:
- 26 gauge sheet metal Note: 28 gague can be used if making smaller flowers
- 18 or 20 gauge dead soft round wire
- 1 Pair of ear wires
- 6 balled headpins or 6 headpins and six 2-3mm beads. Hint: If you make your own balled head pins, use 18 or 20 gauge. 18 gauge was used in this tutorial.
Tools:
- French shears
- Ultra fine point Sharpie Marker
- Tack hammer with a rounded chisel face or Mini TruStrike Sharp Designer Hammer-narrow side
- Rubber or plastic mallet
- Bench block
- Sharpened 1/2" dowel Hint: a knitting needle of that size will also work. See Steps 11 and 12
- Alcohol and cotton pad
- Round and chain nose pliers
- Flush cutter
- Ruler
- Mini torch and firing block or charcoal block
- Fine file and possibly a bead reamer
- Pickle pot and pickling solution
- Optional: 6 step barrel pliers
- Optional: Tumbler with shot, Liver of Sulphur, very fine steel wool
Instructions:
Read through all the directions before beginning the project. Only one earring is shown being made. Make both at the same time so both will be the same when completed.
- Make a the leaf/petal pattern on paper using the photo as a guide. The heavy lines denote a 1" grid and the dots 1/3 Inch. Cut the pattern out. Hint: Make the pattern larger for a pendant, or smaller for more petite earrings.
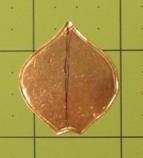

- Using an ultra fine point sharpie marker, trace the pattern twice onto the 26 gague metal sheet-one for each earring. Use french shears to cut out each shape.

- Using an ultra fine point Sharpie marker, draw hammering guidelines on each piece. If you are more experienced with texturing metal and weilding hammers, you will find that you do not need all the guidelines. However, the center line is helpful, so you may wish to draw just that line on your piece. .
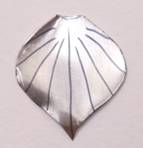

- Choose a rounded sharp edge hammer to texture your blank. The Mini TruStrike Sharp Designer Hammer is a great choice. In this tutorial, I used an antique jewelers hammer I inherited from my father-in-law as well as the Mini True Strike hammer.
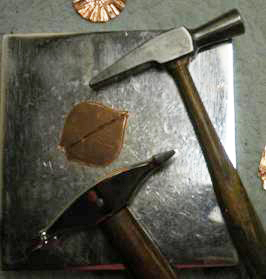

- First hammer a line down the center and then texture the edges, following your guidelines.

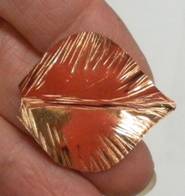

- Finish texturing from the center line outwards, following the guidelines. You may want to file the point at this time if it is too sharp.
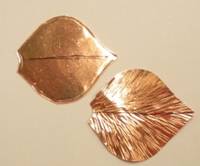
.
- Use a plastic mallet to more or less flatten your piece on your bench block. It does not have to be perfect and you do not want to remove the texture you just worked so hard to achieve.


- Clean the ink lines off the piece with a bit of alcohol on a cotton pad.
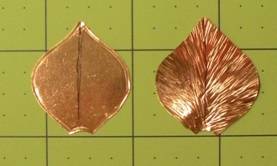

- Because hammering dramatically hardens the metal piece, anneal each piece to make it easier to form the cone shape of the flower.
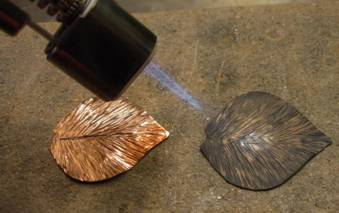

- Pickle the pieces to remove the fire scale.

- Sharpen a 1/2 inch dowel to a cone shape. Hint: You may be able to sharpen the dowel in a pencil sharpener if the opening in the sharpener is large enough. A file was used to sharpen this dowel after a bit of whittling. The angle of the point determines the spread of the flower cone. The heavy lines denote a 1" grid and the dots1/4 inch. The size of the dowel and the length of the cone will determine the size of the lower opening of the flower.
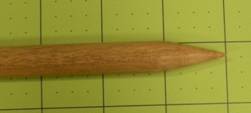

- Place the point of the dowel just below the top curved edge of the petal. You may wish to make both earrings roll the same direction, or make each a mirror image of each other.
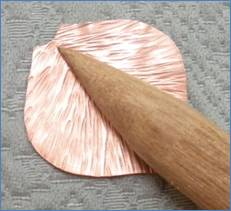

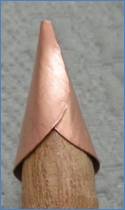
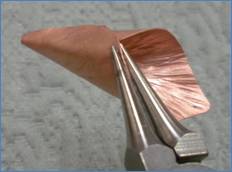
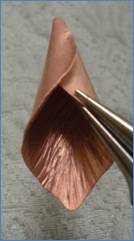
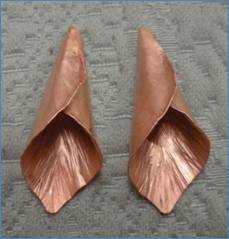

- Use the tips of your round nose pliers to roll/curl the edge of the petal outward. The size and placement of the roll is up to you and can be changed any time during the construction of the earrings.
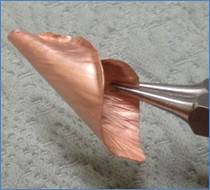

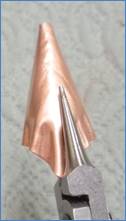
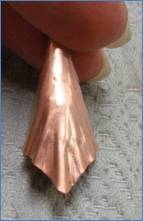

- To ruffle the cone, use a twisting motion with the tips of your round nose pliers. The deeper you place the pliers when twisting, the more pronounced the ruffle will be. Because the cone may curve inward after doing this, you can straighten the cone by using the full tip of your round nose pliers as shown in the photos in step 13. Of course, you can leave the edge plain, or just very slightly ruffle the edges.
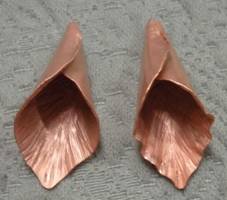

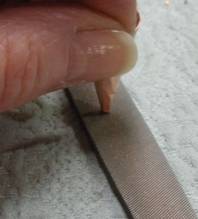
- Lightly file the edge, which may have not met evenly when you rolled it on the dowel, by dragging the top of the cone across a fine file.

- At this point, you can tumble the flower cone, patina and polish it. Or you can wait until you are done with construction.

- Straighten and cut a 3" piece of 18 or 20 gauge round wire for each eye pin. Note: 18 gauge wire was used in this tutorial, but it can be difficult to make a wire wrapped loop with it so you may wish to use 20 gauge wire. You can use your round nose pliers or step 2 of your 6 step barrel pliers to make the 3.25mm ID eye loop on one end of the wire.


- Each earring has three stamens of different lengths dangling from the inside of the cone. Cut balled head pins at the following lengths for each earring: 15/16", 11/16" and 9/16". Make a small eye loop at the top of each head pin, making sure that it will swing freely on the wire you have chosen for the eye pin made above. If you are using head pins with beads, cut the head pins at those lengths, slide the beads on and make the eye loop. Hint: If you do not want to use three dangling stamens, one large bead on a head pin pulled up through the center of the cone looks fabulous!

- Open the eye pin loop. Slide each balled head pin on, with the longest in the center. Close the eye pin loop.


- Slide the eye pin into the flower and out through the hole in the top. If the wire does not fit through the hole in the top, use a bead reamer to clean up the hole and enlarge it a bit. The eye pin should be positioned sideways so the head pins will lie side by side.


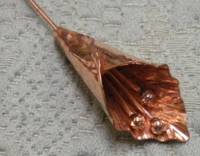

- Make a wire wrapped loop with the eye pin wire, keeping this loop sideways as well.
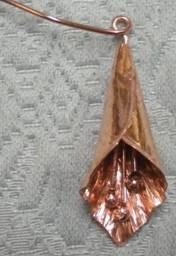
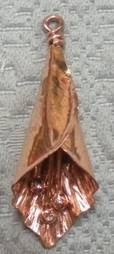

- Attach the ear wire.
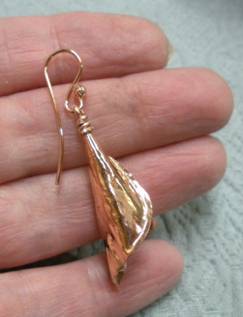
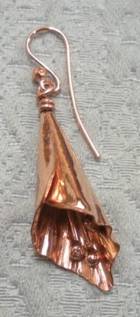

- Optional: Tumble the earrings with steel shot to harden and polish them.
- Optional: Patina the earrings, if desired, using a liver of sulphur solution. Polish with very fine steel wool to bring out the design of the earrings.
- Optional: Tumble for 30 minutes or so with steel shot if you want the earrings to have a brighter shine after the patina is applied. This will not affect the patina.

Congratulations! You've made your first set of Calla Lilly Earrings!
 Free Wire Jewelry Patterns
Did you find this pattern through a link from a friend? This Free Wire Jewelry Pattern is just one of dozens of free wire jewelry patterns we send via email. Get patterns like this one straight to your inbox - click here!


