


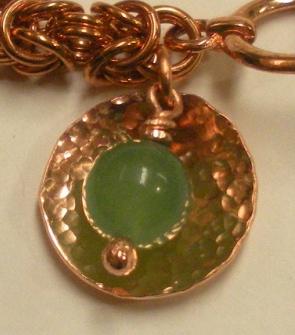
Bead Charm

Designed by Judy Larson © 2016
Skill Level: All Levels
Materials:
- 24 gauge sheet metal - use the circle template (CLICK HERE to see Judy's Templates)
- One 8mm round bead
- One purchased 4mm ID jump ring or make your own
- 20 gauge balled headpin or make your own
Tools:
- Tools for your preferred method of cutting out sheet metal shapes
- Mini TruStrike Embossing Hammer
- Bench block
- 1.5mm hole punch
- Dapping punch set and hammer
- Flat and chain nose pliers
- File
- Liver of sulfur and 0000 steel wool
Directions:
Step 1: Copy the circle template. - CLICK HERE to use Judy's templates
Step 2: Transfer the design to your sheet metal.
Step 3: Cut the circle out using your preferred method for cutting sheet metal.
Step 4: File any sharp edges.
Step 5: Use a 1.5mm hole punch to make a hole in the center top of the piece.

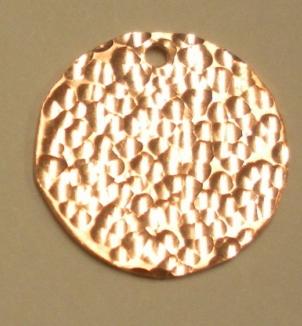
Step 6: Use the larger side of the Mini TruStrike Embossing Hammer to texture the disk.
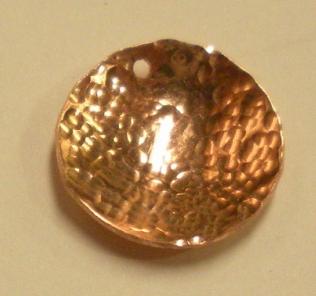
Step 7: Use the Dapping Punch Set to cup the disk, textured side facing up. To preserve the texture when forming the piece, consider placing a piece of felt between the dap and the disk.

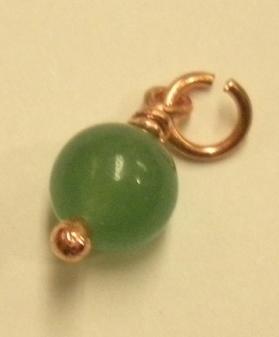
Step 8: Make a wire wrapped bead dangle using your bead on the balled headpin.
Step 9: Use the jump ring to connect the bead and disk to another piece of jewelry. Charms are really versatile. You could attach the charm to a necklace or bracelet as shown.
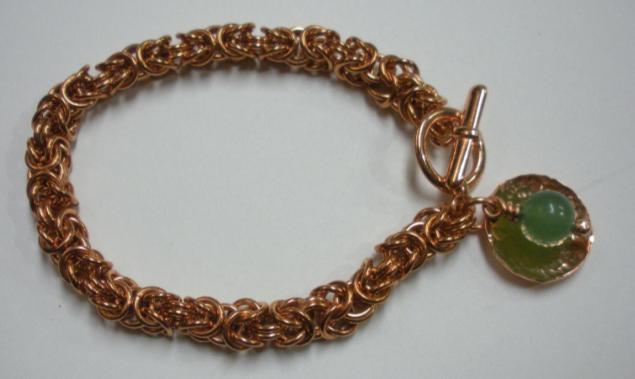
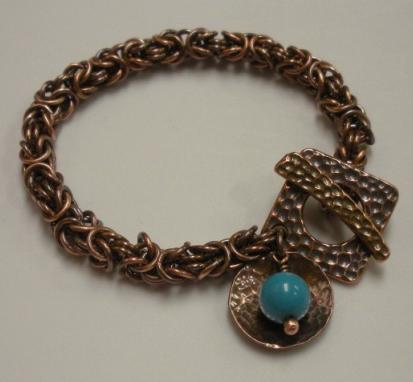
Step 10: You can leave your piece bright and shiny or use liver of sulfur to patina it. Buff with 0000 steel wool to bring out the dimension.
Congratulations! You've made your first Bead Charm!
 Free Wire Jewelry Patterns
Did you find this pattern through a link from a friend? This Free Wire Jewelry Pattern is just one of dozens of free wire jewelry patterns we send via email. Get patterns like this one straight to your inbox - click here!
![]()
The premier place for all your jewelry making needs. The best in wire, tools, cabochons, gemstone beads and more. As well as a superior resource for educational support to help build your jewelry making skills and techniques.
Connect With Us

® 2007 - 2026 Wirejewelry.com Powered by ClaimTheWeb Cart