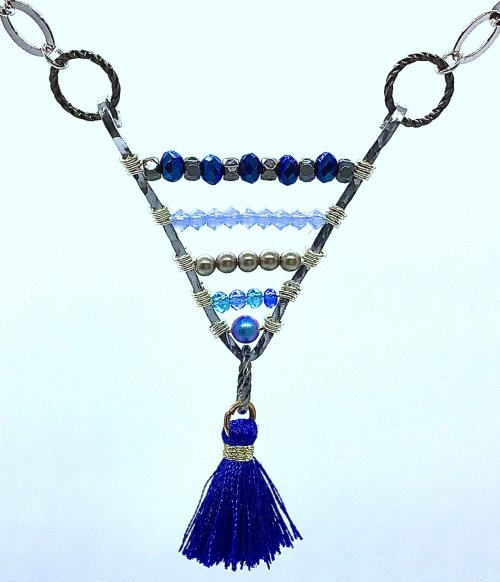
Pearl Chandelier Earrings

Designed by Dale "Cougar" Armstrong
A chandelier is a lighting fixture hung from the ceiling, with branches for candles or light bulbs, often decorated with dangling crystals to cast prisms of light about the room. During the late Georgian Era, (c. 1760-1837), this lavish idea was incorporated into earring designs, as they complemented the fashion for upswept hair. In the Roaring Twenties, the need to forget the war resulted in exuberant styles, bringing back this light-hearted design. The more elaborate, chandelier earring made yet another sparkling comeback in 2003 and is enjoying major popularity today.
materials
- 1ea. 6 foot length of 22 gauge square 1/2 hard jewelry wire
- 1ea. pair ear wires
- 16ea. 6 or 7mm large-hole freshwater pearls or crystal beads of your choice
- 2ea. 22 gauge 1 1/2 inch headpins
- 4ea. 22 gauge 2 inch headpins
- 6ea. 4mm seamless metal beads
- 4ea. 6mm corrugated saucer beads or your choice
- 4ea. 5mm corrugated melon beads or your choice
tools
- Round nose pliers
- Fine chain nose pliers
- Flat nose pliers
- Wire angle cutters
- Pin vise
- Quilter's tape
- Ruler
- Extra fine point marker
- Automatic wire twister
- 3-step round looper, pliers
instructions
- A. Straighten, clean, and then cut 18 - 3 inch pieces of 22g sq 1/2 hard wire. Separate into two groups of 9 wires each. Bundle each group of 9 wires, side-by-side, with one flush end and tape near each end on both groups of wire. On each flat bundle, measure down from the flush end, 1 inch and mark across the entire bundle. Straighten, clean then cut 2 - 6 1/2 inch pieces of 22g sq 1/2 hard wire and put aside. (These wires will be used as the binding or wrap wires.)
B. Using one 6 1/2" piece of 22g sq 1/2 hard wire, start binding on top of the mark, (making sure that end of wire goes completely across the bundle at both the start and the finish of the wrap). Bind down from the mark, 4 times to show on the back, showing 5 wires across the front. Trim the wrap/binding wire flush with the side of the bundle. This will be referred to as the "main binding".
Repeat on the other earring bundle, starting your wrap opposite the first bundle. Ex: if you started wrapping to the right on one bundle, then you will start wrapping to the left on the other - thus making a matching "left & right" pair of earrings. (*NOTE! All wraps will begin and end on the FRONT of the earrings bundles and be covered later, thus giving a smooth finish to the backside). - A. Remove tape from the top, or shorter end, of each earring bundle. Slightly fan the outer, edge wires on the top of each bundle. Measuring from the top of the binding wire toward the top of the earring bundle, measure each of the edge wires to 1/2 inch and trim.
B. Place the tip of the round nose pliers on the very end of a 1/2" long edge wire and roll a perfect circle, up, toward the side/top of the earring bundle. Remove round nose pliers and replace their tip just behind the circle just made, on the same wire, and roll down toward the side/base of the bundle, ending by placing the "inverted swan" shape next to the bindings. Repeat on remaining 3 edge wires, (2 total on each bundle).
C. Slightly fan the next 2 edge/side wires away from each main bundle, and twist with pin vise. Measuring from the top of the main binding up, trim each twisted wire to 7/16 inch long. Using fingers, gently bend each twisted, 7/16 " long wire to the side, following the curve of the "inverted swan". - From the top of the main binding, measure 3/16 inch toward the top of the bundle, and mark. Use remaining wrap wire, start on front mark, going completely across the bundle, bind 2 times to show on back, showing 3 wires on front. Measure wrap wire to 7/16 inch longer than where it comes across bundle the third time, and trim. (Again, remember to "mirror" your moves by starting one bundle wrap to the right and the other to the left).
**NOTE: It is an optical illusion that your work does not seem symmetrical on the front of the earring bundles! This is because the wraps are beginning and ending on the front of the bundle, instead of the back. When the design is complete, you will see a major difference. - Place tip of fine chain nose pliers at the end of the wrap wire and make a small, tight loop, headed down along the side of the bundle. Use flat nose pliers to rosette loop toward center of earring bundle, ending with rosette on top of binding just made. Repeat on other bundle.
- A. Return to twisted wires coming from main binding wire at center of earring bundle, and using the tip of round nose pliers, roll end of twisted wire up toward top/side of bundle, ending with 1/2 heart shape placed alongside bundle, and just below the second set of bindings. Repeat on other 3 twisted edge wires.
B. Fan next 2 edge/side wires on each bundle, toward sides and twist with pin vise. Trim each twisted wire to 5/8 inch. Repeat on other bundle. - A. From the top of the top binding wire, (with rosette), measure 1/8 inch toward top of bundle and mark. Use remaining wrap wire and bind, (completely across bundle), 2 times to show on back, showing 3 wires across front - and measure 7/16 inch after wrap wire crosses the third time and then trim. Twist end of wrap wire with pin vise. (Again, remember to start the wraps on one bundle from the left, and on the other bundle from the right.)
B. Using fine chain nose pliers, place tip at the end of twisted wrap wire end and start tiny, tight rosette, rolling toward the top of earring bundle. Finish rosette with flat nose pliers, ending with the completed rosette on top of binding just created. - A. Return to the twisted wires coming from second set of bindings, repeat step # 8, ending with lacy heart shape just under third set of bindings and alongside bundles.
B. Slightly fan last 2 wires, on either side of center wire of each bundle. Measuring from the top of the last binding made, toward the top of the bundle, trim each of these edge wires to 1/4 inch long. Use tip of round nose pliers; roll the end of the wire toward the center, forming a nice loop on either side of the remaining center wire on each bundle.
C. On the BACK, from the top of the third binding wire, measure up the remaining, center wire 7/16 inch and trim. With fingers, bend center wire to the right on one bundle, to the left on the other, and use round nose pliers to form eye loop, or lollypop, at the top, center of each earring. (This will be used later, to attach the ear wires.) The tops are now finished. - Remove tape from the bottom of the earring bundles, and fan outer 2-edge/side wire and twist with pin vise. Measuring from the bottom of the main binding, trim each wire to 3/4 inch long. Use fine chain nose pliers to start tiny, tight rosette, rolling end of twisted wire toward the side/center of the earring bundle. Finish rolling with flat nose pliers, rosette up toward top/center, and then placing rosettes side-by-side, on top of the main binding wire.
- A. Fan out the next 2 edge/side wires to each side of bundle and raise the center wire straight up, out the front of the bundle, at a 90-degree angle.
B. Place regular chain nose pliers on the center wire, at the base where it comes from the binding, and hold it there, while using fingers, bend the center wire back toward the bottom of the bundle - thus forming a platform to add a pearl or bead. Repeat on other bundle. - A. Thread one large hole freshwater pearl onto the center wire platform just created. Place chain nose pliers, on the center wire, 1mm after the pearl, and bend center wire at a 90-degree angle, back through the center of the bundle. Place flat nose pliers on center wire where it comes through the back of the bundle, and bend the center wire toward the base of the bundle, at a 90 degree angle, back where it belongs. Tape center 5 wires together.
B. Return to the fanned edge wires. From the bottom edge of the main binding, measure down 1 inch and mark each of the 4 wires. Place round nose pliers just above the mark on the right wire on one earring, (the left on the other), and bend toward and crossing over the center bundle, at a 45 degree angle. Use this wire to wrap the center of the bundle, going from where it crosses UP, 2 times to show on the back, showing 3 wires on the front, (ending just under pearl), and trim flush with the edge of the bundle. (NOTE: distance from inside the 45-degree bend to where the wire crosses bundle is approx 5mm.)
C. On opposite edge wire, place round nose pliers just below mark, and repeat step # 19, with the exception of when the wire crosses the bundle, wrap DOWN, once around the back. - Twist the end of the wrap wire with a pin vise, (when it comes back around the front), and trim it to 1/2 inch and rosette tightly toward the top of the earring, placing finished rosette on top of bindings, under pearl.
- A. Remove tape from the bottom of each bundle. Fan out the next 2 edge wires on each bundle and trim each to 5/8 inch long. Place tip of round nose pliers at end of each wire and roll up forming nice circle. Remove pliers and replace them on same wire, immediately behind circle just made, and roll down, forming "inverted swan". End by placing swan shapes directly under the 45-degree angle bends, that surround pearl.
B. Fan next 2 edge/side wires on each bundle and twist with pin vise. Trim each to 3/4 inch long. Use fine chain nose pliers to start tiny, tight rosette, rolling wire tip toward outside edge and up toward inverted swan. Finish rosette with flat nose pliers and place each rosette into body of swan. Repeat with all 4 wires.
C. On center wire of each bundle, place one large hole pearl, a 6mm corrugated saucer bead and another pearl. End by bending center wire to the side, thus locking on beads. Finish by using round nose pliers and making an "eye" loop at the bottom of the center/bead wire - Create all headpin charms: (NOTE: do not wrap loops at top of charms, thread them through their proper places first - them wrap them in! Next step.) On all 4, two inch headpins, start with a pearl, then add a 5mm corrugated melon bead, another pearl and top with a 4mm seamless round, metal bead. On both of the 1 1/2 inch headpins, start with a pearl, then add a 6mm corrugated saucer bead and top with a 4mm seamless round, metal bead.
- Attach headpin charms to their places on the chandeliers. One single pearl charm goes at the bottom of each center wire, and the remaining four; longer charms go into the swan heads on either side of the center.


