


Wire-wrapped Bead Link Bracelet
- Category: Contemporary
- Technique(s): Chain Making, Coiling, Making Loops, Wrapping
- Skill Level: Beginner
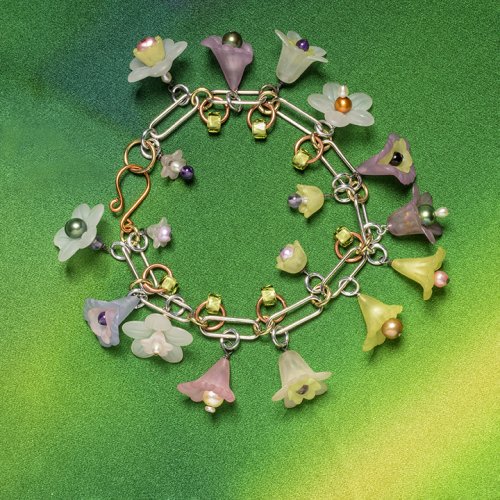
A simple way to add extra interest to a beaded chain is to create wrapped links. Not only is this style of chain very strong, you can also easily add extra detail by wrapping the wire around the beads. This makes the chain pretty enough to use on its own or make a focal necklace extra special.
The finished look is greatly affected by using different sized and shaped beads.
The finished length of this bracelet is 8 inches, with an inside circumference of 7 inches due to the size of the beads. You can adjust the length by increasing or decreasing the number of wrapped links you use accordingly.
Special Instructions: Companion Tutorials:
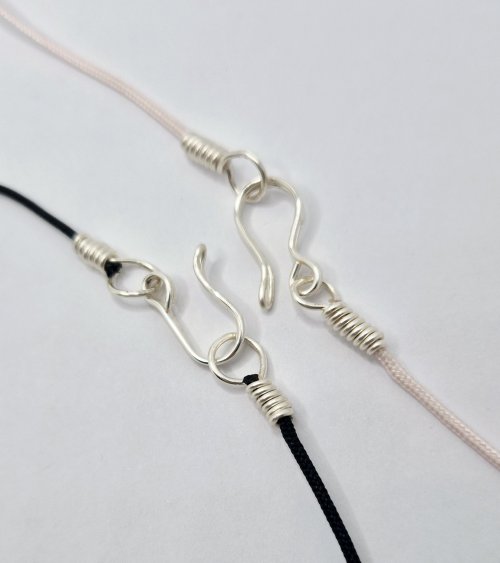
Embellished Hook Clasp
Embellished Hook Clasp
Materials

Yellow Turquoise 16mm Round Beads - 8 Inch Strand
A1-496
- Lesson Quantity: 1.00 pieces
- Purchase Quantity: 1.00 each
- Price: $11.68
- Gold Club Price: $8.76

Prehnite 10mm Round Beads - 8 Inch Strand
A1-509
- Lesson Quantity: 4.00 pieces
- Purchase Quantity: 1.00 each
- Price: $10.77
- Gold Club Price: $8.08

African Turquoise 8mm Round Beads - 8 Inch Strand
A1-735
- Lesson Quantity: 2.00 pieces
- Purchase Quantity: 1.00 each
- Price: $8.40
- Gold Club Price: $6.30

Gold Filled J Hook Clasp w/ Fig. 8 Connector Small 14mm - Pack of 1
J3-74
- Lesson Quantity: 1.00 pieces
- Purchase Quantity: 1.00 pieces
- Price: $12.58
- Gold Club Price: $9.44

20 Gauge Round Half Hard 14/20 Rose Gold Filled Wire
H6-20H
- Lesson Quantity: 4.00 feet
- Purchase Quantity: 1.00 5FT
- Price: $73.31
- Gold Club Price: $54.99
Tools

Round Nose Wire Pliers
G2-507
- G2-507
- Lesson Quantity: 1.00 pieces
- Purchase Quantity: 1.00 each
- Price: $32.95
- Gold Club Price: $24.71

Flat Nose Wire Pliers
G2-506
- G2-506
- Lesson Quantity: 1.00 pieces
- Purchase Quantity: 1.00 each
- Price: $32.95
- Gold Club Price: $24.71

Chain Nose Wire Pliers
G2-508
- G2-508
- Lesson Quantity: 1.00 pieces
- Purchase Quantity: 1.00 each
- Price: $32.95
- Gold Club Price: $24.71

Economy Nylon Jaw Pliers
G2-25
- G2-25
- Lesson Quantity: 1.00 pieces
- Purchase Quantity: 1.00 each
- Price: $11.97
- Gold Club Price: $8.98

5 inch Plato Slim Flush Cutters for Wire Working or Beading - Pack of 1
G35-3
- G35-3
- Lesson Quantity: 1.00 pieces
- Purchase Quantity: 1.00 each
- Price: $11.95
- Gold Club Price: $8.96
Instructions
Step 1:
Prepare the wire
Start with a 10mm bead. Cut a 7" length of 20 gauge wire.
Straighten by holding one end in the chain nose pliers and pulling the length through the nylon jaw pliers a couple of times.
Straighten by holding one end in the chain nose pliers and pulling the length through the nylon jaw pliers a couple of times.
Pro Tip: Each bead is wrapped using one piece of wire, which forms the fat wrap loops and also spiral around the bead. Therefore, different sized beads require different amounts of wire. For the purposes of this lesson, we are wrapping 8, 10, and 16mm beads but you can use any size you like. If you are unsure of wire length, use a piece too long, rather than too short. Measure it and you will know for next time! (See the end of the tutorial for wire lengths for the bracelet).

Step 2:
Bend the wire
Thread the bead onto the wire and place it in the centre (in this case at 3 1/2”).
Grasp the wire immediately after the bead with the flat nose pliers and bend the wire by 45° against the jaw of the pliers, using your thumb.


Step 3:
Form a loop
Remove the bead.
Grasp the wire with the round-nose pliers just after the bend.
Shape the wire around the jaw, so that the loop wire forms a 90° angle to the straight wire.
Grasp the wire with the round-nose pliers just after the bend.
Shape the wire around the jaw, so that the loop wire forms a 90° angle to the straight wire.
Pro Tip: For this chain, with larger beads, I am using the center of the jaw to form a loop 3/16” across. For smaller beads, you will want to form a small loop, so that it does not look oversized.


Step 4:
Wrap the loop
Now that the loop is formed, it needs to be wrapped, securing it closed and creating the base for the final wrap.
Grasp the loop flat, with the chain nose pliers, so that the loop wire points straight up from the pliers.
Wrap the loop wire around the straight wire, using your fingers to pull the wire round, keeping the wires at a 90° angle at all times.
Coil 3 times.
Grasp the loop flat, with the chain nose pliers, so that the loop wire points straight up from the pliers.
Wrap the loop wire around the straight wire, using your fingers to pull the wire round, keeping the wires at a 90° angle at all times.
Coil 3 times.


Step 5:
Form a second wrapped loop
Thread the bead back onto the wire.
Grasp the wire with the flat nose pliers, just after the bead.
Bend 45° in the opposite direction to the existing loop.
Form a loop and wrap 3 times as before.
Ensure that the straight wires are pointing in opposite directions and adjust if necessary.
Grasp the wire with the flat nose pliers, just after the bead.
Bend 45° in the opposite direction to the existing loop.
Form a loop and wrap 3 times as before.
Ensure that the straight wires are pointing in opposite directions and adjust if necessary.


Step 6:
Wrap the bead
Grasp one loop flat in the chain nose pliers and shape the wire coming from that loop around the bead to the loop on the opposite side, by grasping the end with your fingers and gently shaping it around the bead.
Coil once, locking the wire in between the existing coils.
Repeat on the other side.


Step 7:
Create a fat wrap
Continue coiling around the existing coils on either end, by grasping one loop with the chain nose pliers and the wrapping wire with the flat nose pliers, ensuring that the coils sit in between each existing coil.
This creates a double layer wrap.
This creates a double layer wrap.

Step 8:
Trim and tuck the end in
Trim the tail wire close to where the loop wires cross, (taking great care not to catch the wrong wire with the cutters!).
Tuck the end into the loop with the chain nose pliers.
Tuck the end into the loop with the chain nose pliers.
The link is now complete!


Step 9:
Complete the bracelet!
The bracelet is made up of the following beads and wire lengths:
1 x 16mm bead - 8" 20 gauge wire each
4 x 10mm beads - 7" 20 gauge wire each
2 x 8mm beads - 6" 20 gauge wire each
Remember to add the previous link that you made to the loop of the new link before you close it!
1 x 16mm bead - 8" 20 gauge wire each
4 x 10mm beads - 7" 20 gauge wire each
2 x 8mm beads - 6" 20 gauge wire each
Remember to add the previous link that you made to the loop of the new link before you close it!
Pro Tip: Make the loop at the opposite end to the hammered hook clasp slightly larger than the other loops, to accommodate the thicker wire of the clasp and make closing it slightly easier.

Supply Detail
loading...
Change Metal:
This Pattern requires:
Purchase quantity:
Price: $
Gold Club Price: $
Purchase quantity:
Price: $
Gold Club Price: $

Abby Hook
Other Patterns by Abby Hook
 Wire Wrapped Bail for Top-drilled Stones
 Wire Wrapped Bail for Stone Donuts
 Figure 8 Chain
 Seed of Change Pendant
 testdenise
 Heart Frame Bracelet
 Embellished Hook Clasp
 Embellished Heart Earrings
 Embellished Artisan Ear Wires
 Coiled T-bar and Toggle Clasp
 Simply Elegant Pendant
 Lavender Lariat Necklace
 Brooch Pin
 Woven Wire Lotus Flower Pendant
 Coiled Ear Wires
 Wire Wrapped Briolette Pendant
 Simple T-bar and Toggle Clasp
 Cirrus Pendant
 Spiral Wire End Caps
 Mermaid's Teardrop Necklace
 Spiral Bead Cage
 Spiral Bead Charm
 Quick and Easy Loop Earrings
 Squares Bracelet
 Fuchsia Bud Earrings
 Dainty Boho Ring
 Jasmine Pendant
 Dainty Interchangeable Boho Bracelet Tutorial
 Delicate Jasmine Earrings
![]()
The premier place for all your jewelry making needs. The best in wire, tools, cabochons, gemstone beads and more. As well as a superior resource for educational support to help build your jewelry making skills and techniques.
Connect With Us

® 2007 - 2026 Wirejewelry.com Powered by ClaimTheWeb Cart