Natalie Patten's Cord ends and Clasp, Findings & Components, Toggles & Clasps, Earwire & Headpin. Findings, Clasps, Components, Loops, Wire Loop, Wrapped Wire Loop. Natalie Patten shares an easy way to give handmade jewelry a polished, professional finish.

Cord ends and Clasp

by Natalie Patten
  • Category: Findings
  • Technique(s): Making Findings, Making Loops
  • Skill Level: Beginner
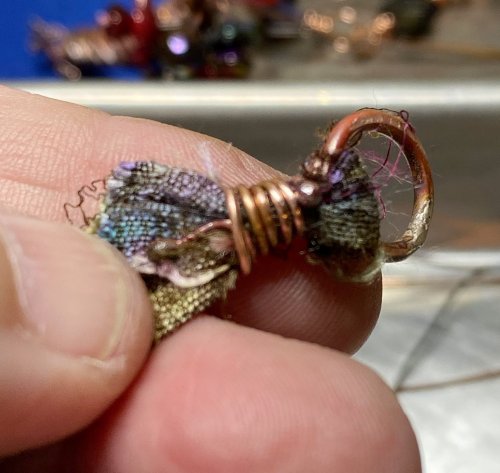
Natalie Patten shares an easy way to give handmade jewelry a polished, professional finish. With just one piece of wire and your favorite cord or ribbon, you can create secure closures that add both style and function to your design.

It's a simple detail that makes every piece look complete!

Materials

18 Gauge Round Silver Plated Silver Copper Craft Wire - 12 ft
H17-I18-12FT
  • Lesson Quantity: 1.00 pieces
  • Purchase Quantity: 1.00 each
  • Price: $8.00
  • Gold Club Price: $6.00
Out of Stock
ribbon or cord
  • Lesson Quantity: 1.00 pieces
  • Purchase Quantity: 1.00 each
18 Gauge Wire - Variety of metals available
Shop Now
Add All Items to Cart

Tools

6 Step Barrel Plier - Pack of 1
G2-503
  • G2-503
  • Lesson Quantity: 1.00 pieces
  • Purchase Quantity: 1.00 each
  • Price: $14.95
  • Gold Club Price: $11.21
Add to Bag
Round Nose Wire Pliers
G2-507
  • G2-507
  • Lesson Quantity: 1.00 pieces
  • Purchase Quantity: 1.00 each
  • Price: $32.95
  • Gold Club Price: $24.71
Add to Bag
Chain Nose Wire Pliers
G2-508
  • G2-508
  • Lesson Quantity: 1.00 pieces
  • Purchase Quantity: 1.00 each
  • Price: $32.95
  • Gold Club Price: $24.71
Add to Bag
Xuron Flush Cutter - Pack of 1
G2-504
  • G2-504
  • Lesson Quantity: 1.00 pieces
  • Purchase Quantity: 1.00 each
  • Price: $29.95
  • Gold Club Price: $22.46
Add to Bag
Optional Tools
WireJewelry - Ultimate Wire-Pliers Jewelry Pliers with Case, Set of 5
G15-20
  • Lesson Quantity: 1.00 pieces
  • Purchase Quantity: 1.00 each
  • Price: $170.72
  • Gold Club Price: $128.04
Add to Bag
5 1/2 Inch Nylon Flat Jaw Pliers with Replacement Jaws
G2-1
  • Lesson Quantity: 1.00 pieces
  • Purchase Quantity: 1.00 each
  • Price: $9.97
  • Gold Club Price: $7.48
Add to Bag
Lighter or cord zapper
  • Lesson Quantity: 1.00 pieces
  • Purchase Quantity: 1.00 each
Add All Items to Cart
Instructions
Step 1
Straighten out 4 inches of 18-gauge wire for each cord end.
Natalie Patten's Cord ends and Clasp - , Findings & Components, Toggles & Clasps, Earwire & Headpin, Findings, Clasps, Components, Loops, Wire Loop, Wrapped Wire Loop, Straighten 18 gauge wire
Step 2
Using the bail step pliers or round nose pliers, form a loop about one inch down from the end of the wire.
Natalie Patten's Cord ends and Clasp - , Findings & Components, Toggles & Clasps, Earwire & Headpin, Findings, Clasps, Components, Loops, Wire Loop, Wrapped Wire Loop, Using step pliers to form loop
Step 3
Center the loop so that it sits directly above the half inch wire tail.
Natalie Patten's Cord ends and Clasp - , Findings & Components, Toggles & Clasps, Earwire & Headpin, Findings, Clasps, Components, Loops, Wire Loop, Wrapped Wire Loop, Center loop
Step 4
Using chain nose pliers, slightly pry open the loop, just enough to fit in the cord or ribbon.
Natalie Patten's Cord ends and Clasp - , Findings & Components, Toggles & Clasps, Earwire & Headpin, Findings, Clasps, Components, Loops, Wire Loop, Wrapped Wire Loop, Open loop
Step 5
Place the end of your cord or ribbon between the opening of the loop.

Close the loop down to trap the cord and position the cord so that it sits on top of the half inch tail of wire.
Natalie Patten's Cord ends and Clasp - , Findings & Components, Toggles & Clasps, Earwire & Headpin, Findings, Clasps, Components, Loops, Wire Loop, Wrapped Wire Loop, Closing wire loop
Step 6
Start to form a wrapped loop around the tail end and cord with the longer end of wire.
Natalie Patten's Cord ends and Clasp - , Findings & Components, Toggles & Clasps, Earwire & Headpin, Findings, Clasps, Components, Loops, Wire Loop, Wrapped Wire Loop, Attaching cord to 18 gauge wire
Step 7
Keep the wraps tight to grip the cord inside.


Natalie Patten's Cord ends and Clasp - , Findings & Components, Toggles & Clasps, Earwire & Headpin, Findings, Clasps, Components, Loops, Wire Loop, Wrapped Wire Loop, Tight wraps on cord
Step 8
Ensure each wrap sits neatly below the last.

Compress the wraps with pliers if needed to keep the wraps neat and close together around the cord.
Natalie Patten's Cord ends and Clasp - , Findings & Components, Toggles & Clasps, Earwire & Headpin, Findings, Clasps, Components, Loops, Wire Loop, Wrapped Wire Loop, Wrap loops tightly
Natalie Patten's Cord ends and Clasp - , Findings & Components, Toggles & Clasps, Earwire & Headpin, Findings, Clasps, Components, Loops, Wire Loop, Wrapped Wire Loop, Using pliers to insure loop close together
Step 9
Cut off any excess wire that runs along the inside of the wrap and continue to wrap the other wire end around to cover the ending of the cut wire.

Cut off any excess of the wrapping wire once you have completed the number of coils that you would like. Using chain nose pliers, ensure the wire end is firmly pressed in to avoid any sharp edges.
Natalie Patten's Cord ends and Clasp - , Findings & Components, Toggles & Clasps, Earwire & Headpin, Findings, Clasps, Components, Loops, Wire Loop, Wrapped Wire Loop, Cutting off excess wire
Step 10
Trim away any cord sticking out inside of the top loop.
Natalie Patten's Cord ends and Clasp - , Findings & Components, Toggles & Clasps, Earwire & Headpin, Findings, Clasps, Components, Loops, Wire Loop, Wrapped Wire Loop, Trimming excess cord
Step 11
A lighter or thread zapper can be used to shrink any ends of man-made cord or ribbon further and can make it easier to remove any excess with scissors or cutters.

Repeat this process on the opposite side of the cord or ribbon, creating loops of equal size and the same number of coiled wraps so that your cord ends are the same length and symmetrical.
Natalie Patten's Cord ends and Clasp - , Findings & Components, Toggles & Clasps, Earwire & Headpin, Findings, Clasps, Components, Loops, Wire Loop, Wrapped Wire Loop, Burn cord endings
Natalie Patten's Cord ends and Clasp - , Findings & Components, Toggles & Clasps, Earwire & Headpin, Findings, Clasps, Components, Loops, Wire Loop, Wrapped Wire Loop, Creating symmetrical cord endings
Step 12
To make your clasp, take another piece of 18- gauge wire at around 4 inches in length and bend it in the centre to fold it in half.

Using chain nose pliers, pinch the bend of the wire together so that they are drawn in closely together and sit parallel, close to one another.

Natalie Patten's Cord ends and Clasp - , Findings & Components, Toggles & Clasps, Earwire & Headpin, Findings, Clasps, Components, Loops, Wire Loop, Wrapped Wire Loop, 4 inches of 18 gauge wire folded in half
Natalie Patten's Cord ends and Clasp - , Findings & Components, Toggles & Clasps, Earwire & Headpin, Findings, Clasps, Components, Loops, Wire Loop, Wrapped Wire Loop, Pinching wire with plier
Step 13
Trim the opposite ends to make them flush and even.

Slightly bend these ends of the wire up together at around 1cm from the end.
Natalie Patten's Cord ends and Clasp - , Findings & Components, Toggles & Clasps, Earwire & Headpin, Findings, Clasps, Components, Loops, Wire Loop, Wrapped Wire Loop, Trim to even out ends
Natalie Patten's Cord ends and Clasp - , Findings & Components, Toggles & Clasps, Earwire & Headpin, Findings, Clasps, Components, Loops, Wire Loop, Wrapped Wire Loop, Bending ends of wire
Step 14
Use round nose pliers or bail step making pliers, form this 1cm part of the wire into a turned loop.
Natalie Patten's Cord ends and Clasp - , Findings & Components, Toggles & Clasps, Earwire & Headpin, Findings, Clasps, Components, Loops, Wire Loop, Wrapped Wire Loop, Using pliers to make loop
Step 15
Facing the opening of the loop away from you, position the bail step making pliers a few millimetres up from the loop.

Bend the wire from the folded tip around the bail making pliers so that it travels in the direction of the loop.

Slightly flick up the folded point of the wire into a gradual curve.
Natalie Patten's Cord ends and Clasp - , Findings & Components, Toggles & Clasps, Earwire & Headpin, Findings, Clasps, Components, Loops, Wire Loop, Wrapped Wire Loop, Using bail making pliers to bend clasp
Natalie Patten's Cord ends and Clasp - , Findings & Components, Toggles & Clasps, Earwire & Headpin, Findings, Clasps, Components, Loops, Wire Loop, Wrapped Wire Loop, Bending wire clasp
Natalie Patten's Cord ends and Clasp - , Findings & Components, Toggles & Clasps, Earwire & Headpin, Findings, Clasps, Components, Loops, Wire Loop, Wrapped Wire Loop, Making gradual curve on clasp
Step 16
Open up the turned loops on the clasp and attach them to the cord end loop, before closing the loops up fully to secure it.
Natalie Patten's Cord ends and Clasp - , Findings & Components, Toggles & Clasps, Earwire & Headpin, Findings, Clasps, Components, Loops, Wire Loop, Wrapped Wire Loop, Attaching clasp to cord
Step 17
The clasp can now hook into the cord end on the opposite side, to close the cord chain.
Natalie Patten's Cord ends and Clasp - , Findings & Components, Toggles & Clasps, Earwire & Headpin, Findings, Clasps, Components, Loops, Wire Loop, Wrapped Wire Loop, Completed clasp