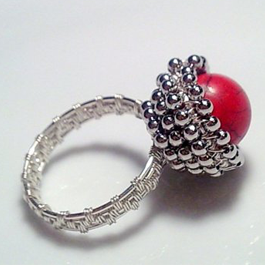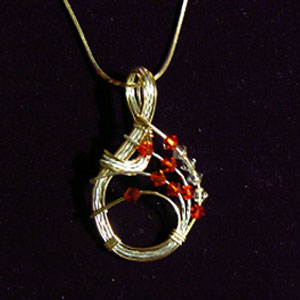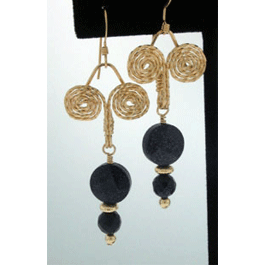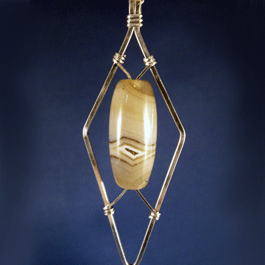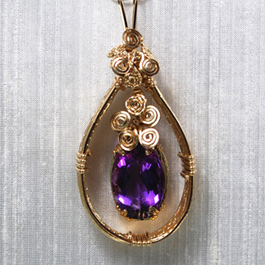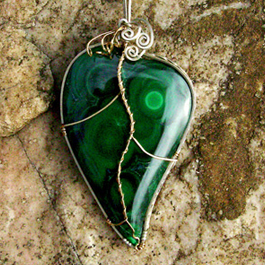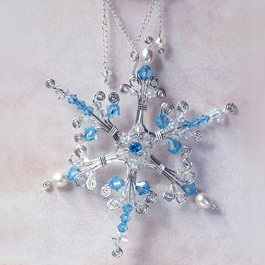


Natalie Patten's Chain Net Cage Pendant, Contemporary Wire Jewelry. Making Chain, Chain Making . Natalie Patten shares a creative way to wear your favorite gemstones without drilling or permanent settings.

Chain Net Cage Pendant

by Natalie Patten
  • Category: Contemporary
  • Technique(s): Chain Making
  • Skill Level: Beginner
Natalie Patten shares a creative way to wear your favorite gemstones without drilling or permanent settings. This customizable gemstone holder makes it easy to swap stones, crystals, or carvings to match your style, mood, or outfit.

It's a versatile jewelry project that combines function, beauty, and endless possibilities!

Materials

Sterling Silver Jump Ring Closed (.027) 21ga. 4mm - Pack of 10
K11-16
  • Lesson Quantity: 15.00 pieces
  • Purchase Quantity: 2.00 each
  • Price: $5.60
  • Gold Club Price: $4.20
Add to Bag
Sterling Silver Chain Flat Curb 1.21mm 20 inch - Pack of 1
C8-176F
  • Lesson Quantity: 1.00 pieces
  • Purchase Quantity: 1.00 each
  • Price: $16.01
  • Gold Club Price: $12.01
Add to Bag
Silver Filled Oval Lobster Clasp 9mm - Pack of 1
S3-13
  • Lesson Quantity: 1.00 pieces
  • Purchase Quantity: 1.00 each
  • Price: $1.50
  • Gold Club Price: $1.13
Add to Bag
Chains - Wide variety of finished or unfinished chains to choose from
Shop Now
Handmade Venetian Glass Beads
Shop Now
Beads of different Gemstones, shape and sizes
Shop Now
Cabochons - Variety of stones, shapes and sizes including One-Of-A-Kind
Shop Now
Add All Items to Cart

Tools

20 X 15 Inch Padded Work Mat
MAT-620.00
  • MAT-620.00
  • Lesson Quantity: 1.00 pieces
  • Purchase Quantity: 1.00 each
  • Price: $14.95
  • Gold Club Price: $11.21
Add to Bag
Chain Nose Wire Pliers
G2-508
  • G2-508
  • Lesson Quantity: 2.00 pieces
  • Purchase Quantity: 1.00 each
  • Price: $32.95
  • Gold Club Price: $24.71
Add to Bag
Xuron Flush Cutter - Pack of 1
G2-504
  • G2-504
  • Lesson Quantity: 1.00 pieces
  • Purchase Quantity: 1.00 each
  • Price: $29.95
  • Gold Club Price: $22.46
Add to Bag
5 Punch Dapping Set
DAP-140.05
  • DAP-140.05
  • Lesson Quantity: 1.00 pieces
  • Purchase Quantity: 1.00 each
  • Price: $12.57
  • Gold Club Price: $9.43
Add to Bag
Adhesive reusable putty
  • Lesson Quantity: 1.00 pieces
  • Purchase Quantity: 1.00 each
Optional Tools
Jump Ring Opener/Holder - Pack of 1
G10-39
  • Lesson Quantity: 1.00 pieces
  • Purchase Quantity: 1.00 each
  • Price: $3.47
  • Gold Club Price: $2.60
Add to Bag
Add All Items to Cart
Instructions
Step 1
Create your own interchangeable crystal gemstone holder, perfect for turning undrilled gemstones or carvings into beautiful pendants. Simply open the top of the netted cage, place your favourite stone inside, and swap it out whenever you want to match your mood or outfit.

Using layers of chain and jump rings, you'll create a secure cage that holds your chosen gemstone in place. This versatile design can be easily customised to fit stones of any size or shape, making it ideal for showcasing your favourite crystals and carvings.
Step 2
Open your jump rings and cut the chain into 24 pieces, each measuring approximately ½ inch long. Make sure all chain segments are the same length. For this tutorial, each segment contains 6 chain links.

To create a larger cage for bigger gemstones or crystals, simply increase the number of chain segments and jump rings used in the design.
Natalie Patten's Chain Net Cage Pendant - , Contemporary Wire Jewelry, Making Chain, Chain Making , Jump rings for chain segments
Step 3
Begin creating the base of your netted cage by attaching four chain segments to a single jump ring. Close the jump ring securely. This forms the first layer of the cage, with the jump ring at the centre and connected to the end link of each chain segment.
Natalie Patten's Chain Net Cage Pendant - , Contemporary Wire Jewelry, Making Chain, Chain Making , Base of chain cage
Step 4
To create the next layer of the netted cage, attach a jump ring to the end of each chain segment from the first layer. Add two additional chain segments to each jump ring and close the rings securely. This layer will consist of four jump rings, each connected to three chain segments, for a total of eight new chain segments.
Natalie Patten's Chain Net Cage Pendant - , Contemporary Wire Jewelry, Making Chain, Chain Making , Second layer of chain cage
Step 5
Join the sections together by connecting one chain from each adjacent section with a jump ring, as shown. Close the jump ring securely to create a continuous netted structure.

Adding in these four jump rings, will form the net into a square shape (as pictured).
Natalie Patten's Chain Net Cage Pendant - , Contemporary Wire Jewelry, Making Chain, Chain Making , Step in chain cage
Natalie Patten's Chain Net Cage Pendant - , Contemporary Wire Jewelry, Making Chain, Chain Making , Connecting sides of chain cage
Step 6
As your netted cage grows, it can become difficult to keep track of where each chain should be attached. To make the process easier, secure the centre jump ring-the starting point of your net-on top of a mandrel or another small cylindrical object using putty or reusable adhesive. This will give the cage structure and allow the layers to hang naturally, making it easier to see where the next chains and jump rings need to be added.
Natalie Patten's Chain Net Cage Pendant - , Contemporary Wire Jewelry, Making Chain, Chain Making , Using stand to position chain cage
Step 7
Open the jump ring hanging from the bottom layer and attach two additional chain segments. Once the chains are in place, close the jump ring securely.
Natalie Patten's Chain Net Cage Pendant - , Contemporary Wire Jewelry, Making Chain, Chain Making , Adding chain and jump rings
Step 8
Repeat this process for each jump ring in the row, adding two more chain segments to each one. This will create the foundation for the next layer, with the chains hanging down and ready to be connected.
Natalie Patten's Chain Net Cage Pendant - , Contemporary Wire Jewelry, Making Chain, Chain Making , Next layer in chain cage
Step 9
Connect these sections together with jump rings to complete the next layer of the netted cage. If you would like to make the cage larger, you can continue adding additional chain segments to the bottom row of jump rings, as described in the previous steps.
Natalie Patten's Chain Net Cage Pendant - , Contemporary Wire Jewelry, Making Chain, Chain Making , Netted chain cage
Step 10
Once your netted cage has reached the desired size and length, begin tapering it by adding only one chain segment to each jump ring in the bottom row. This will gradually reduce the size of the cage and start forming the top section.
Natalie Patten's Chain Net Cage Pendant - , Contemporary Wire Jewelry, Making Chain, Chain Making , Tapering in netted chain cage
Step 11
These chain segments can now be paired together and connected with another jump ring. If preferred, you can use larger jump rings for this step, as these two rings will later be used to attach the pendant cage to the main necklace chain.
Natalie Patten's Chain Net Cage Pendant - , Contemporary Wire Jewelry, Making Chain, Chain Making , Final section of netted chain cage
Step 12
Make sure the jump rings are attached to the final link of each chain segment and that all jump rings are fully closed and secure.
Natalie Patten's Chain Net Cage Pendant - , Contemporary Wire Jewelry, Making Chain, Chain Making , Closing final jump rings
Step 13
At this stage, the final layer of the netted cage should taper into two points, positioned on opposite sides of the mandrel.
Natalie Patten's Chain Net Cage Pendant - , Contemporary Wire Jewelry, Making Chain, Chain Making , Two points at close of netted chain cage
Step 14
Remove the netted cage from the mandrel and lay it flat, making sure the last two jump rings you added are positioned at the top.
Natalie Patten's Chain Net Cage Pendant - , Contemporary Wire Jewelry, Making Chain, Chain Making , Positioning netted chain cage
Step 15
Thread the necklace chain through these top two jump rings.
Natalie Patten's Chain Net Cage Pendant - , Contemporary Wire Jewelry, Making Chain, Chain Making , Attaching to necklace
Step 16
Add a jump ring and clasp of your choosing to the necklace chain.
Natalie Patten's Chain Net Cage Pendant - , Contemporary Wire Jewelry, Making Chain, Chain Making , Adding clasp to necklace
Step 17
Add your chosen gemstone into the netted cage.
Natalie Patten's Chain Net Cage Pendant - , Contemporary Wire Jewelry, Making Chain, Chain Making , Choosing stone for netted chain cage
Step 18
The two jump rings at the top will slide along the chain, allowing the pouch to open and close. This makes it easy to insert, remove, and interchange your gemstones whenever you wish.
Natalie Patten's Chain Net Cage Pendant - , Contemporary Wire Jewelry, Making Chain, Chain Making , Netted chain cage necklace
Step 19
When worn, the two top jump rings will sit close together, drawing the netted cage closed around the gemstone or crystal to hold it securely in place.
Natalie Patten's Chain Net Cage Pendant - , Contemporary Wire Jewelry, Making Chain, Chain Making , Netted chain cage necklace
Step 20
Your interchangeable gemstone holder is now complete! You can wear your favourite gemstones or crystals as a pendant and easily swap them out whenever you like, regardless of their shape or size.
Natalie Patten's Chain Net Cage Pendant - , Contemporary Wire Jewelry, Making Chain, Chain Making , Netted chain cage necklace