Working with Transparent Enamels Pt 1
The use of torch fired transparent enamels for making jewelry will be explored in this series of articles/tutorials on the topic. The content is largely based upon what I've learned through discovery and may differ somewhat from other information you have read.
Introduction to transparents on copper
We will be discussing the use of transparents on copper and I will share what works for me. We will examine how transparent enamels can be used in a variety of ways. These include direct-on-copper, the use of flux, transparent on opaque white enamel, transparents on embossed copper and transparent on other color opaques. The topic of using transparent enamel on liquid enamel is not included in this series.
If you would like to follow along and make various samples, we can put them together in the end to create a necklace.
If you would like to follow along and make various samples, we can put them together in the end to create a necklace.

One way to determine if you like the look of transparent enamels is to do samples of similar colors in opaque and relatively close transparent colors. In the photo below, I've used an opaque Red Flame 1980 on Foundation White 1030 for the left piece, transparent Woodrow Red 2880 over Foundation White for the middle piece and Woodrow Red over medium flux (to be explained later) for the far-right piece. It is difficult to view the translucent quality of the transparents in this photo; however, it is more noticeable when you hold the pieces. The color variations are apparent.

I often use transparent enamels for monochromatic work and for achieving subtle shade differences. The pieces in the following photo were first covered and fired with opaque Grape 1780. The top rectangular piece then received one fired coat of transparent Harold Purple 2720 in the middle and three fired coats of Harold Purple on the far right side. The bottom piece also started with opaque Grape and then received one fired coat of transparent Raspberry 2836 in the middle and two fired coats on the far right side.

Purchased transparent enamels contain various size grains, the smallest of which have the potential for creating cloudiness. The mixture of grain sizes helps keep the enamel from bouncing off the metal when sifted on.
Much of the literature on transparent enamels indicates that transparent enamels should be screened and/or washed before using to reduce the propensity for cloudiness. Following is a brief explanation of both processes. In my humble opinion, I do not think these processes are necessary for the way I am currently using transparents; however, I would likely use them in practicing more advanced techniques such as wet packing for cloisonné, etc. I wouldn't want you to review the procedures below and decide transparents are too much trouble. I use transparents all the time without washing or sifting for the purposes discussed in this series. Yet, I would be remiss if I did not show you these.
Mesh Size Separation
The various grain sizes in enamels can be separated using different mesh size sifters. The larger grains of enamel should provide the clearest transparent color. Use stackable sifting trays for this procedure. The tray set I have has more trays that I feel I need for my current purpose.

Safety is paramount when sifting enamels. Please wear a dust mask to avoid inhaling enamels. The fine grains (aka fines) float about without being seen producing a health hazard. Even though I work with unleaded enamels, I wear a mask when sifting.
Procedure:
(Note: I chose to use four of the trays, 80, 100, 200 and 325, for this process.) Stack the trays in size order starting with the mesh size with the largest holes at the top. The smallest mesh size tray is placed at the bottom. The larger the mesh size the smaller the number. Use a collection tray under the last sifter. Put some powdered enamel in the top tray and cover this with a lid to keep the dust down. I don't have a lid and use a piece of foil.
Shake the trays to activate the sifting process collecting the smallest particles in the bottom tray.


You may wish to keep these small particles for later projects such as painting; however, we are not using them at this time. The gains left in the larger mesh size trays are supposed to provide the most clarity.
Washing Method: (Note: Washed enamels deteriorate faster than unwashed. Just wash the amount you expect to use for your current project.)
Place some transparent enamel in a small cup and add enough distilled water to cover it.
Washing Method: (Note: Washed enamels deteriorate faster than unwashed. Just wash the amount you expect to use for your current project.)
Place some transparent enamel in a small cup and add enough distilled water to cover it.
Swirl the water around in the cup and allow the enamel to settle to the bottom. The water on the top will be cloudy.
Plan to capture the fines in the cloudy water since you don't want these going down the sink. Prepare a container with a coffee filter supported at its opening. Gently pour off the cloudy water through the filter. The larger grain enamels will remain in the cup. The fines will catch in the filter while the water goes to the bottom. You will use this container and filter several times.
Repeat steps 1-3 until the water about the transparent enamel is relatively clear.
Wick the excess water from the enamel using the corner of a paper towel. I do this several times.
Wick the excess water from the enamel using the corner of a paper towel. I do this several times.
We are not using the transparent for wet packing; however, if you were, it would now be ready for use. If you are using dry transparents, any moisture from the washing must be removed. Spread the wet enamel on a piece of paper and let it dry completely. This will take considerable time, but damp enamel won't sift. (Note: embossed paper towels do not work well and waste enamel by trapping it.) You may want to place another piece of paper over the drying enamel so it won't be contaminated.


If you are considering sifting and/or washing your transparents, I suggest doing a few samples to compare the difference in those you have processed and what comes directly out of the jar. If you can see a different in your samples, you may want to sift and/or wash. If not, then proceed with using the transparent directly from the jar.
In Part II of this series we will look at shaping the copper for making a piece, examine how the transparent enamel reacts with the copper and determine what to do about this. Let's make something or begin a project in Part II.
In Part II of this series we will look at shaping the copper for making a piece, examine how the transparent enamel reacts with the copper and determine what to do about this. Let's make something or begin a project in Part II.
Materials

Copper Oval, 24 Gauge, 18 by 13 Millimeters, Pack of 6
MET-520.20
- Lesson Quantity: 1.00 pieces
- Purchase Quantity: 1.00 each
- Price: $2.97
- Gold Club Price: $2.23

Copper Rectangle with Ring, 24 Gauge, 1 by 7/16 Inch, Pack of 6
MET-510.35
- Lesson Quantity: 1.00 pieces
- Purchase Quantity: 1.00 each
- Price: $3.00
- Gold Club Price: $2.25

Copper Rectangle, 24 Gauge, 1/2 by 7/8 Inch, Pack of 6
MET-510.30
- Lesson Quantity: 1.00 pieces
- Purchase Quantity: 1.00 each
- Price: $2.86
- Gold Club Price: $2.14

Copper Rectangle, 24 Gauge, 3/4 by 1 Inch, Pack of 6
MET-510.20
- Lesson Quantity: 1.00 pieces
- Purchase Quantity: 1.00 each
- Price: $4.57
- Gold Club Price: $3.43

Copper Teardrop, 24 Gauge, 3/4 by 1-1/4 Inch, Pack of 6
MET-550.32
- Lesson Quantity: 1.00 pieces
- Purchase Quantity: 1.00 each
- Price: $3.95
- Gold Club Price: $2.96

Copper Horizontal Oval with 2 Rings, 24 Gauge, 1 by 1/2 Inch, Pack of 6
MET-520.55
- Lesson Quantity: 1.00 pieces
- Purchase Quantity: 1.00 each
- Price: $2.60
- Gold Club Price: $1.95
Tools

1608 Storm Blue Thompson Opaque Enamel
EN-1608
- EN-1608
- Lesson Quantity: 1.00 pieces
- Purchase Quantity: 1.00 each
- Price: $3.07
- Gold Club Price: $2.30

1660 Ultramarine Blue Thompson Opaque Enamel
EN-1660
- EN-1660
- Lesson Quantity: 1.00 pieces
- Purchase Quantity: 1.00 each
- Price: $2.79
- Gold Club Price: $2.09

1708 Pastel Pink Thompson Opaque Enamel
EN-1708
- EN-1708
- Lesson Quantity: 1.00 pieces
- Purchase Quantity: 1.00 each
- Price: $4.99
- Gold Club Price: $3.75

1715 Clover Pink Thompson Opaque Enamel
EN-1715
- EN-1715
- Lesson Quantity: 1.00 pieces
- Purchase Quantity: 1.00 each
- Price: $6.41
- Gold Club Price: $4.80

1745 Fox Glove Purple Thompson Opaque Enamel
EN-1745
- EN-1745
- Lesson Quantity: 1.00 pieces
- Purchase Quantity: 1.00 each
- Price: $6.41
- Gold Club Price: $4.80

1760 Iris Purple Thompson Opaque Enamel
EN-1760
- EN-1760
- Lesson Quantity: 1.00 pieces
- Purchase Quantity: 1.00 each
- Price: $6.41
- Gold Club Price: $4.80

1995 Black Thompson Opaque Enamel
EN-1995
- EN-1995
- Lesson Quantity: 1.00 pieces
- Purchase Quantity: 1.00 each
- Price: $2.79
- Gold Club Price: $2.09

Thompson 40 Mesh Sifter Small - Pack of 3
G11-4
- G11-4
- Lesson Quantity: 1.00 pieces
- Purchase Quantity: 1.00 each
- Price: $20.95
- Gold Club Price: $15.71

1/32 Line Sifter - Pack of 1
G11-5
- G11-5
- Lesson Quantity: 1.00 pieces
- Purchase Quantity: 1.00 each
- Price: $9.95
- Gold Club Price: $7.46

WireJewelry - Ultimate Wire-Pliers Jewelry Pliers with Case, Set of 5
G15-20
- G15-20
- Lesson Quantity: 1.00 pieces
- Purchase Quantity: 1.00 each
- Price: $170.72
- Gold Club Price: $128.04
- Category: Enamel
- Technique(s): Enamel






 See Yourself as a Creative Thinker
 See Yourself as a Creative Thinker-Part II
 See Yourself as a Creative Thinker-Part III
 See Yourself as a Creative Thinker, Part IV
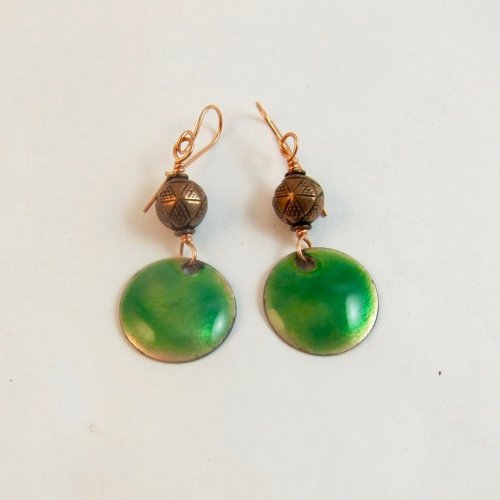 Working with Transparent Enamels Part 2 -The Use of Flux with Transparent Enamels on Copper
 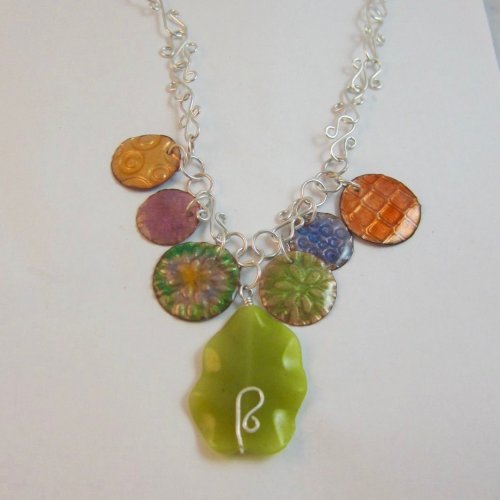 Working with Transparent Enamels, Pt. 3
 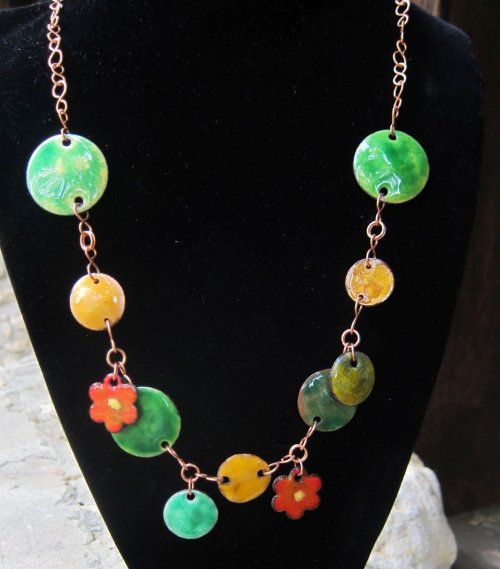 Working with Transparent Enamels Pt 4
