


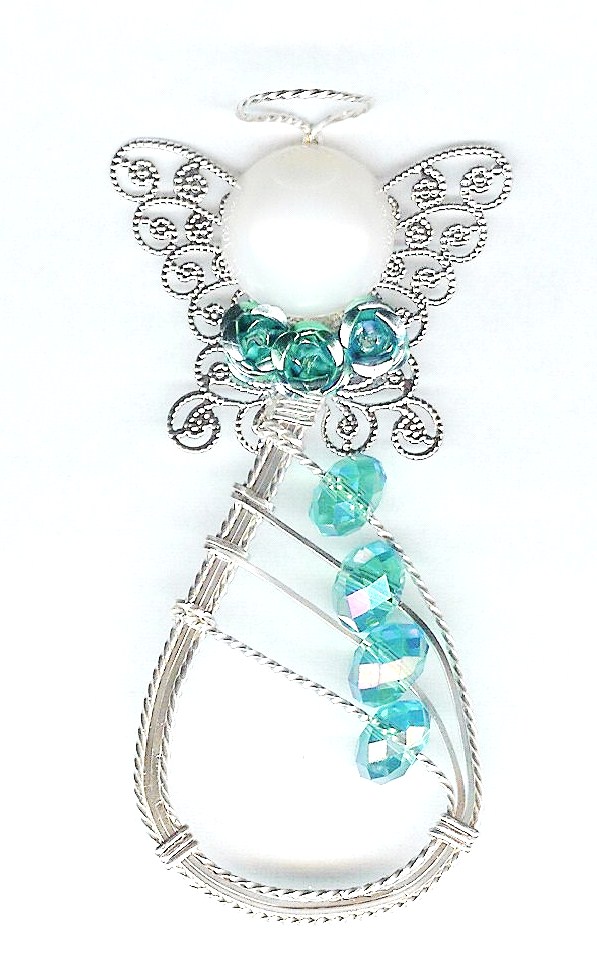
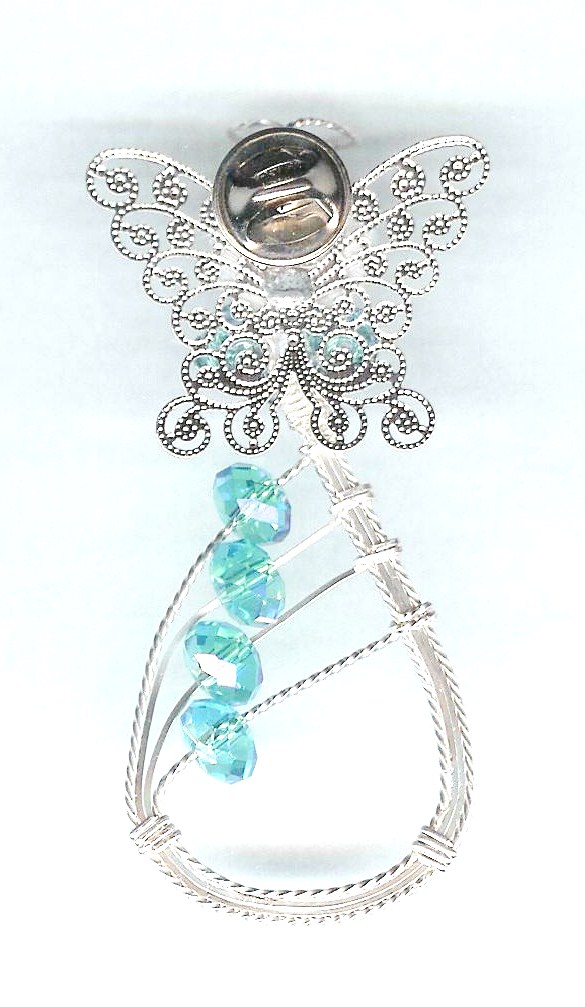
Heaven Rejoices Angel Pin
Designed by Anita Russell © 2013
Skill Level: Beginner
Technique: Wrapping bundles, gluing components
Making this angel should be fun and easy and can be made in a jiff. Feel free to substitute pieces from your own jewelry box or parts on hand. Come as close to these as you can. Don't have the right parts? Most craft stores carry pieces you'll find that are just perfect for the project. It is easily adaptable to copper, gold, bronze, brass, silver - any wire.
Materials
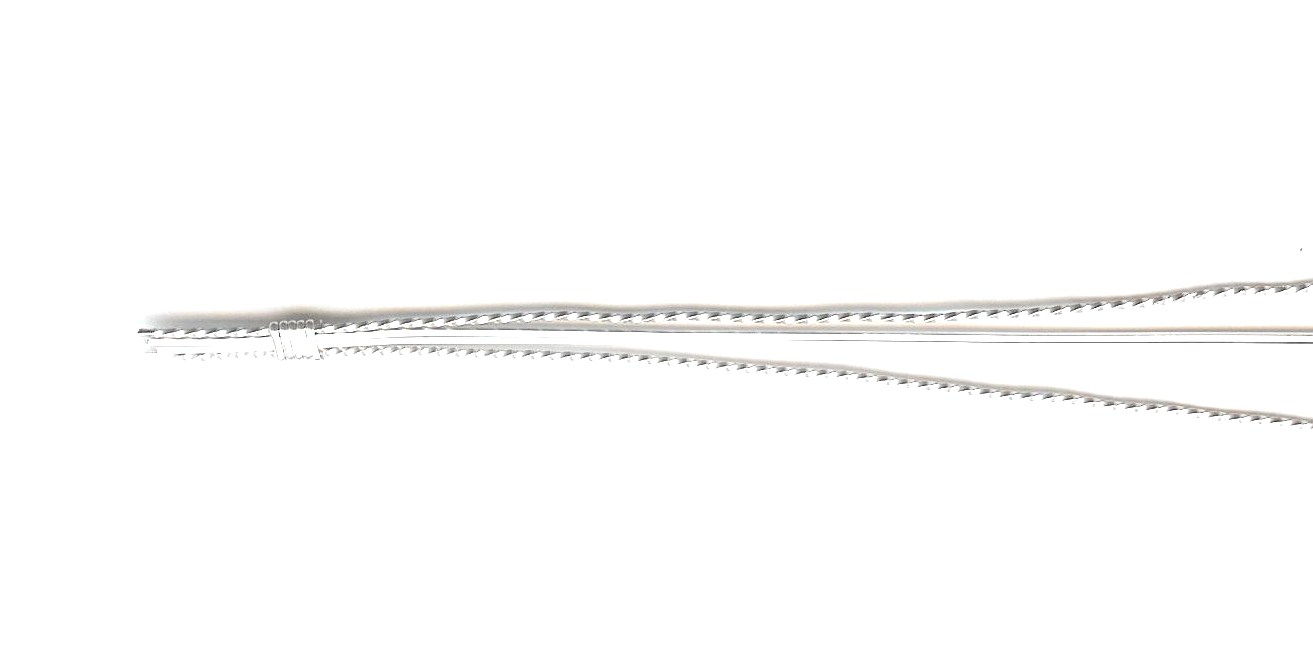
- 21-gauge half round wire: One (1) piece about 7" in length. Note: you can substitute 21-gauge round wire if using craft wire that isn't available in half round.
- 22-gauge square wire: Two pieces, 6 " in length.
- 22-gauge twisted wire: Two pieces, 6" in length.
- 22-gauge twisted wire: One piece 3" in length.
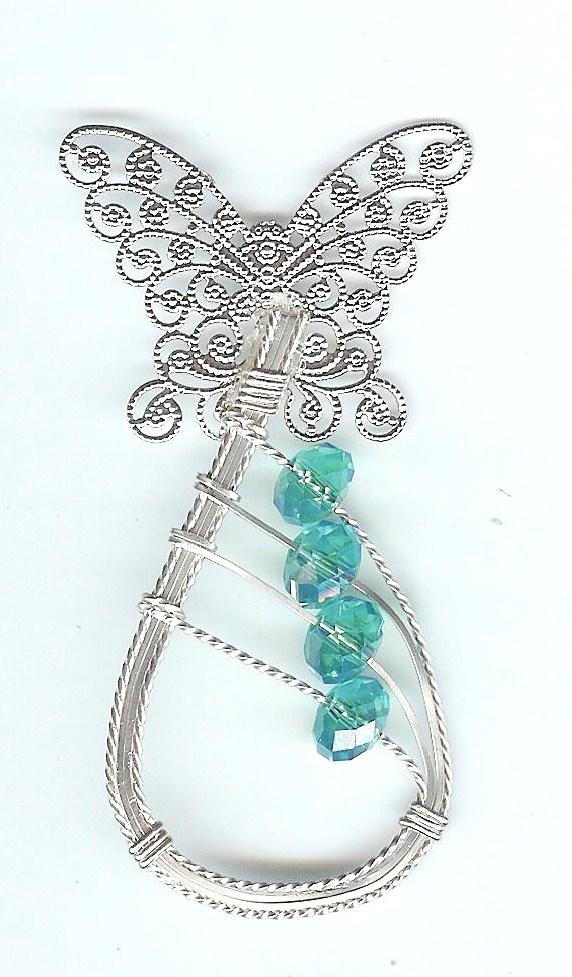
- Butterfly: 35mm by 25mm
- 14mm pearl cabochon Substitution: a pearl button with the shank cut off
- 3 agua aluminum roses: 4mm to 6mm but you can choose a bow, heart, or other adornment.
- 4 aqua crystals: I chose 6mm rondelles but you can pick any color or a round bead will do as well. Just make sure the bead hole is large enough for the wire to pass through.
- Tie tac finding.
Tools
Instructions
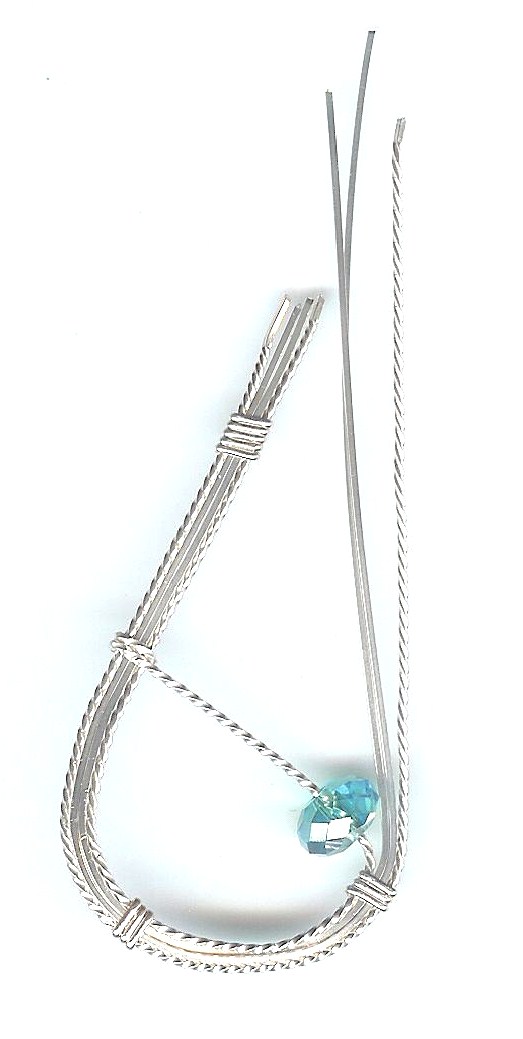
- Align the four 7" wires with the twisted wires on the outside, straight wires on the inside and use the 1/2 round wire to make a bundle 1/2" from the top. Wrap 5 times to secure the wires.

- Measure 1 3/4" from the top wrap. Using the half round wire, make 3 wraps. Then measure 2 3/4" from the top bundle and make 3 more wraps, again using the 1/2 round wire.
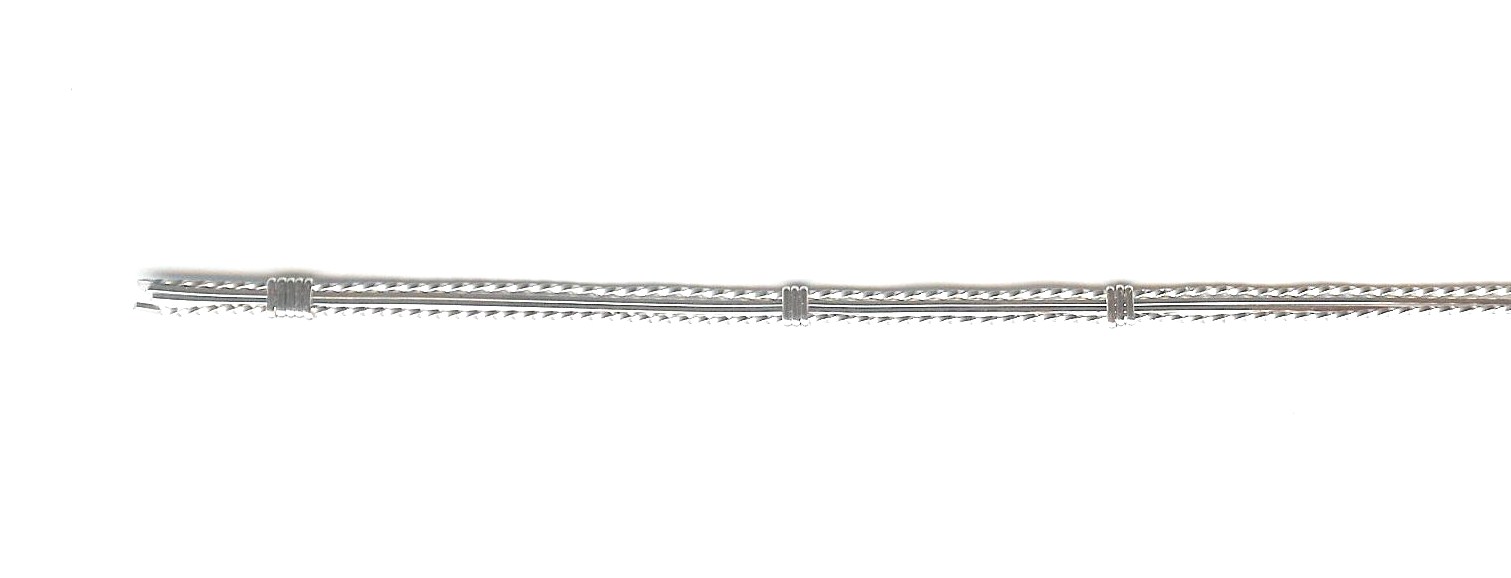
- Holding the wire at the 1 3/4" wrap, very gently bend the 4 wires to make a horse-shoe. The wrap at 1 3/4" should be level with the wrap at 2 3/4".

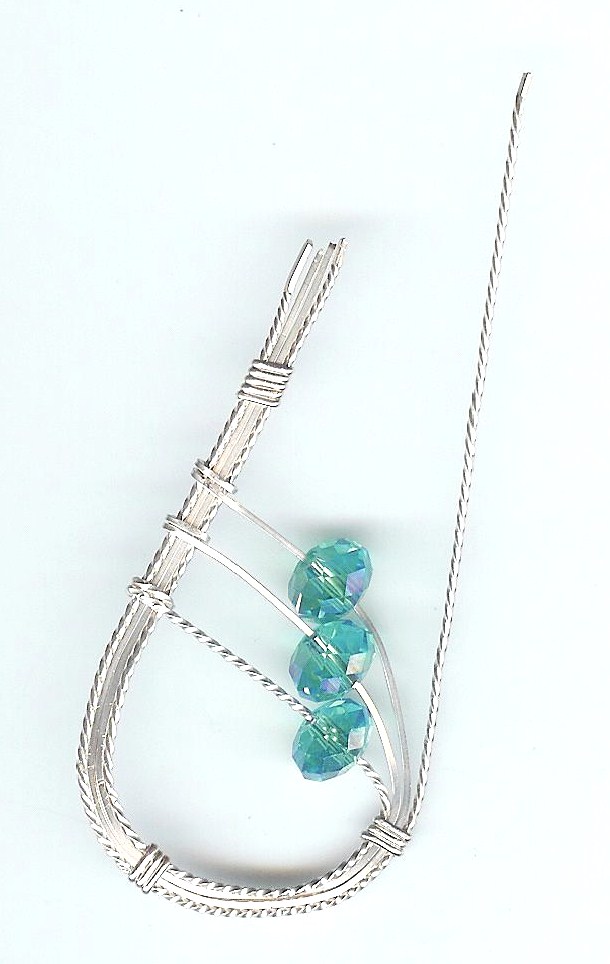
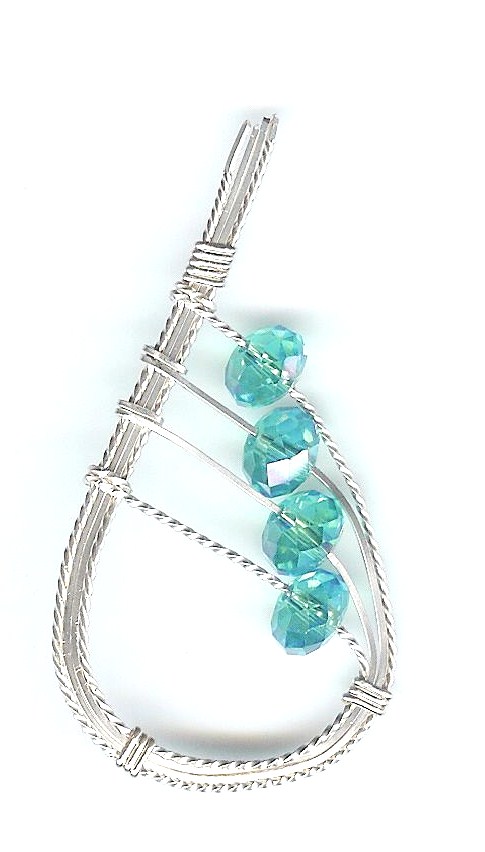
- Thread your first bead on the twisted wire and secure with 2 wraps on the opposite side about 3/4" up from the 1 3/4" wrap
- Thread your second bead on the straight wire and secure, using 2 wraps, on the opposite side about 1/8" from the last.

- Thread your third bead on the other straight wire and secure, using 2 wraps, on the opposite side about 1/8" from the last wrap.
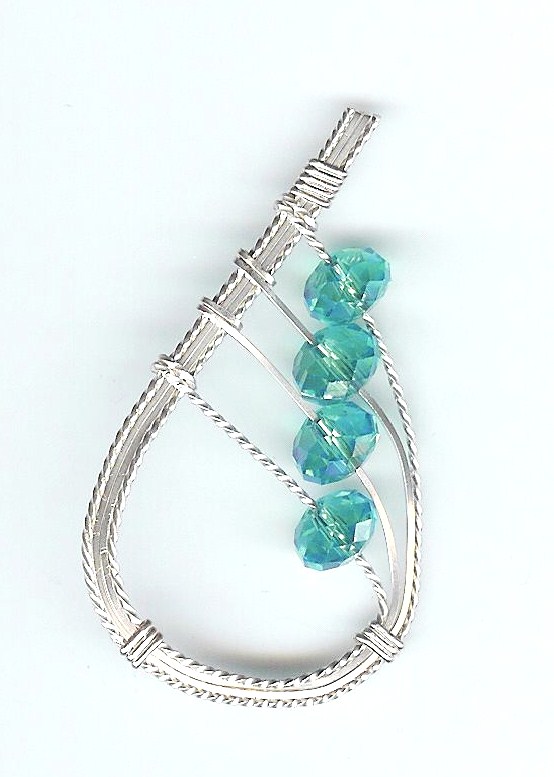
- Thread your 4th bead on the twisted wire and secure, using 2 wraps, just under the bundle of wires at the top.
- Flush cut the extra wire at the end of the bundle so that 1/4" of extra wire shows. You will use this to glue to the butterfly in the next step.
- Glue the angel's skirt to the front of your wings with E-6000 glue. Wait at least 1-1/2 hours for the glue to dry before going on to the next step.
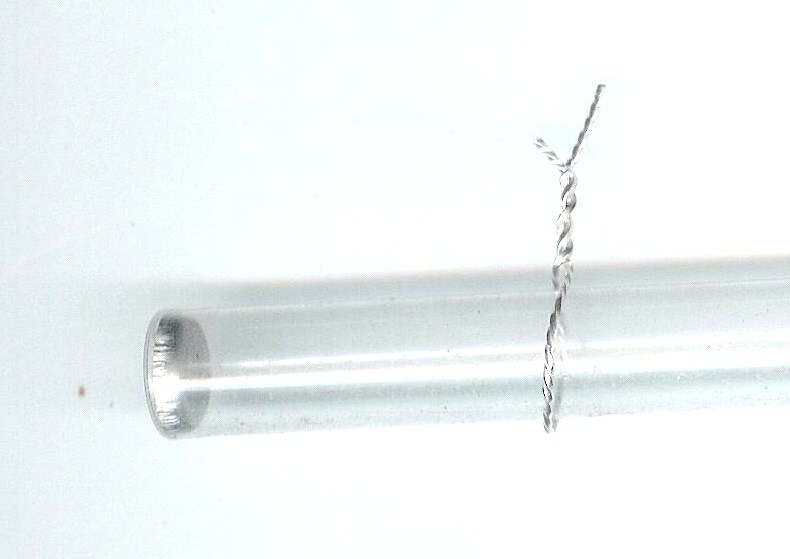
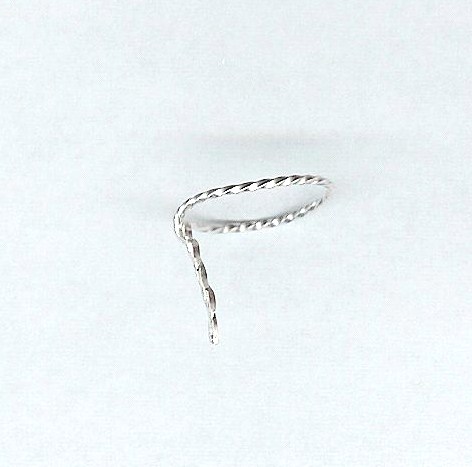
- Now for the halo. Take the 3" piece of twisted wire and form around a round object. I found a round pencil was too small so I used an empty tube that holds seed beads. Use something about the same size as your cab or button. Now twist.
- Flatten the stem of the halo with your flat nose pliers or jeweler's hammer. It needs to be as flat as possible so the cab can glue evenly.
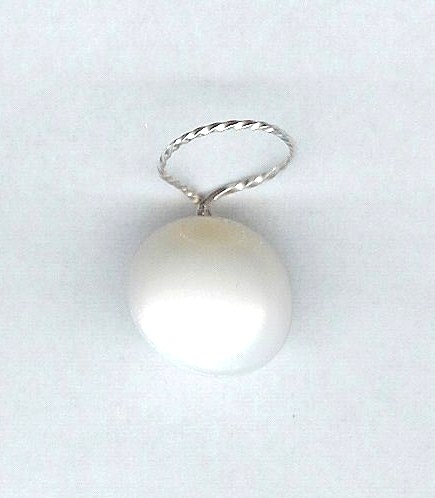
- Glue the cab you've chosen to the halo stem using the E-6000. Wait at least 1-1/2 hours for the glue to dry before going on to the next step.
- Glue the halo-face combination to the wings using E-6000 glue. Wait at least 1-1/2 hours for the glue to dry before going on to the next step.
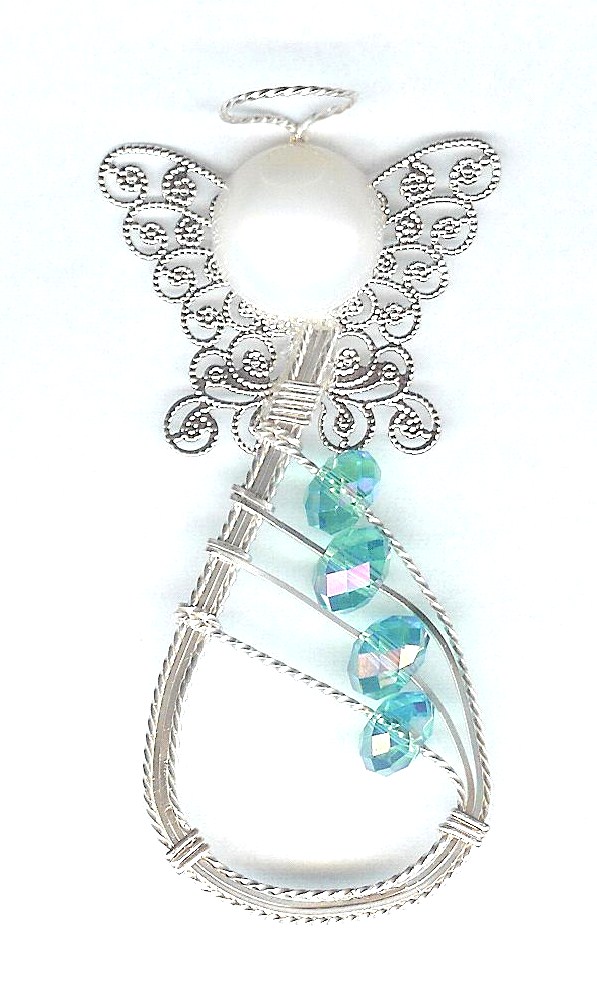
- Glue the roses to the angel just under her head using E-6000. Wait at least 1-1/2 hours for the glue to dry before going on to the next step.
- Glue the tie tac just behind the head using E-6000. Wait at least 1-1/2 hours for the glue to dry.
- Wear and Enjoy!
Our thanks to Anita Russell for this pattern! Anita's angels are her signature design, which she created while caring for her father. Her handmade angels are so popular that she even teaches classes on making them at her local community college in Oregon, and also has published a book about her angels. You can explore Anita's collection of angels and read her story here: theangellady.biz.
 Free Wire Jewelry Patterns
Did you find this pattern through a link from a friend? This Free Wire Jewelry Pattern is just one of dozens of free wire jewelry patterns we send via email. Get patterns like this one straight to your inbox - click here!
![]()
The premier place for all your jewelry making needs. The best in wire, tools, cabochons, gemstone beads and more. As well as a superior resource for educational support to help build your jewelry making skills and techniques.
Connect With Us

® 2007 - 2024 Wirejewelry.com Powered by ClaimTheWeb Cart