Create an 'Instant Memory Jogger' for Weaves, Techniques and Tips
I admit it. I am a voracious reader and 'super scavenger' of other people's good ideas'! Don't misunderstand - I don't infringe on other artist's designs - but I am definitely excited to learn a new special technique that I can use in my own work.
The only problem is....I may not remember the 'exact how-to' when I'm ready to use it! How frustrating!
The only problem is....I may not remember the 'exact how-to' when I'm ready to use it! How frustrating!
I'm not admitting to a memory problem, you understand. It's just that all of us accumulate a massive amount of 'mind clutter' in this the technological world that we live in. For me, I need an easy retrieval method for everything I learn....and that means saving what I want to remember...in an index card file...an amazing non-technical device that doesn't require a computer to retrieve!
I love 'lace' knitting. That's not too surprising, since I also love 'wire weaving', and the two are somewhat similar. I found that fumbling with standard 8-1/2" x 11" pages of instructions was just plain annoying! Most 'lace knitters' work from a chart - little squares marked with knitting symbols - that tell you when to 'knit' or 'purl'. It's like 'shorthand' - much quicker to 'see' the whole pattern, without reading hundreds of lines of printed abbreviations.
I solved the problem by creating an index card file with hundreds of knitting patterns that I have 'compacted' to fit on the cards. Then... a light bulb moment! Why not do the same thing with wire work patterns?!? So I began another card file - for wire work.
Wirework 'How-to Memories' That I Collect:
Wire Weaving Patterns:
Now they're right at my fingertips... every weaving pattern that I have ever learned, and more patterns that I want to use when I find the right gemstone for them. A quick flick through my card box, and I can start weaving immediately. No hunting through magazines or saved tutorials in some notebook (that I can't find), or searching on my computer. They're right at my fingertips!
Tips & Techniques:
We learn so much from others, as they generously share 'special secrets' that make our crafting so much easier! It may be exaggerating a bit, but it seems to me that I have at least a small obligation to save and use that information - if 'someday', we might use it.
I save tips on wire gauges, tool use, design aids, the Mohs scale for gemstone hardness, a color chart for inspiration...the list goes on and on. Anything that makes me say: "Oh...what a good idea!" is likely to end up in my card file.
Jewelry Tutorials:
I previously wrote two articles on saving both print and video tutorials - in more useable forms. I use many of these same techniques to create my 'wire cards'. You'll probably find it helpful to refer to those articles before you begin creating your own card file system. "How to Copy, Save and Compact Tutorials" https://www.wirejewelry.com/jewelry_making_articles/How-to-Copy-Save-and-Compact-Tutorials_261.html and "How to Create a 'Print-Out' From a Video Tutorial" https://www.wirejewelry.com/jewelry_making_articles/How-to-Create-a-Print-out-from-a-Video-Tutorial_287.html
Getting Started
If you haven't created a 'copy and compact' document yet, you'll be greatly helped to print out the instructions of the articles mentioned above. However, I'll briefly go over the basics here.
The photo above shows a finished page of step-by-step instructions from a video, by Natalie Trenh, for making two matching open spirals from wire. Fortunately, the 'video' consisted of still photos with text - so it was a simple process to pause the video, use the Snipping Tool, copy the text and photo, then paste and save it into a document.
The document had been set up with two columns, each of which is slightly smaller (column edge to edge) than the standard 4" wide vertical index card. If you wish, you can format for a larger index card. (They also come in 5" x 8" size, if you'd prefer a slightly 'easier' read.)
It is then a simple process to carefully trim the columns, and paste them onto an index card. Use a pencil to 'outline' a section of text and photos that will fit nicely on the card. Choose where to separate the text, if there is not a 'natural' break, so it will a) fit well on the card, and b) be easy to 'splice together' if needed.
Although you may immediately grab your scissors, please consider: You absolutely cannot cut an exactly straight line with scissors. You can cut a fairly straight line - but it will still have tiny waves in the cut - and may not precisely match another cut. This is important when you are splicing text - especially if you have a 'small accident' and cut a photo! If you're not a 'semi-perfectionist'.... use scissors.
Scissors with l-o-n-g blades are preferable. They allow you to make a long cut without having to use a 'scissoring action', as you would with short-bladed scissors. Before cutting, pencil a line close to the photo or text, using a straight edge (a ruler or the edge of an index card), then try to cut exactly on the line.
Successful scissor cuts are made by turning the paper, not the scissors. You get much cleaner, smoother cuts when you just 'meander' the paper where it needs to be cut. Slowly close the scissors in the cutting action as you move the paper. This 'pro' maneuver is much more important if you are cutting curves, turning corners, and doing other 'design cutting' - but it helps with 'straight cutting', also.
I've used a 'notebook-sized' scrapbook paper cutter/trimmer for years, for various crafts. It's a bit smaller than the one shown, small enough to fit into a 3-ring notebook. But, it serves the purpose. It cuts straight lines in paper, and even in thin fabrics that have been treated to make them stiffened. Now it perfectly trims my 'card files' in seconds. If you do a lot of paper cutting in your crafting, this might be a good investment.
After trimming as close as possible to the photos and text, I use rubber cement to glue the cut columns on the index cards. You can use a 'gluestick', but rubber cement offers an extremely easy 'cleanup' - you just let it dry and then rub off any excess or spills with a paper towel. It also causes the paper to stay fairly flat; other glues (with a water base) often make paper curl or bubble. After gluing, I 'squeegy' it flat with anything convenient - the side of the glue stick - a folded index card - anything straight and fairly sturdy.
Since I punch holes on the left side of the cards (to fasten together with jump rings), I keep this in mind as I position the column pieces to the far right on the front side, and far to the left on the back side.
When piecing the columns together, so you get the maximum amount possible on each card, I like to mark the corners of each piece on the card. I then apply the rubber cement on the back of the column I'm pasting, and quickly place it into position on the card. This causes much less 'over-glue' on the card. Be sure that all the edges and corners are fastened down. You don't want them to catch and pull up - possibly tearing off - during use.
When a few minutes have elapsed, and the glue has dried, I use a small hole punch to punch a hole in the top left and bottom left corners. Keep in mind the size of jump rings you plan to use. The larger the rings, the further from the edge you can punch the hole. I like very 'roomy' jump rings, to make turning the 'pages' easier. I punch all the cards at the same time, to be sure the holes match. If there are too many cards to easily punch, I use one punched card as a 'pattern' for the remaining card pages.


If I'm not using the 'card book' immediately, I tuck it away in an index card box. I file these little 'info books' by the type of information, so I can quickly flip through the cards to retrieve just what I want.
An obvious advantage of these 'info cards' is their size. They take up very little space on your work bench, but are easy to read as you work, step by step, on your project. Keep a pen handy, to make your own notes, if you find you need further explanation of a step - or if you discover a better way to gain the same effect.
I hope you try this way to keep your own special 'Memories'. It takes a little work, but the result enables you to work more quickly and efficiently, which is certainly worth the small effort!
Suggestions for Articles are Always Appreciated.
"Design With Your Heart - Craft With Your Hands"
--Linda Gale
Materials

20 Gauge Half Round Half Hard Argentium .940 Silver Wire
H19-20HRH
- Lesson Quantity: 5.00 feet
- Purchase Quantity: 1.00 5FT
- Price: $8.80
- Gold Club Price: $6.60

26 Gauge Round Half Hard Argentium .940 Silver Wire
H19-26H
- Lesson Quantity: 25.00 feet
- Purchase Quantity: 1.00 25FT
- Price: $19.02
- Gold Club Price: $14.26
Tools

WireJewelry - Ultimate Wire-Pliers Jewelry Pliers with Case, Set of 5
G15-20
- G15-20
- Lesson Quantity: 1.00 pieces
- Purchase Quantity: 1.00 each
- Price: $170.72
- Gold Club Price: $128.04
- Category: General Education
- Technique(s): General Education






 creating a tutorial
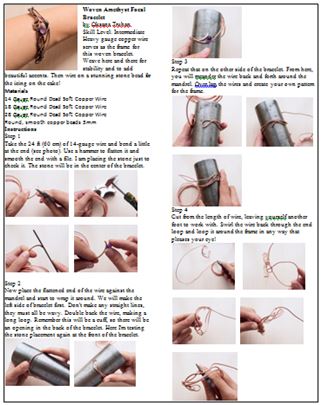 How to Copy, Save, and Compact Tutorials
 Three Ways to Keep Weaving Railroad Straight
 How to Determine the Correct Height of a Bezel
 Permanent Marker - the Tool You Love to Hate
 How to Create a Print-out from a Video Tutorial
 An Unusual Wire Weave
 Necklaces - How to Choose the Correct Length
