


- NEW DVD Series – Stone Setting with Bezels
- Tube Set Charm by Kim St. Jean
- Prong Basket Pendant by Kim St. Jean
- NEW DVD Series – Stone Setting with Cold Connections
- New DVD Series – Stone Setting with Wire
- NEW DVD Series: Introduction to Stone Setting by Kim St. Jean
- Featured Tool: Bracelet Bending Plier
- NEW Dvd by Eva Sherman
- Fun, Fast Fold Forming DVD Series
- Double Band Ear Cuff from Alex Simkin
Easy Ear Wire are Always an Option By Jennifer VanBenschoten

Wire Jewelry Article for August 23rd, 2017

No more excuses when it comes to having plenty of ear wires around! Once you learn how easy it is to make your own ear wires, you’ll have no reason to put off whipping up a pair of gorgeous earrings. Stop adding commercial ear wires to your beautiful designs. Ear wires can add another element of design to your handmade earrings. And it makes the entire design yours and yours alone. Plus, if you know how to make your own, you’ll never find yourself unable to finish a pair of earrings.
Ear wires can be made from any wire, but if you’re concerned with possible allergic reactions for your customers, it’s best to stick with sterling or fine silver. Lots of people can be sensitive to copper or bronze, or any metal that isn’t a precious metal. So, keep that in mind.
You should choose half hard wire, because you want your ear wires to hold their shape, which soft wire will not. That means that craft wire may be too soft, not to mention, it’s copper at its core. You can strengthen your ear wires even more by gently hammering the curve to work harden them.
20-gauge wire is most commonly used for ear wires. 21-gauge and 22-gauge can work too, if they’re work hardened. And 18-gauge can be used, but keep in mind that some people can’t get that through their ears.
These ear wire techniques don’t require any soldering – just a couple of pairs of pliers, a wire cutter, and some handy household items. Once you master the basic technique, you can play with shaping and hammering.
You can also work off your spool and not waste any wire. Just cut away from the spool once you’ve shaped the ear wire.
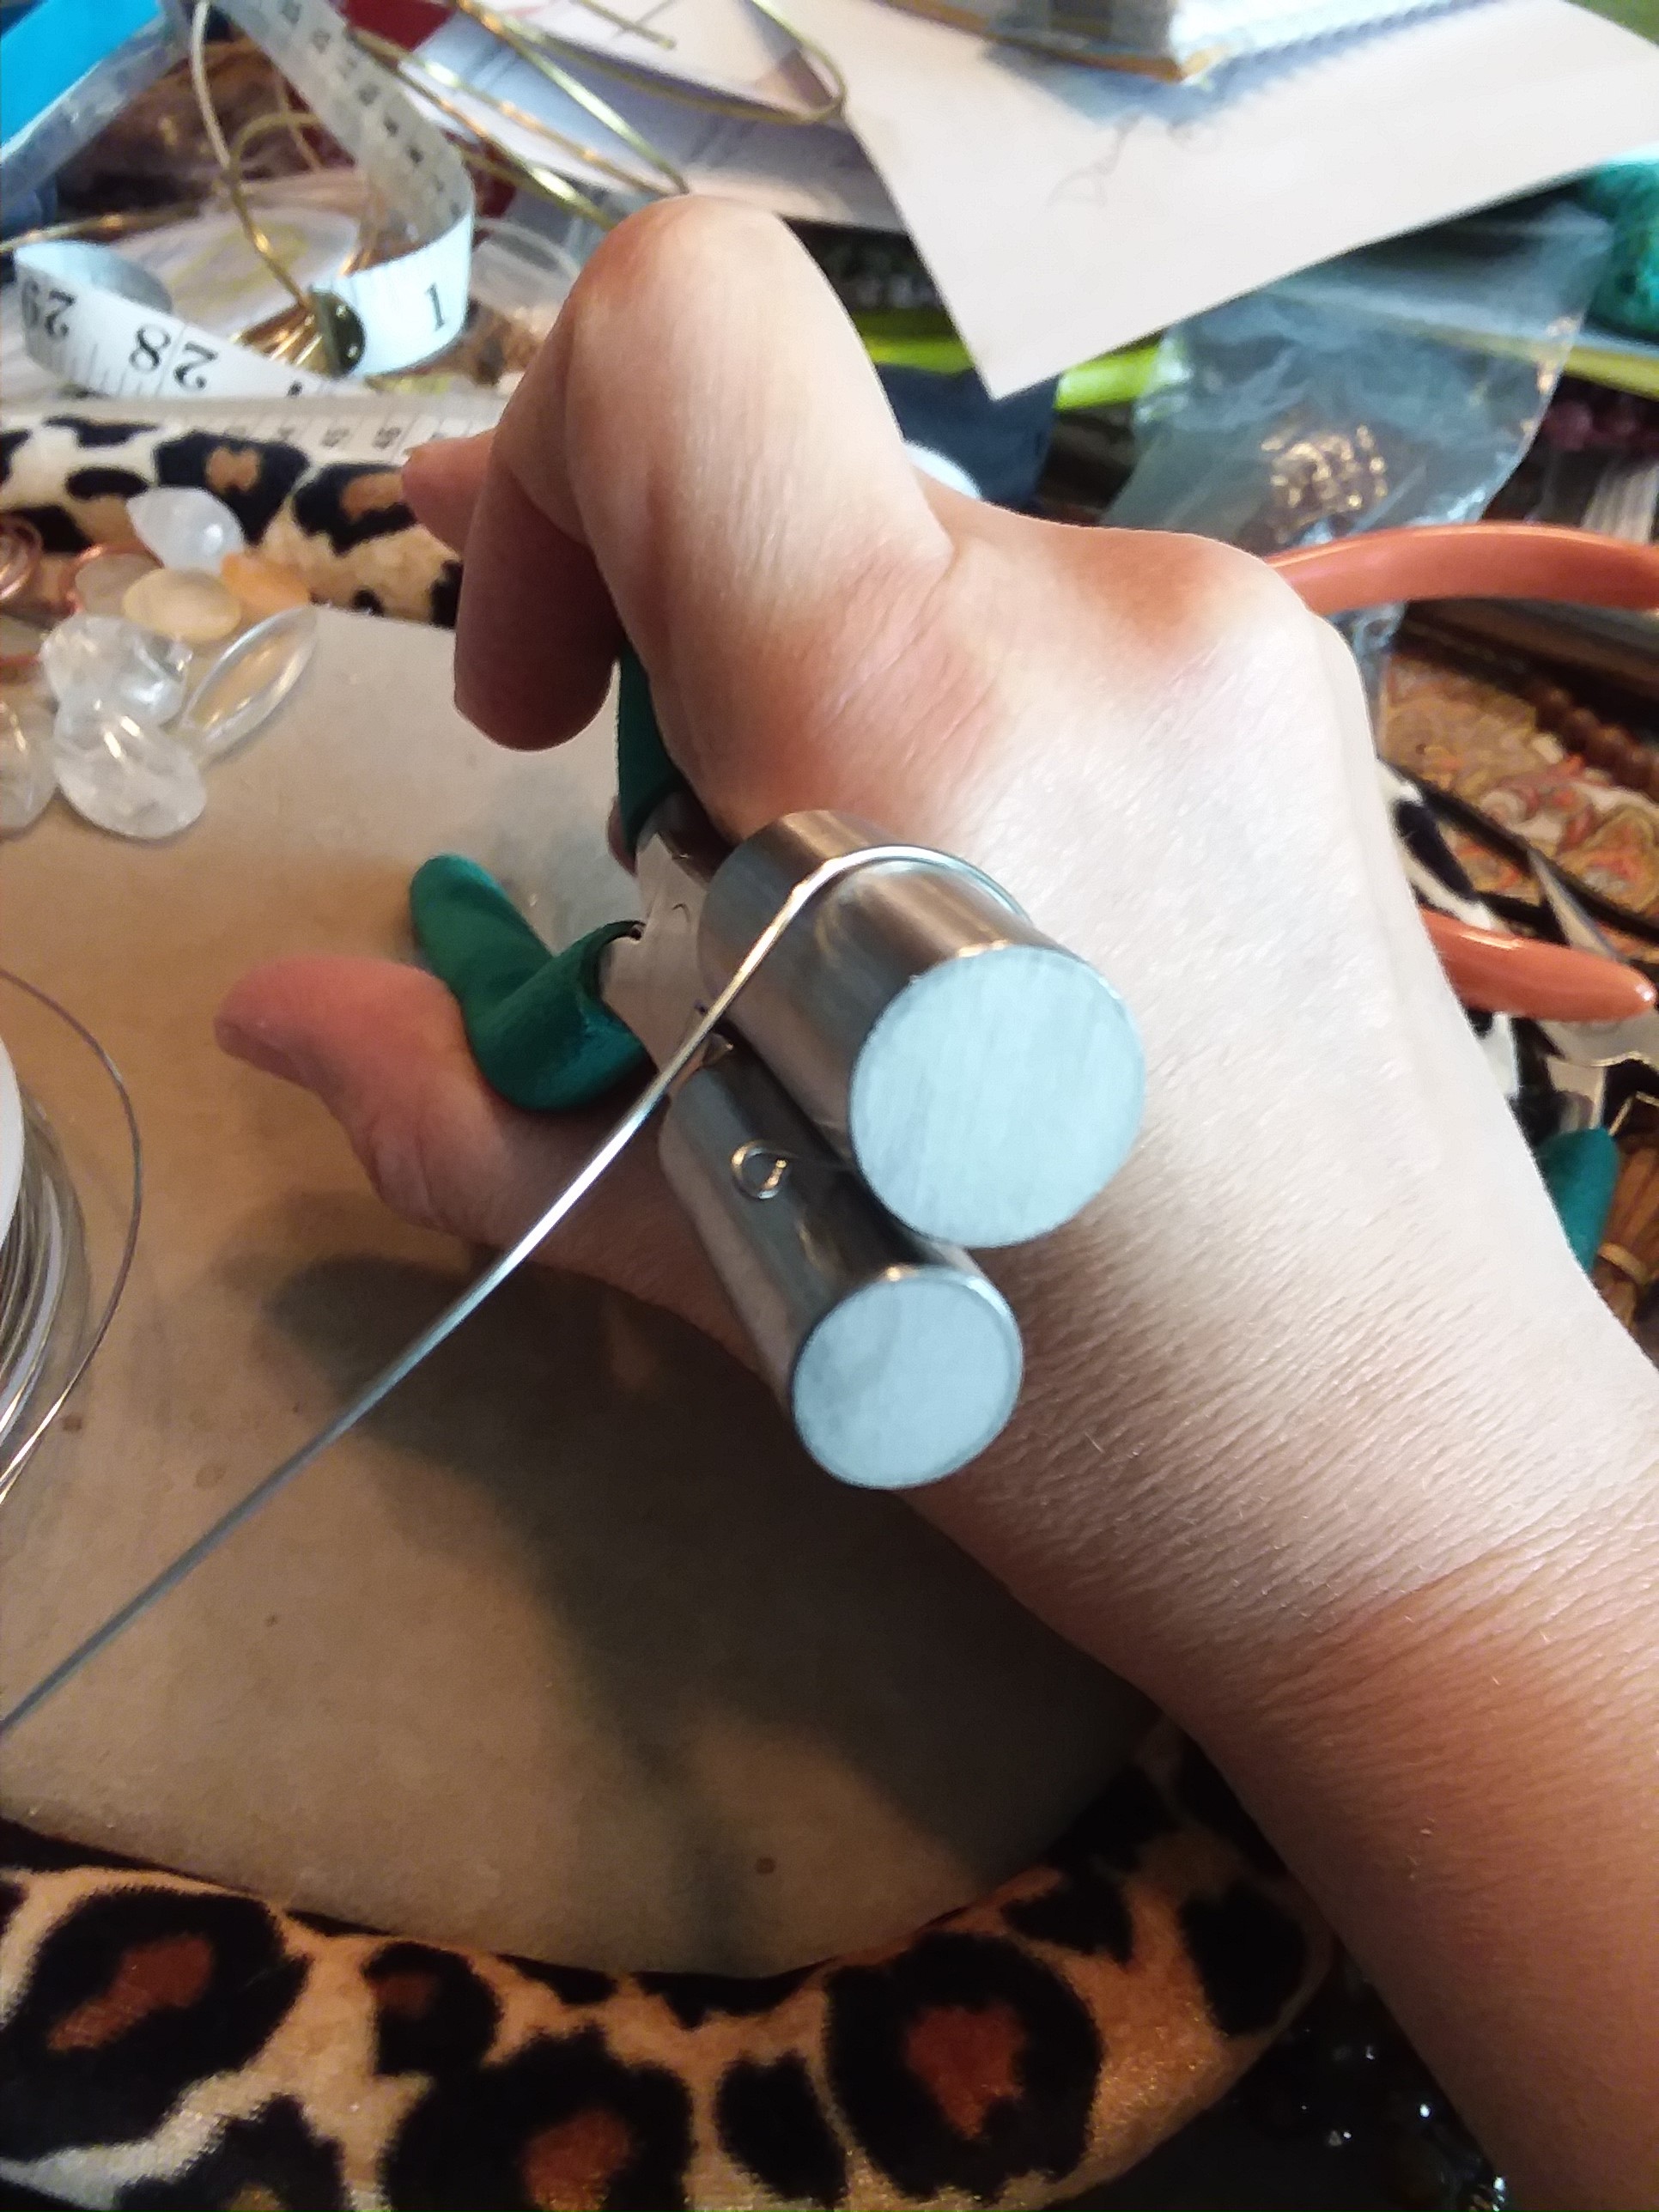
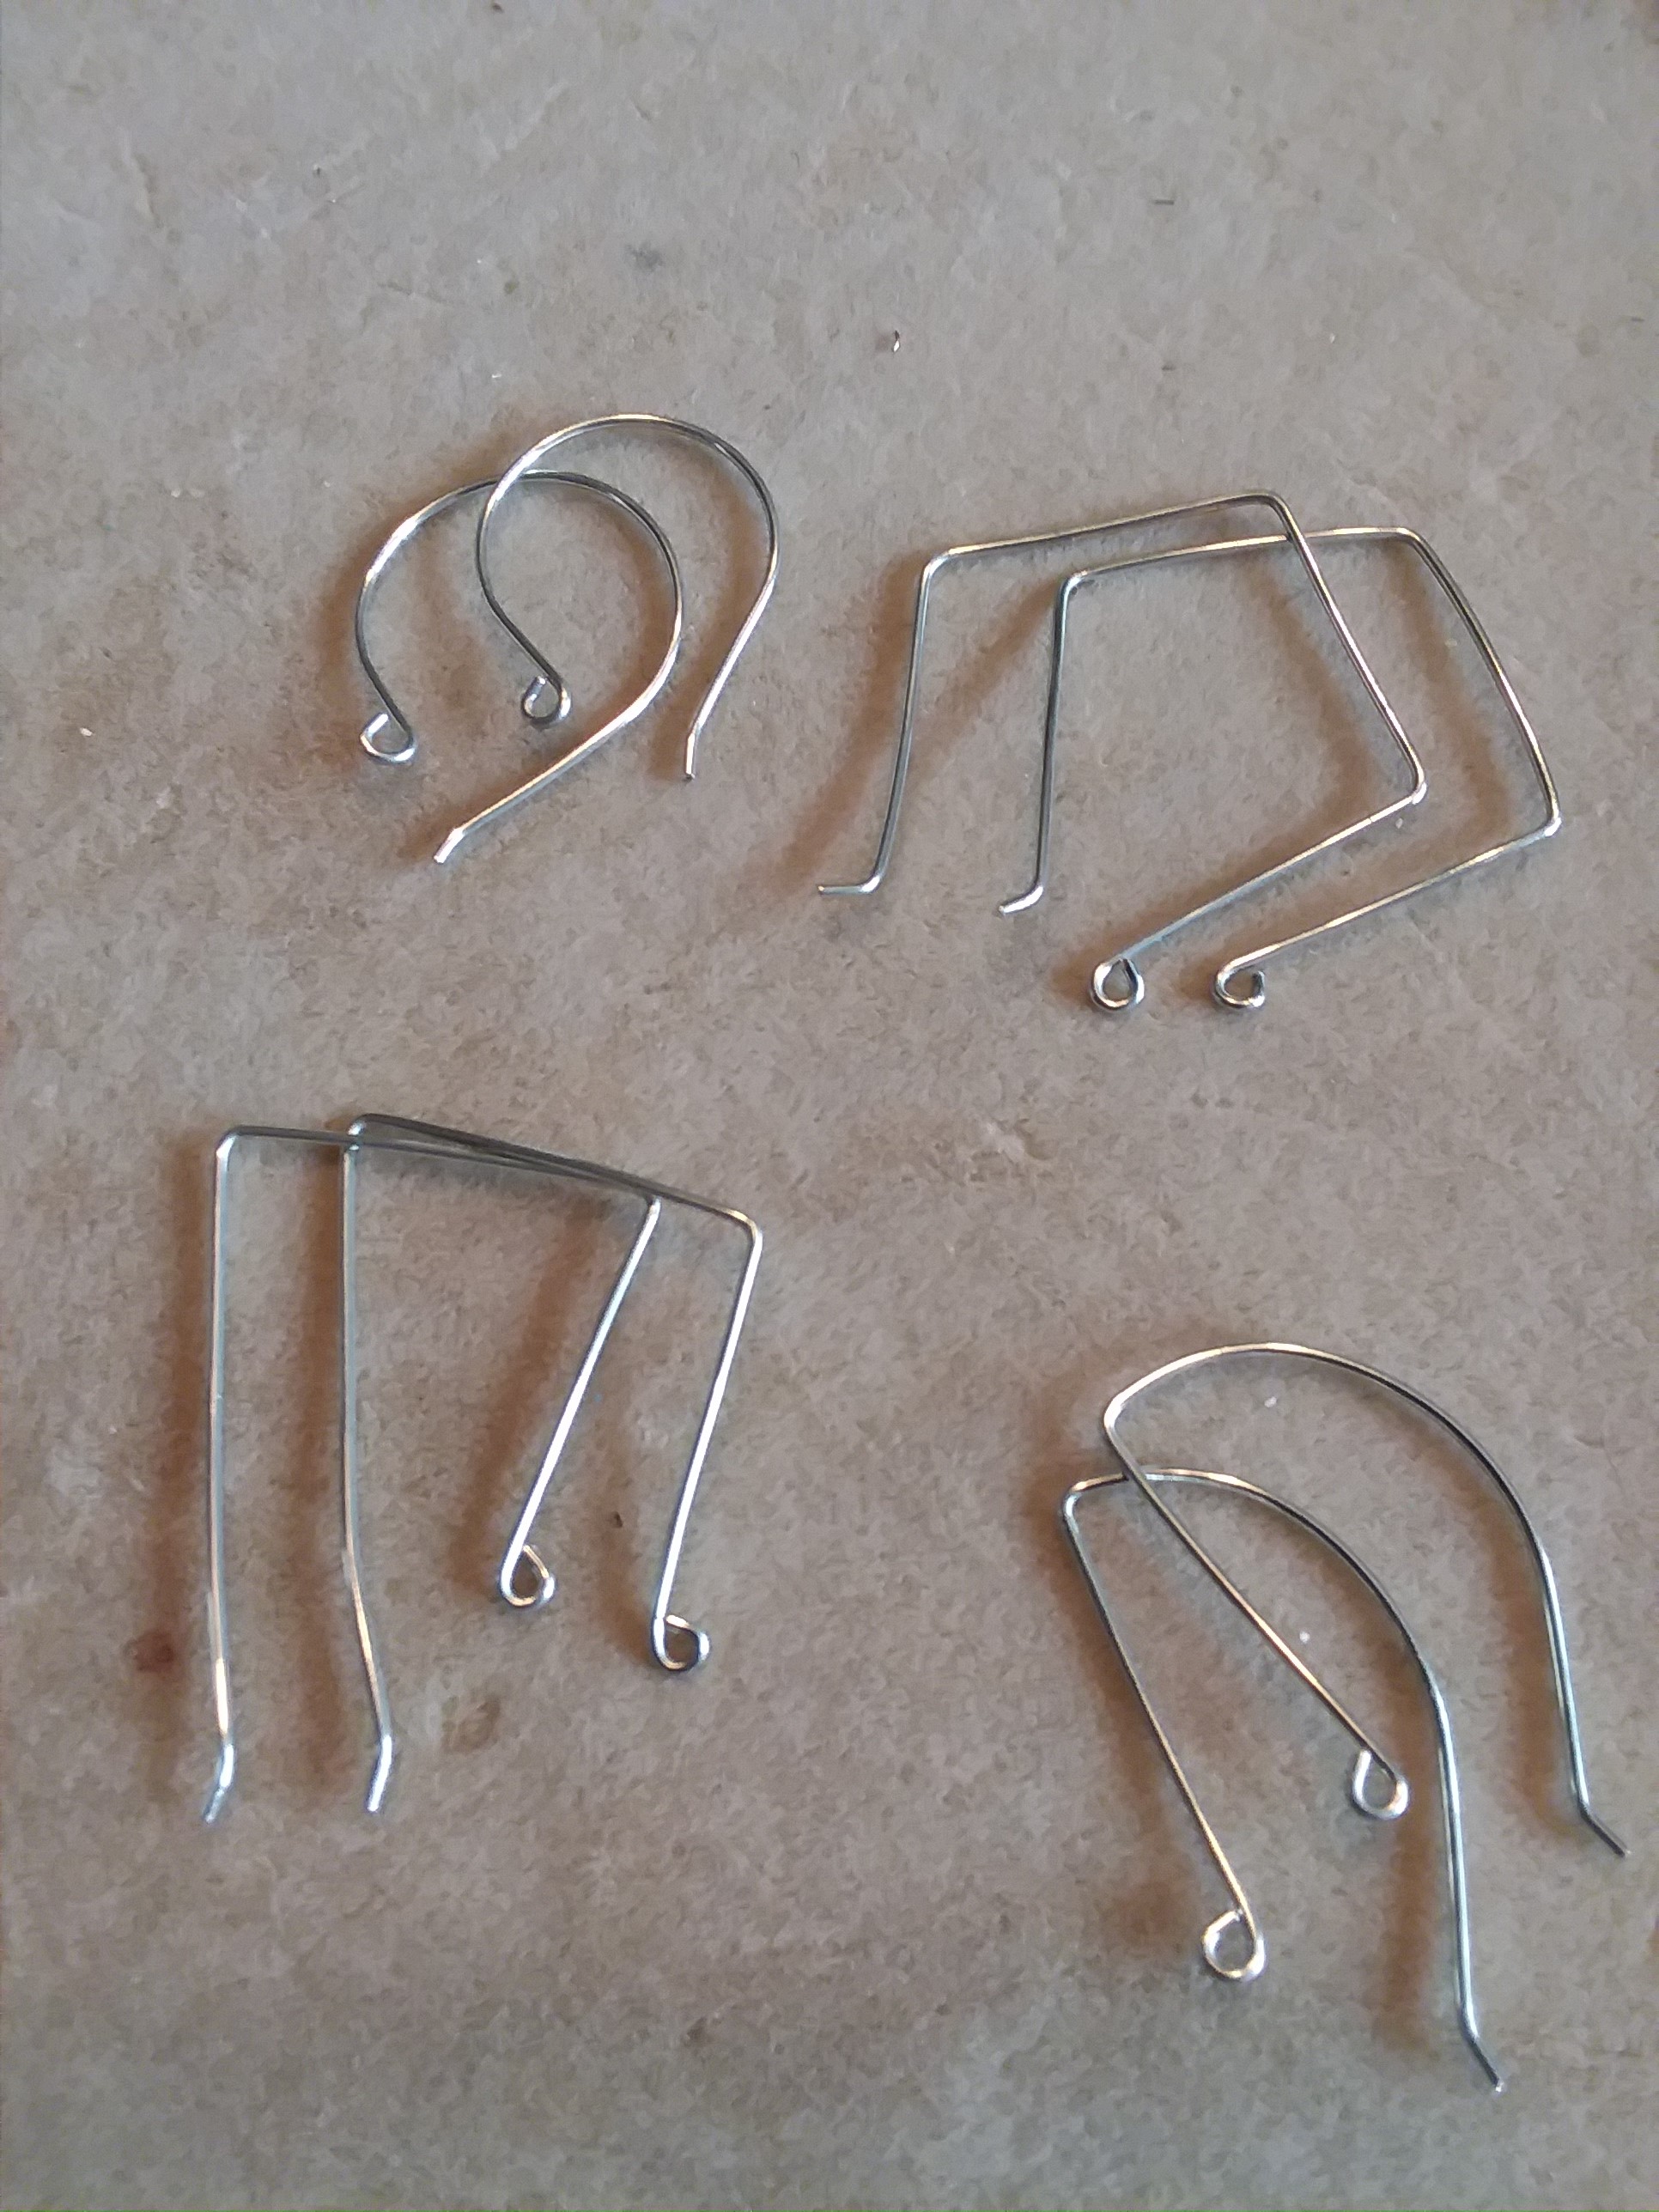
The great thing about using mandrel pliers is that you can experiment with different shapes of ear wires. Who said that ear wires always have to be round? Play with squares and triangles and ovals to make your earring designs stand out!
Materials:
- 20-gauge wire
Tools:
- Sharpie permanent marker or mandrel pliers
- Flush cutters
- Round nose pliers
- Chain nose pliers OR
- Combination pliers
- Wire rounder or metal file
Step 1: Using the round-nose or combination pliers, turn a small loop at the end of the wire. (You don’t have to cut it from the spool yet.)
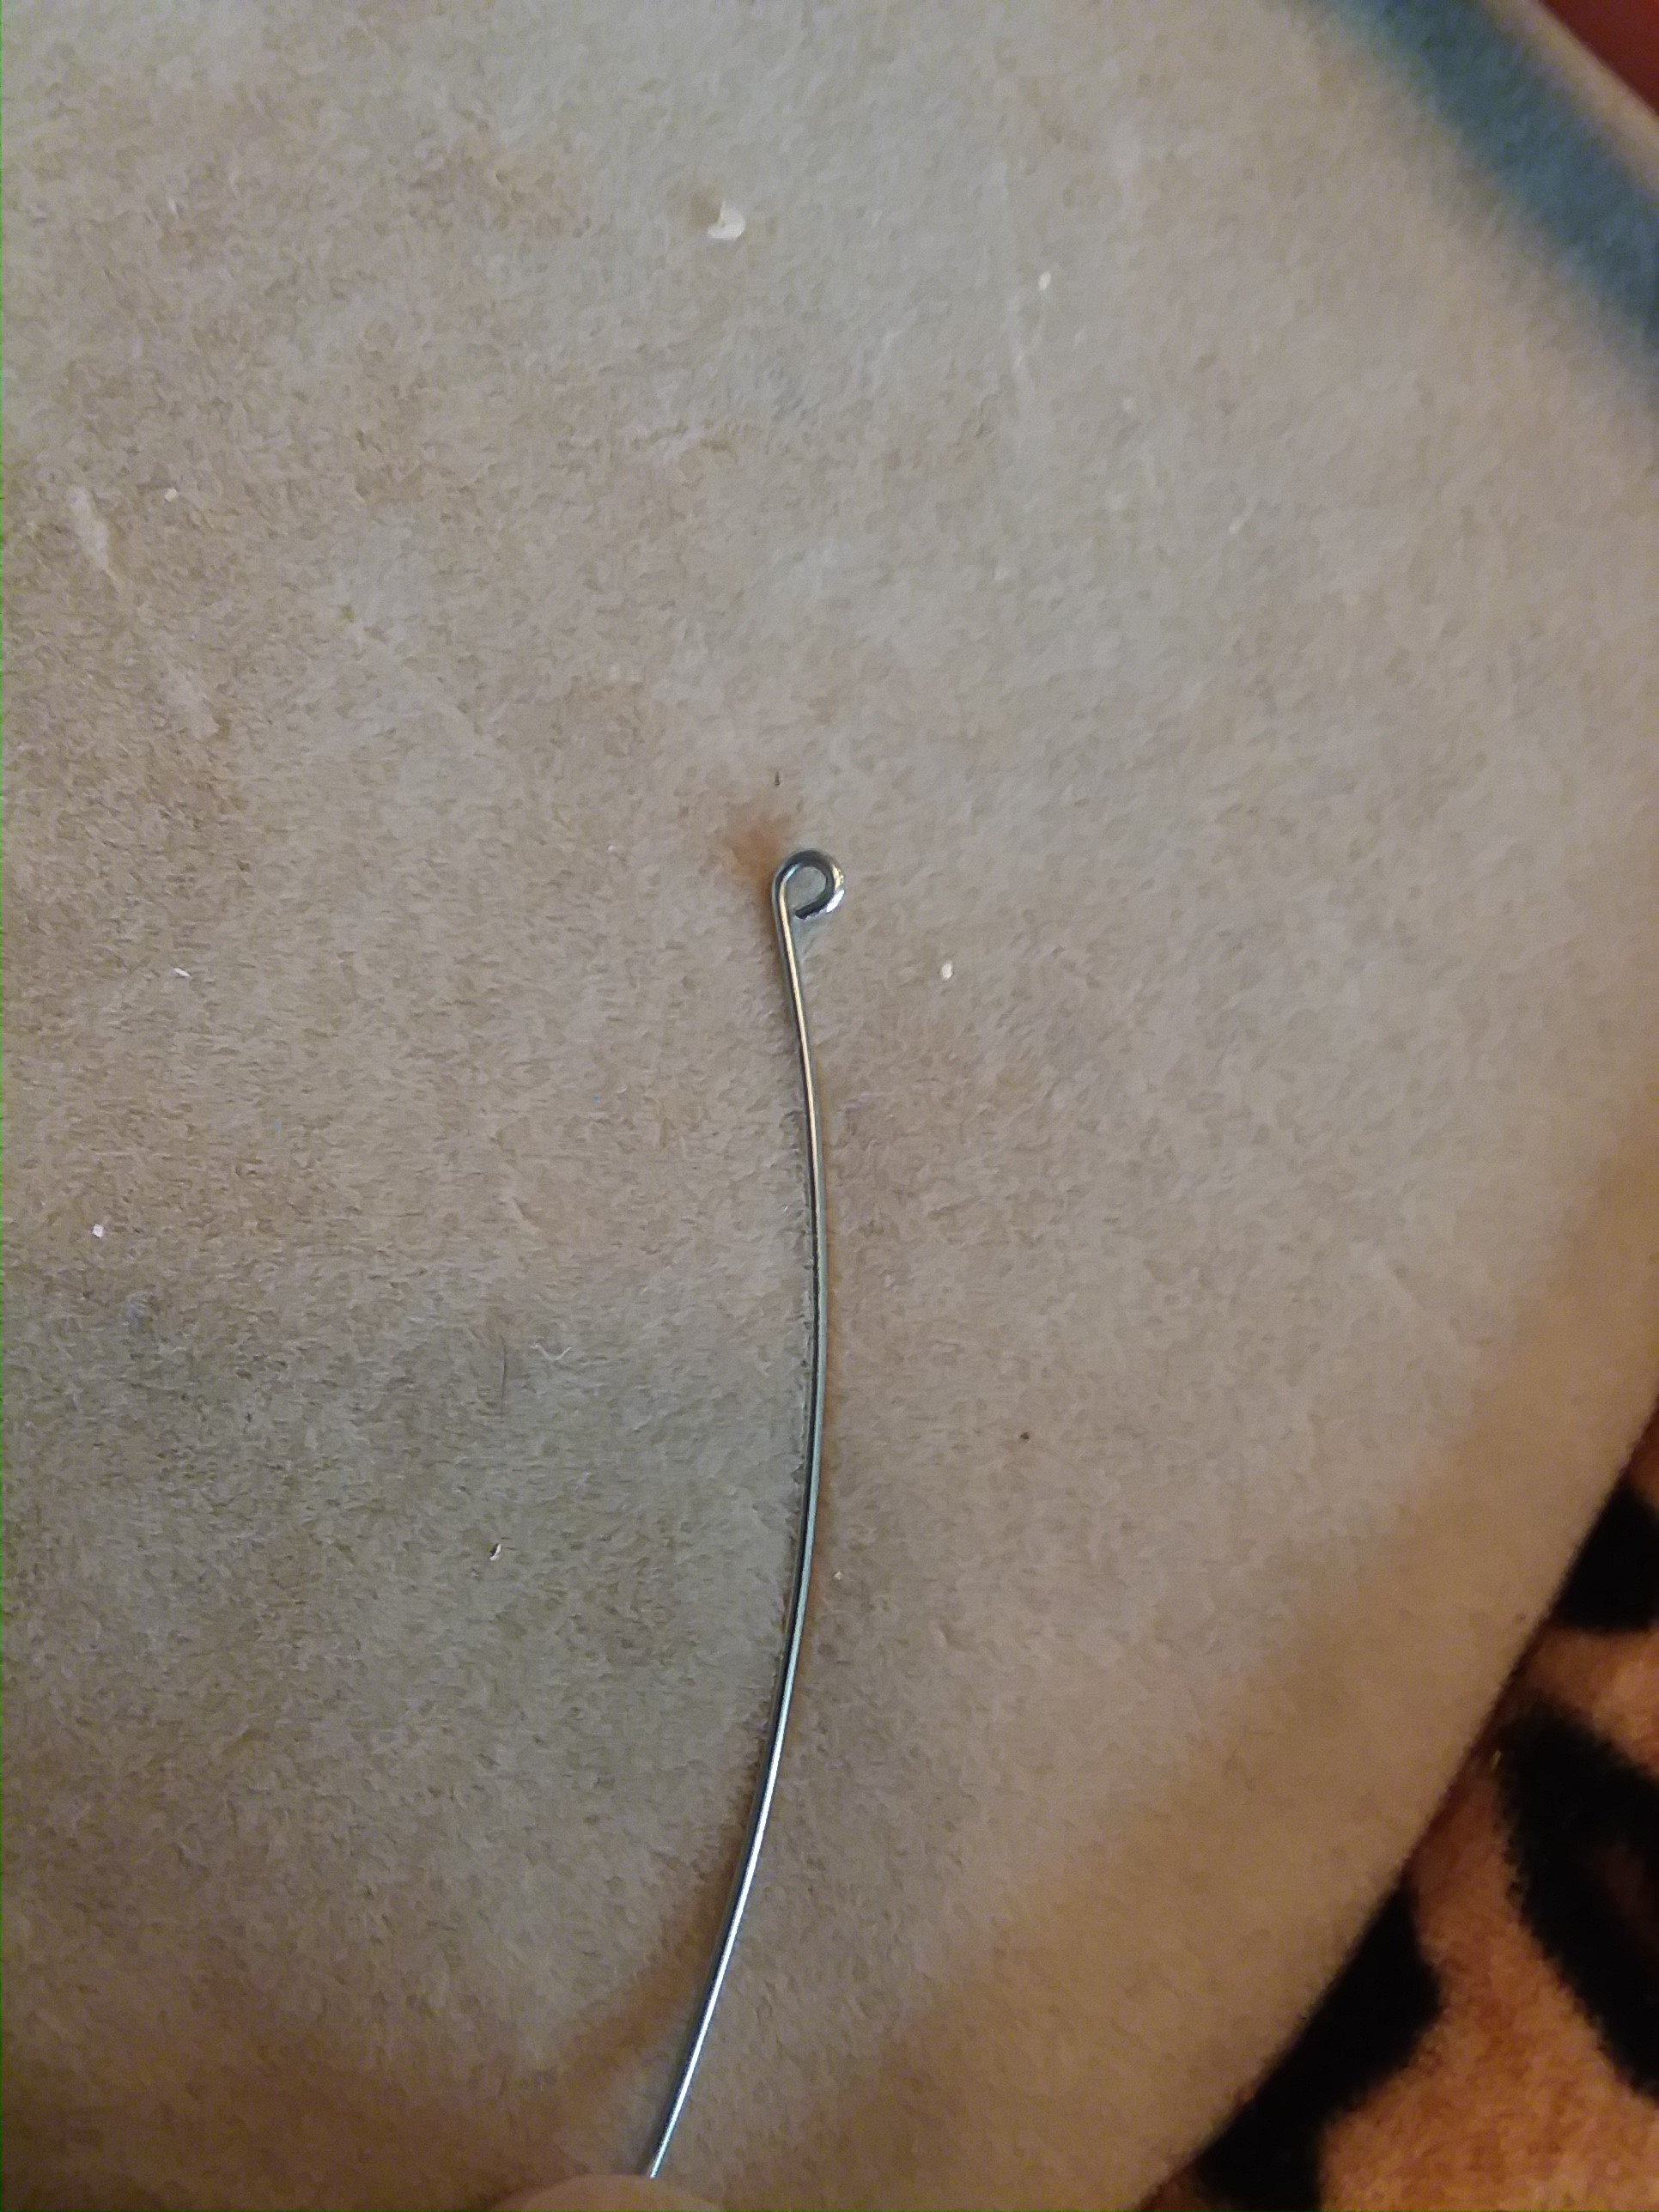
Step 2: Grasping the loop in your mandrel pliers, wrap the wire around the pliers. Alternately, wrap the wire around the Sharpie.
Step 3: Trim the wire. Use your round nose or combination pliers to make a slight 45 degree upward bend at the tip of the wire. Repeat to make a second one.

Step 4: Use the wire rounder to smooth the end of the wire that will go through the ear. Alternatively, use a metal file to smooth it.
Happy Wrapping!
![]()
Click to Receive Daily Tips by Email
One Comment

Wire Jewelry Ideas
-
 See Yourself as a Creative Thinker-Part IV By Karen Meador, PhD
Wire Jewelry Article for September 27th, 2017 If...
- September 27, 2017
-
 See Yourself as a Creative Thinker-Part III By Karen Meador, PhD
Wire Jewelry Article for September 20th, 2017 If...
- September 20, 2017
-
 See Yourself as a Creative Thinker-Part II By Karen Meador, PhD
Wire Jewelry Article for September 13th, 2017 If you...
- September 13, 2017
-
 See Yourself as a Creative Thinker By Karen Meador PhD
Wire Jewelry Article for September 6th, 2017 This is...
- September 6, 2017

Design & Inspiration
-
 Free Pattern: Smile Cluster Necklace by Karen Meador
by Judy Ellis, Wirejewelry.com Wire Jewelry Pattern for August...
- August 7, 2017
-
 Free Pattern: Long crystal round maille earrings by Kylie Jones
by Judy Ellis, Wirejewelry.com Wire Jewelry Pattern for August...
- August 3, 2017
-
 Free Pattern: Stone Twist Wrap by Karen Meador
by Judy Ellis, Wirejewelry.com Wire Jewelry Pattern for July...
- July 31, 2017
-
 Free Pattern: Floating Bead Earrings By Kimberly Newman
by Judy Ellis, Wirejewelry.com Wire Jewelry Pattern for July...
- July 27, 2017
Featured Tools
-
 Get to Know Your Hand Tools – Tube-Cutting Jig By Helen I. Driggs
by Judy Ellis, Wirejewelry.com Wire Jewelry Tip for August...
- August 4, 2017
-
 Wire Jewelry Video: Using Punch Pliers by Judy Freyer Thompson
by Judy Ellis, Wirejewelry.com Wire Jewelry Tip for August...
- August 2, 2017
-
 Wire Jewelry Video: Aligning a Hole Punch by Judy Freyer Thompson
by Judy Ellis, Wirejewelry.com Wire Jewelry Tip for July...
- July 26, 2017
-
 Get to Know Your Hand Tools – Wire Cutters – Helen I. Driggs
by Judy Ellis, Wirejewelry.com Wire Jewelry Tip for July...
- July 25, 2017
Carol Trott
August 23, 2017 at 6:30 am
Great tips onaking ear wires. Thanks!!