


- NEW DVD Series – Stone Setting with Bezels
- Tube Set Charm by Kim St. Jean
- Prong Basket Pendant by Kim St. Jean
- NEW DVD Series – Stone Setting with Cold Connections
- New DVD Series – Stone Setting with Wire
- NEW DVD Series: Introduction to Stone Setting by Kim St. Jean
- Featured Tool: Bracelet Bending Plier
- NEW Dvd by Eva Sherman
- Fun, Fast Fold Forming DVD Series
- Double Band Ear Cuff from Alex Simkin
Sawing Symmetrical Shapes by Judy Freyer Thompson

by Judy Ellis, Wirejewelry.com
Wire Jewelry Tip for July 7th, 2017
Sawing Symmetrical Shapes
by Judy Freyer Thompson
I’ve been frustrated in the past with the failure to make pieces sawn with a jeweler’s saw match correctly (not even a file could remedy some situations!). I’d tried using rubber cement to adhere two pieces of metal together. I couldn’t make it work no matter what I did. Enter cyanoacrylate, AKA Super Glue. Yes, one must be diligent in using this wonder adhesive, as I am sure many of you may have unintentionally attached fingers to fingers, fingers to other objects or objects to other objects. And I am sure those who have done this know that acetone based nail polish remover will help dissolve the adhesive.
This technique is super easy and will yield symmetrical shapes that are particularly desirable for earrings for those who prefer a matched pair. I have used this technique on copper, aluminum and bronze.
Materials:
Sheet metal of your choice, 22-gauge and 24-gauge work the best
Tools and Equipment:
– Metal shears
– Cyanoacrylate adhesive
– 400 grit sandpaper
– Small clamps – These can be found on our sister site JewelryTools.com
– Permanent marker
– Jewelers saw with #1 metal cutting blade
– Beeswax or cutting lube
– Bench pin
– Acetone based nail polish remover
– Metal file
- Decide what pattern or shape desired.
- Using the metal shears, cut two pieces of sheet metal slightly larger than the pattern.
- Lightly sand the pieces using the 400 grit sandpaper; this will give the sheet metal some tooth. Tip: if you are using sheet metal heavier than 24-gauge you may find that there is a small lip left on the cut edges. Just make sure you align the pieces so that the edges with the lips face away from one another. This will assure a tight bond.
- Place two or three drops of the cyanoacrylate adhesive on one piece.
- Place the other piece of sheet metal on top of the adhesive, making sure they are aligned, apply pressure using a small clamp.
- Let the piece sit a few minutes to make sure the adhesive cures.
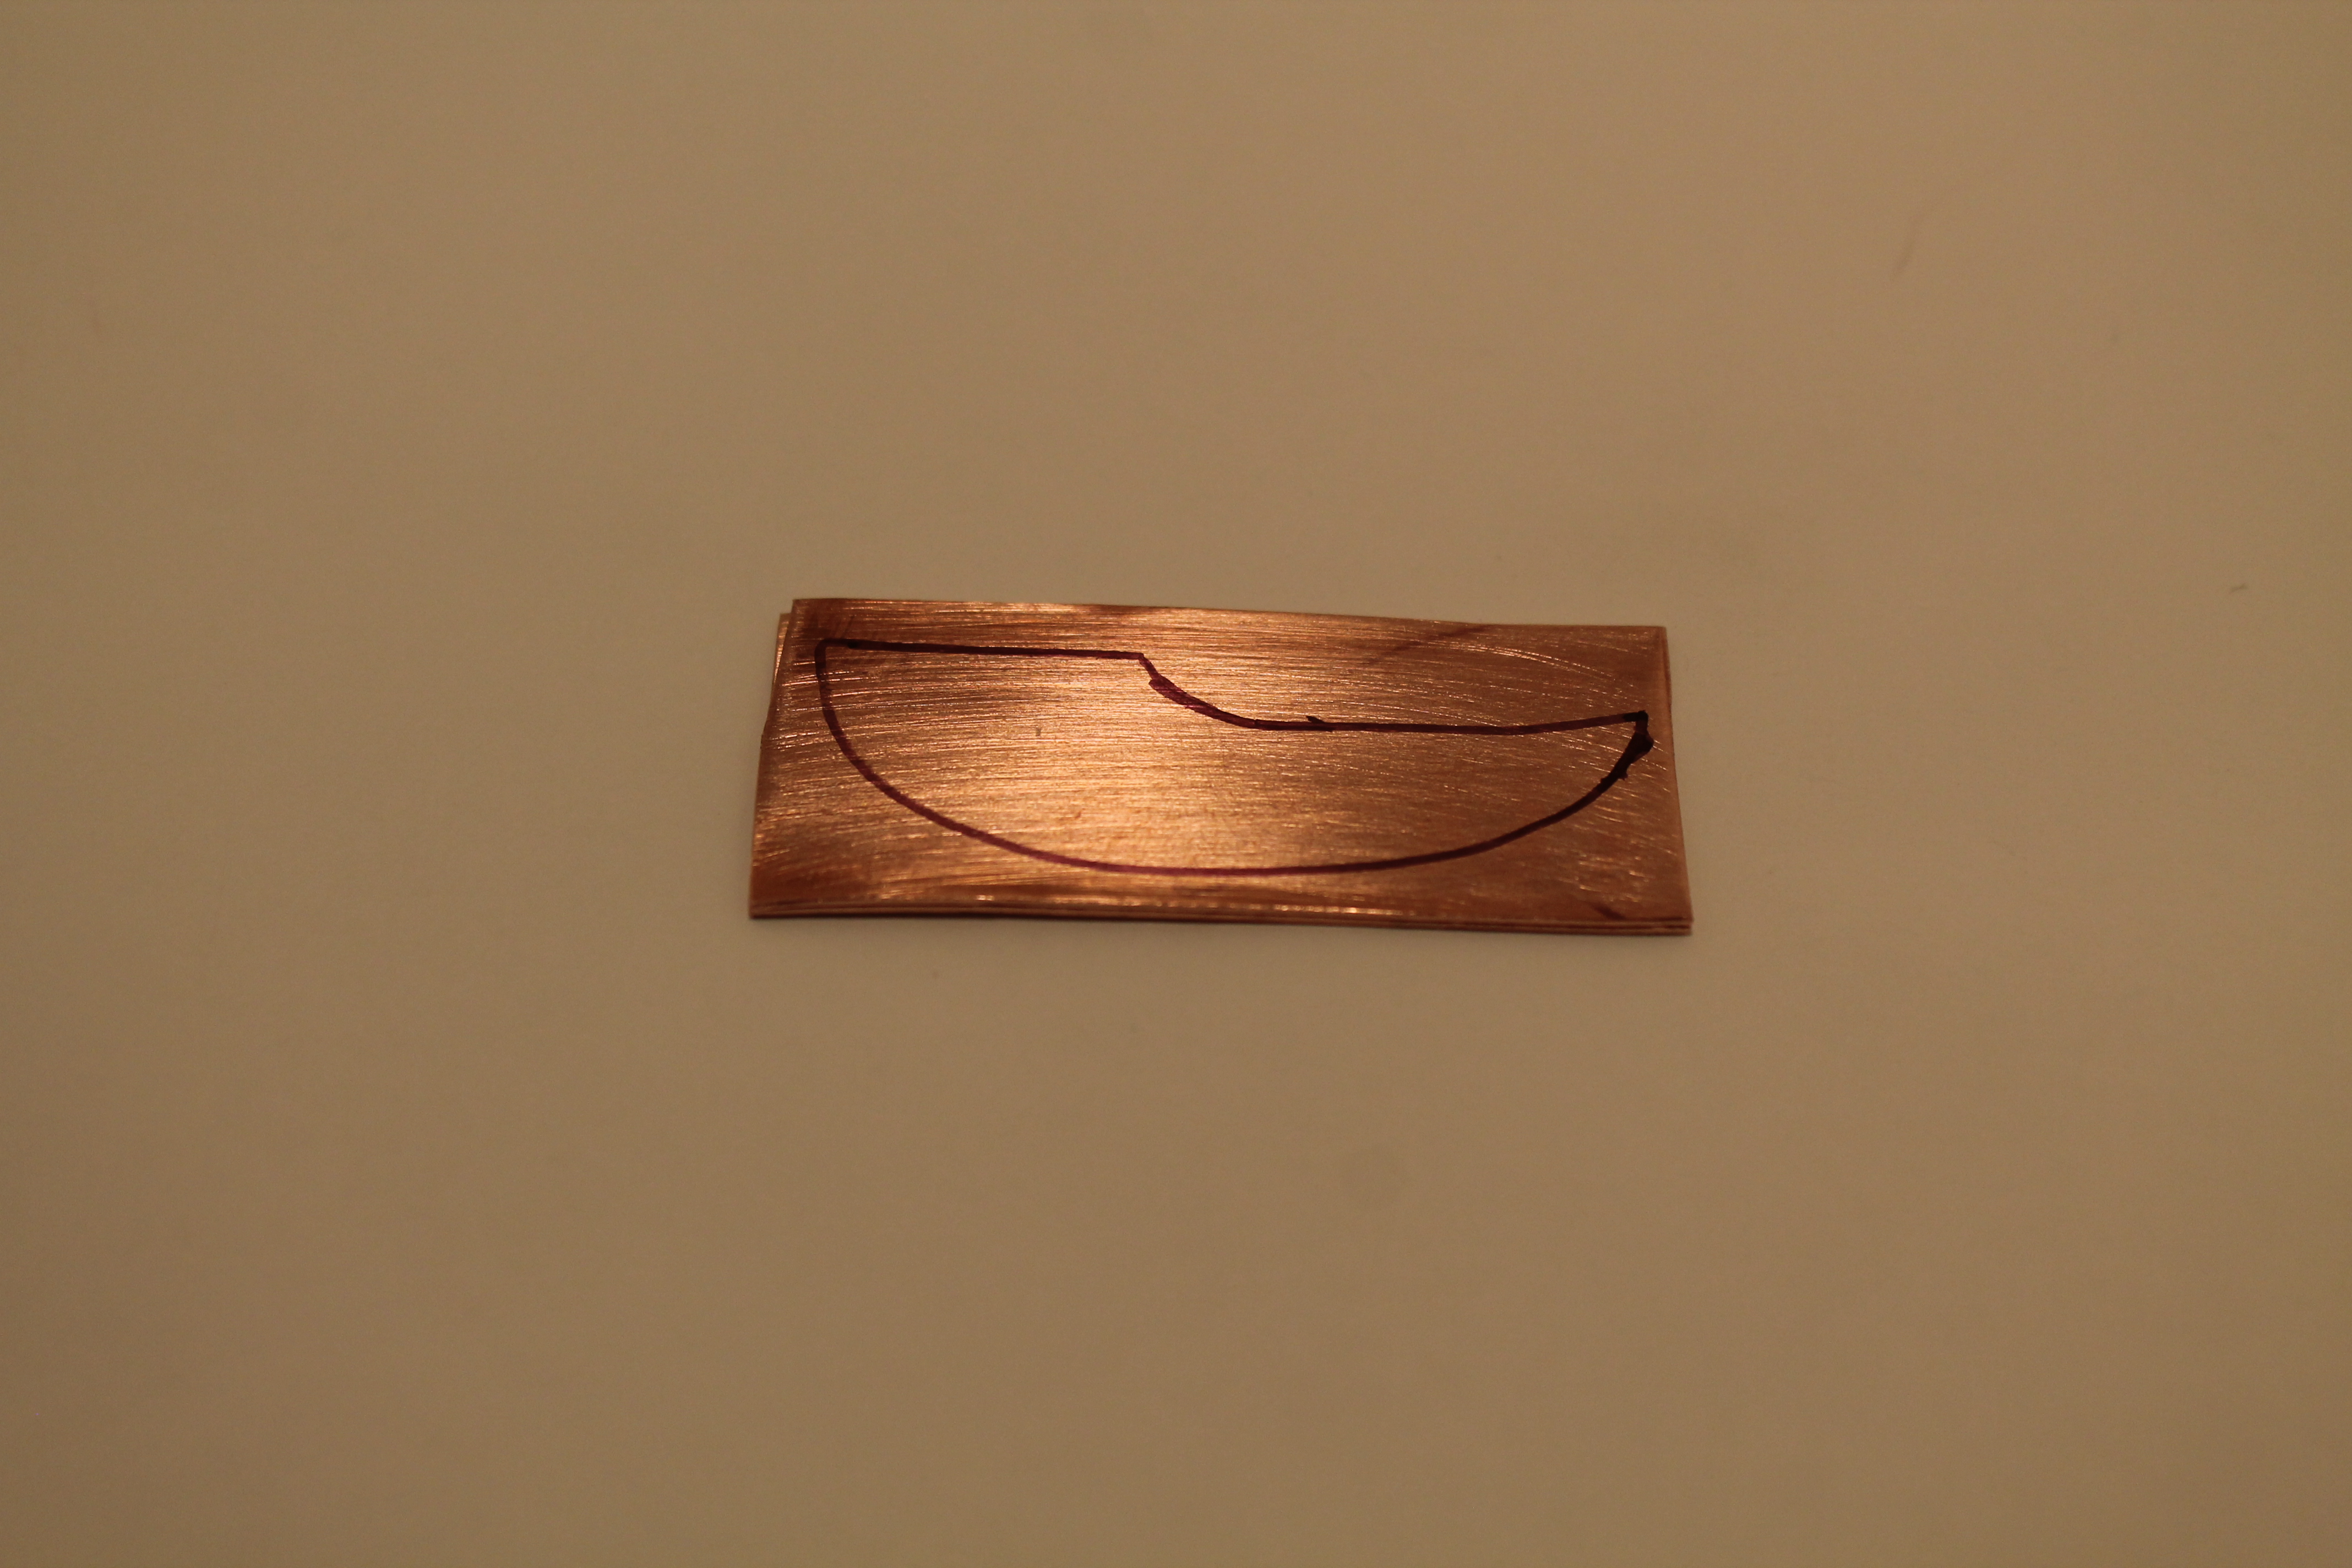
- Transfer the design to the metal using a permanent marker.
- Saw out the design and smooth the edges with a metal file and sandpaper
- Place the piece in a small dish containing a small amount of nail polish remover and let it soak. After approximately 5 minutes, remove the piece and pop the pieces apart. Return to the polish remover to remove the residual. You may need to coax the residual with 400 grit sandpaper. Wash with dish soap to remove any trace of polish remover.

You can find clamps like these of your very own on our sister site JewerlyTools.com
Happy Wrapping!
![]()
Click to Receive Daily Tips by Email
One Comment

Wire Jewelry Ideas
-
 See Yourself as a Creative Thinker-Part IV By Karen Meador, PhD
Wire Jewelry Article for September 27th, 2017 If...
- September 27, 2017
-
 See Yourself as a Creative Thinker-Part III By Karen Meador, PhD
Wire Jewelry Article for September 20th, 2017 If...
- September 20, 2017
-
 See Yourself as a Creative Thinker-Part II By Karen Meador, PhD
Wire Jewelry Article for September 13th, 2017 If you...
- September 13, 2017
-
 See Yourself as a Creative Thinker By Karen Meador PhD
Wire Jewelry Article for September 6th, 2017 This is...
- September 6, 2017

Design & Inspiration
-
 Free Pattern: Smile Cluster Necklace by Karen Meador
by Judy Ellis, Wirejewelry.com Wire Jewelry Pattern for August...
- August 7, 2017
-
 Free Pattern: Long crystal round maille earrings by Kylie Jones
by Judy Ellis, Wirejewelry.com Wire Jewelry Pattern for August...
- August 3, 2017
-
 Free Pattern: Stone Twist Wrap by Karen Meador
by Judy Ellis, Wirejewelry.com Wire Jewelry Pattern for July...
- July 31, 2017
-
 Free Pattern: Floating Bead Earrings By Kimberly Newman
by Judy Ellis, Wirejewelry.com Wire Jewelry Pattern for July...
- July 27, 2017
Featured Tools
-
 Get to Know Your Hand Tools – Tube-Cutting Jig By Helen I. Driggs
by Judy Ellis, Wirejewelry.com Wire Jewelry Tip for August...
- August 4, 2017
-
 Wire Jewelry Video: Using Punch Pliers by Judy Freyer Thompson
by Judy Ellis, Wirejewelry.com Wire Jewelry Tip for August...
- August 2, 2017
-
 Wire Jewelry Video: Aligning a Hole Punch by Judy Freyer Thompson
by Judy Ellis, Wirejewelry.com Wire Jewelry Tip for July...
- July 26, 2017
-
 Get to Know Your Hand Tools – Wire Cutters – Helen I. Driggs
by Judy Ellis, Wirejewelry.com Wire Jewelry Tip for July...
- July 25, 2017
Caroline
July 26, 2017 at 10:47 am
Terrific suggestion. Very impressive lesson – thank you.