


- NEW DVD Series – Stone Setting with Bezels
- Tube Set Charm by Kim St. Jean
- Prong Basket Pendant by Kim St. Jean
- NEW DVD Series – Stone Setting with Cold Connections
- New DVD Series – Stone Setting with Wire
- NEW DVD Series: Introduction to Stone Setting by Kim St. Jean
- Featured Tool: Bracelet Bending Plier
- NEW Dvd by Eva Sherman
- Fun, Fast Fold Forming DVD Series
- Double Band Ear Cuff from Alex Simkin
Free Pattern: Loopy Loo Graduated Bracelet by Karen Meador

by Judy Ellis, Wirejewelry.com
Wire Jewelry Pattern for June 26th, 2017
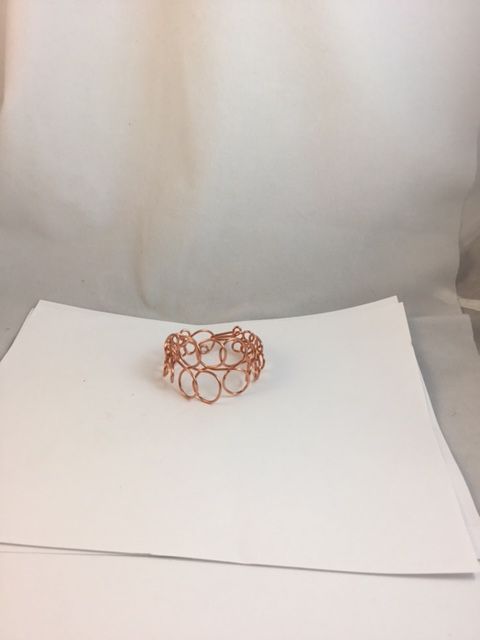
Loopy Loo Graduated Wire Bracelet
by Karen Meador
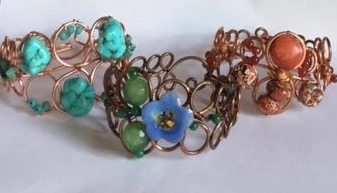
This modern bracelet is easy to make and even easier to embellish with your favorite beads. It’s an eye-catcher!
Materials:
- 14 Gauge Round Dead Soft Copper Wire (Pattern Quantity – 7 Feet, Product ID: H11-14D)
- 24 Gauge Round Dead Soft Copper Wire (Pattern Quantity – 3 Feet, Product ID: H11-24D)
Tools:
- Round Nose Wire Plier (Pattern Quantity – 1 Piece, Product ID: G2-507)
- Chain Nose Wire Plier (Pattern Quantity – 1 Piece, Product ID: G2-508)
- 5 inch Plato Slim Flush Cutters for Wire Working or Beading – Pack of 1 (Pattern Quantity – 1 Piece, Product ID: G35-3)
- Steel and Rubber Bench Block 2X2 Inches (Pattern Quantity – 1 Piece, Product ID: G17-22)
- Nylon Faced Mallet (Pattern Quantity – 1 Piece, Product ID: HAM-365.05)
- Wubbers X-Large Round Mandrel Pliers (Pattern Quantity – 1 Piece, Product ID: G2-1304)
- Wubbers Jumbo Round Mandrel Pliers (Pattern Quantity – 1 Piece, Product ID: G2-1305)
- 6 1/2 Inch Solid Stainless Steel Ball Peen Hammer (Pattern Quantity – 1 Piece, Product ID: G3-18)
Directions:
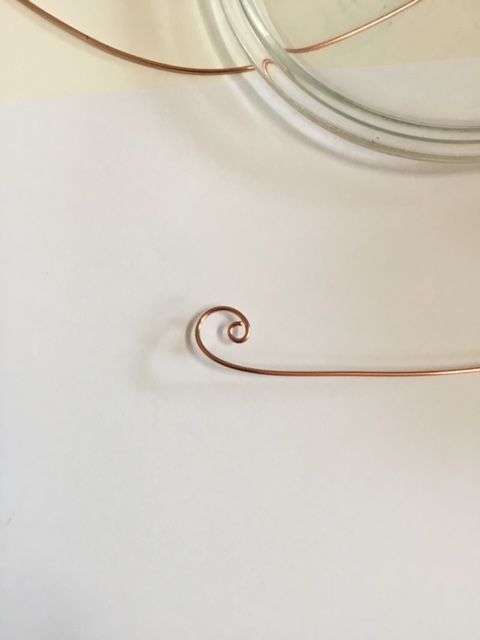
Step 1: Flush cut your chosen length of the 14-gauge wire. Form one end of the clasp by using the round nose pliers to make a small closed loop and gently pulling this to form the top half of a small S shape.
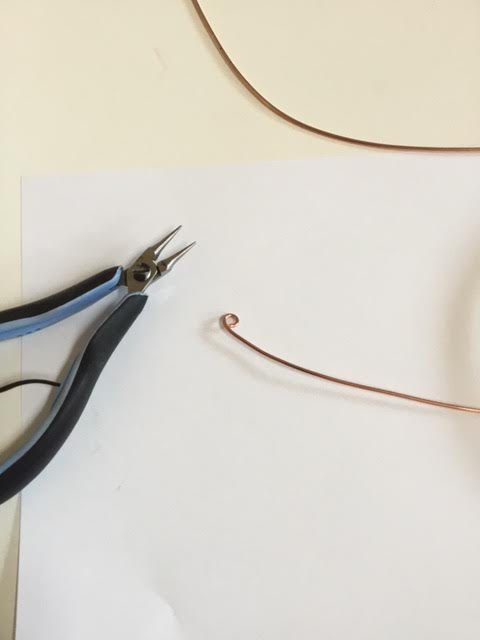
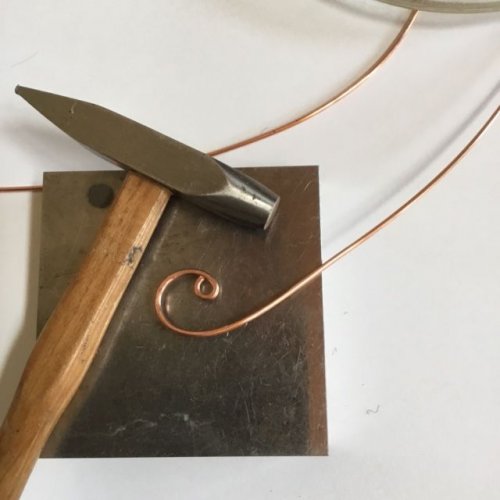
Step 2: Hammer this clasp end on your bench block to work harden it.
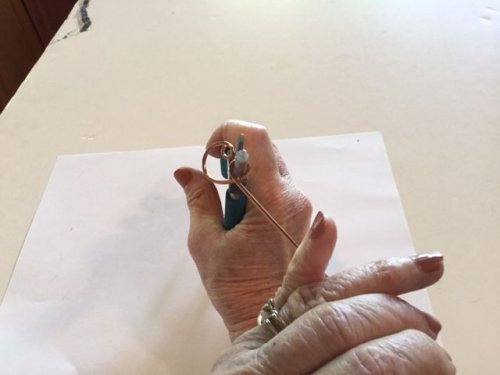
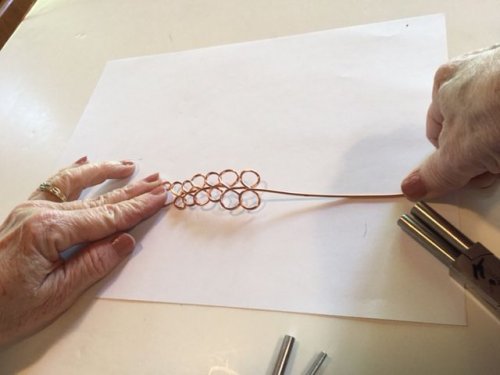
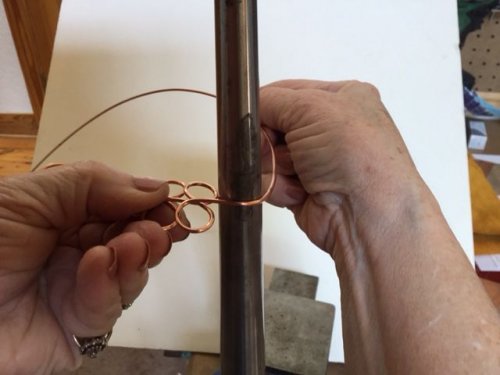
Step 3: Place the smallest mandrel you selected on top of the wire.
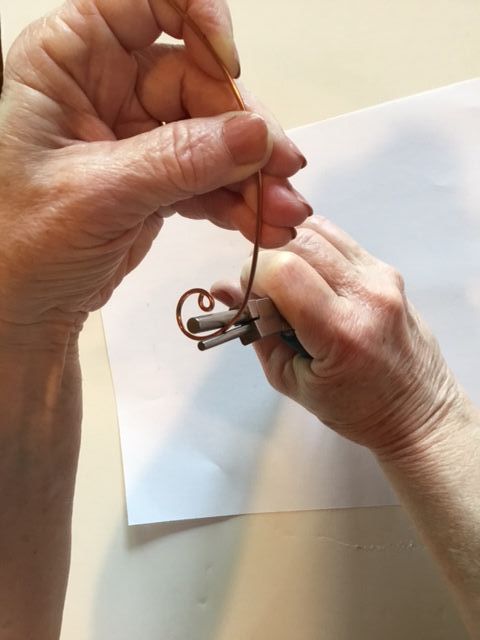
Step 4: Hold the cylinder in place with your right hand and use your left hand to wrap the wire around the tool.
Step 5: Move the same size cylinder to the other side of the wire and wrap it around to form the second loop which is opposite the first loop.

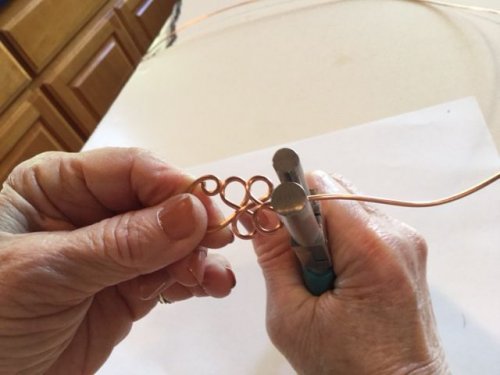
Step 6: Repeat steps 3-6 to form the third and fourth loops using the same size cylinder.

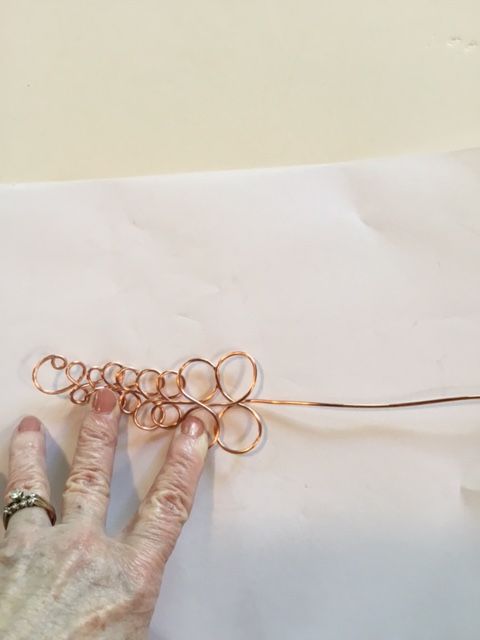
Step 7: Change to the next larger mandrel for creating loops 5-8 in the same manner as you made the first four loops.
Step 8: Change to the next largest cylinder and create 4 more loops.
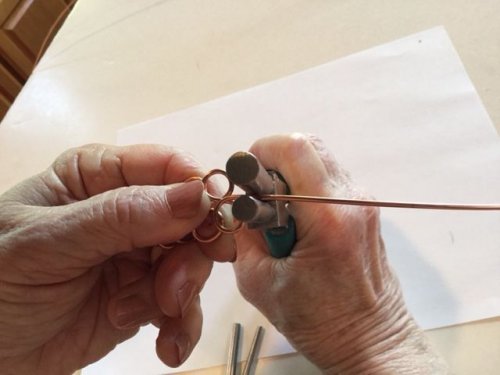
Step 9: Change to the next larger cylinder and only create TWO loops. (I used the ring mandrel for this size.)
Step 10: Create two more loops with the largest cylinder. (I used a larger size on the ring mandrel.)
Step 11: Continue to create loops for the other half of the bracelet working from the next to largest cylinder used in step 9 to the smallest in step 3.

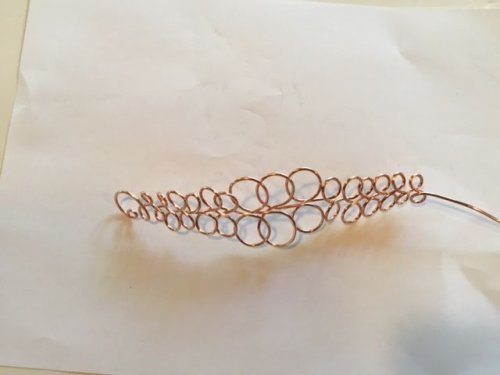
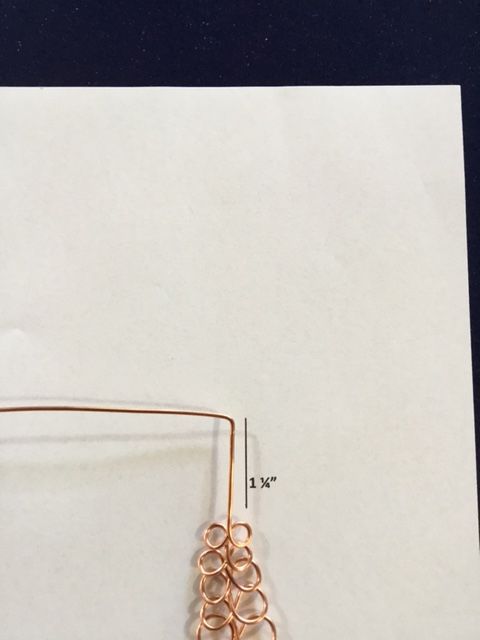
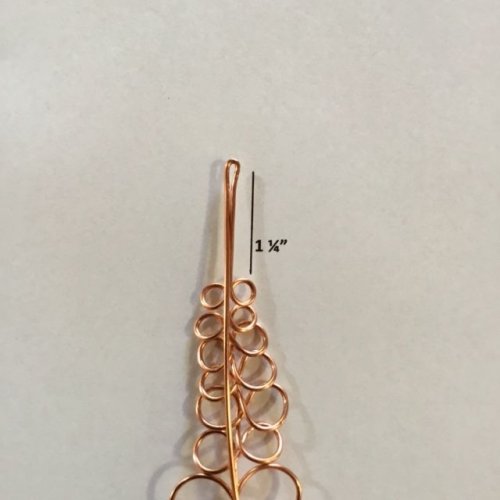
Step 12: Create the other end of the clasp. Measure again 1 1/4 inch from the last loop and create a right angle with the extended wire.
Step 13: Then turn the wire straight back toward the loops.
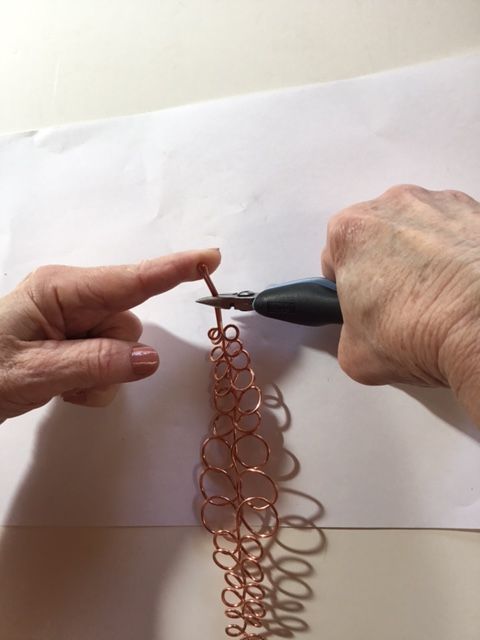
Step 14: Flush cut the straight wire leaving about ¾” for making a loop and use the round nose pliers to create this loop in the end of the wire. The loop will lay atop one of the last loops of the bracelet.

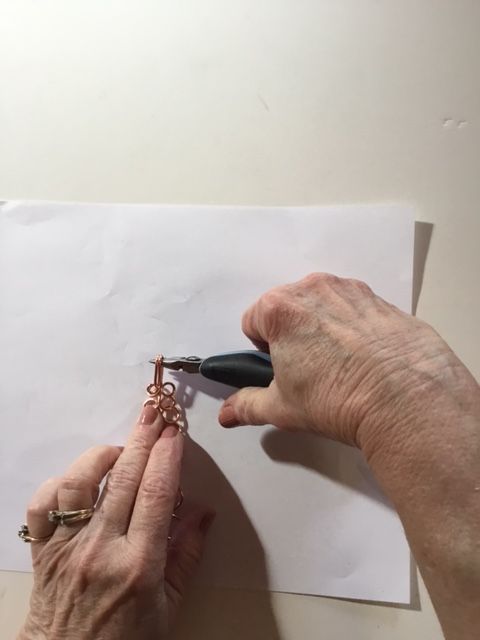
Step 15: Grasp both pieces of the wire about 1/2 inch from the turn end and form a hook by bending the end back towards the front side of the bracelet.
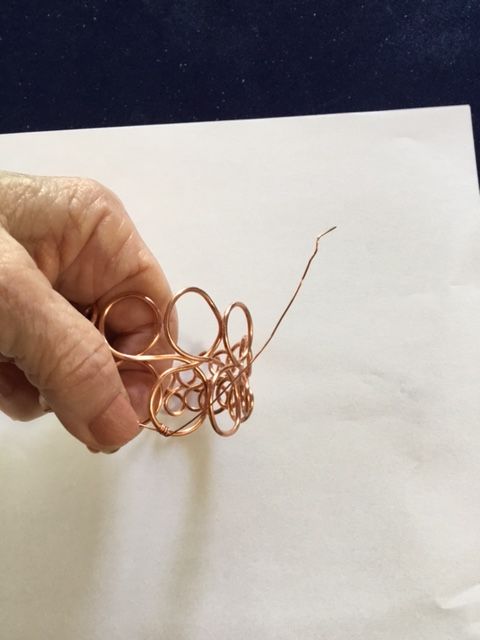
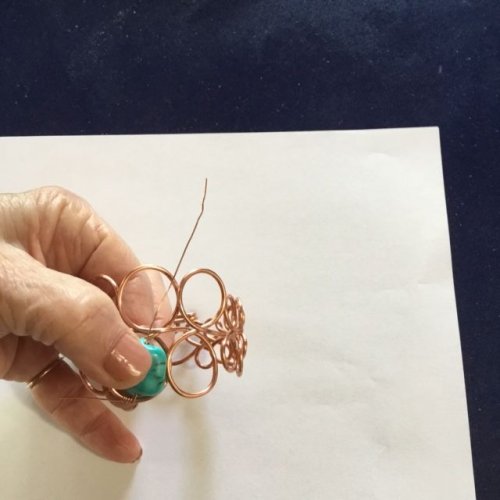
Step 16: Use your hands to carefully manipulate the wire loops into a bracelet shape. You can form it over a bracelet mandrel if desired.
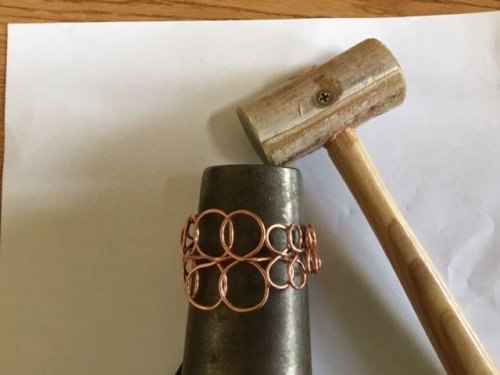
Step 17: Put the piece on a bracelet mandrel and lightly hammer it with a mallet being careful not to enlarge it. In lieu of a bracelet mandrel, gently hammer the piece from the inside.
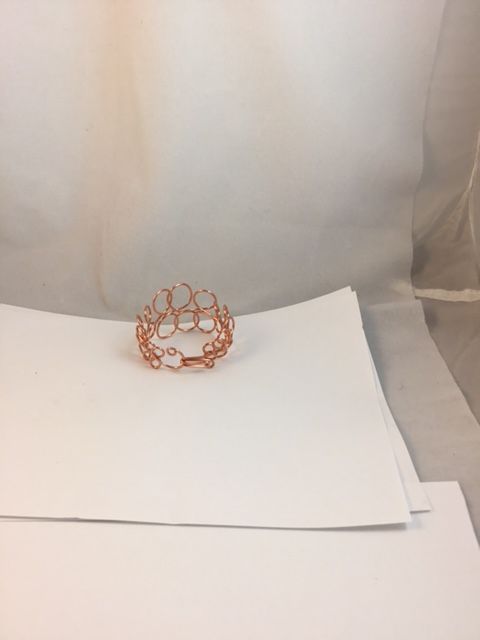
Step 18: The photo below shows how the bracelet clasp ends fit together. I tell folks to put the swirl end under and up through the hook rather than vice versa. This seems to be much easier.
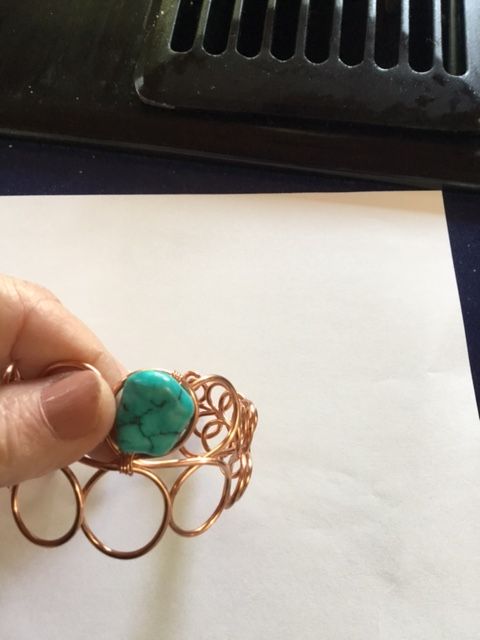
Step 19: Embellish the bracelet as desired by attaching beads with the 24-gauge wire. Wrap the wire around one side of a loop at least three times.
Step 20: Feed a bead onto the wire and attach the wire to the other side of the loop. Note: I like to wrap several times around all the heavier gauge wires where they cross in between the loops. This helps to stabilize the bracelet and help it retain shape. I do this in several different spots on the bracelet.
Step 21: Use the lighter gauge wire to wrap the clasp loop you created in step 15 to the bracelet loop upon which it sits.

Step 22: Continue until you have completed the embellishment that you want.

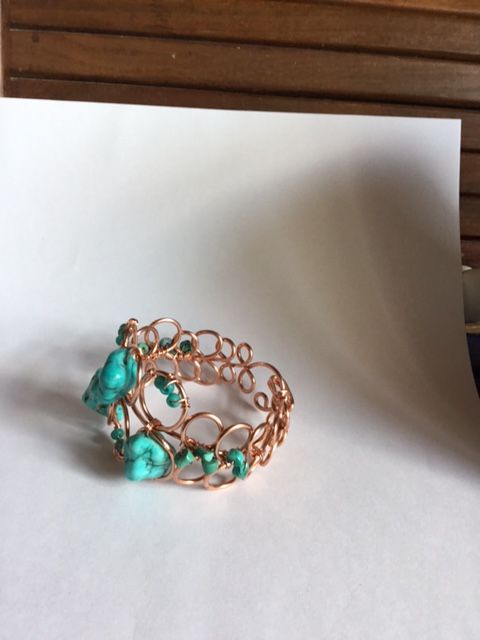
Happy Wrapping!
![]()
Click to Receive Daily Tips by Email
2 Comments

Wire Jewelry Ideas
-
 See Yourself as a Creative Thinker-Part IV By Karen Meador, PhD
Wire Jewelry Article for September 27th, 2017 If...
- September 27, 2017
-
 See Yourself as a Creative Thinker-Part III By Karen Meador, PhD
Wire Jewelry Article for September 20th, 2017 If...
- September 20, 2017
-
 See Yourself as a Creative Thinker-Part II By Karen Meador, PhD
Wire Jewelry Article for September 13th, 2017 If you...
- September 13, 2017
-
 See Yourself as a Creative Thinker By Karen Meador PhD
Wire Jewelry Article for September 6th, 2017 This is...
- September 6, 2017

Design & Inspiration
-
 Free Pattern: Smile Cluster Necklace by Karen Meador
by Judy Ellis, Wirejewelry.com Wire Jewelry Pattern for August...
- August 7, 2017
-
 Free Pattern: Long crystal round maille earrings by Kylie Jones
by Judy Ellis, Wirejewelry.com Wire Jewelry Pattern for August...
- August 3, 2017
-
 Free Pattern: Stone Twist Wrap by Karen Meador
by Judy Ellis, Wirejewelry.com Wire Jewelry Pattern for July...
- July 31, 2017
-
 Free Pattern: Floating Bead Earrings By Kimberly Newman
by Judy Ellis, Wirejewelry.com Wire Jewelry Pattern for July...
- July 27, 2017
Featured Tools
-
 Get to Know Your Hand Tools – Tube-Cutting Jig By Helen I. Driggs
by Judy Ellis, Wirejewelry.com Wire Jewelry Tip for August...
- August 4, 2017
-
 Wire Jewelry Video: Using Punch Pliers by Judy Freyer Thompson
by Judy Ellis, Wirejewelry.com Wire Jewelry Tip for August...
- August 2, 2017
-
 Wire Jewelry Video: Aligning a Hole Punch by Judy Freyer Thompson
by Judy Ellis, Wirejewelry.com Wire Jewelry Tip for July...
- July 26, 2017
-
 Get to Know Your Hand Tools – Wire Cutters – Helen I. Driggs
by Judy Ellis, Wirejewelry.com Wire Jewelry Tip for July...
- July 25, 2017
Leroy Kelly
June 26, 2017 at 8:20 am
Fascinating, really look forward to trying this.
Cecilia
June 26, 2017 at 9:17 am
Love this pattern.