


- NEW DVD Series – Stone Setting with Bezels
- Tube Set Charm by Kim St. Jean
- Prong Basket Pendant by Kim St. Jean
- NEW DVD Series – Stone Setting with Cold Connections
- New DVD Series – Stone Setting with Wire
- NEW DVD Series: Introduction to Stone Setting by Kim St. Jean
- Featured Tool: Bracelet Bending Plier
- NEW Dvd by Eva Sherman
- Fun, Fast Fold Forming DVD Series
- Double Band Ear Cuff from Alex Simkin
Free Pattern: Fish Tail Chain by Deborah Mortlock

by Judy Ellis, Wirejewelry.com
Wire Jewelry Pattern for June 12th, 2017
Fish Tail Chain
by Deborah Mortlock

Materials:
- 16 Gauge Round Dead Soft .925 Sterling Silver Wire (Pattern Quantity – 2 Feet, Product ID: H8-16D)
Tools:
- Dual Size Round Nose Pliers (Pattern Quantity – 1 Piece, Product ID: G2-719)
- Deluxe Soldering Kit (Pattern Quantity – 1 Piece, Product ID: G15-5)
- Wire Rounder Set, 3 pieces (Pattern Quantity – 1 Piece, Product ID: G14-20)
Directions:
Step 1: Take a manageable length of 16 gauge silver wire and ball up one end. If you have never balled the end of a piece of wire before simply hold the piece in a pair of tweezers and gently move the flame from your torch up and down the bottom of it until a ball forms. Holding the wire straight up and down in the flame will ensure an even ball.
After you have made the ball you can round it out using a cup bur which matches the gauge of wire you’re using. If you are using fine silver this step won’t be necessary as it forms a perfect ball when melted.
The hottest part of your flame is the area just in front of where the smaller, inner flame, touches the larger outer flame. You can manipulate the heat you’ll need by watching this part of your flame.

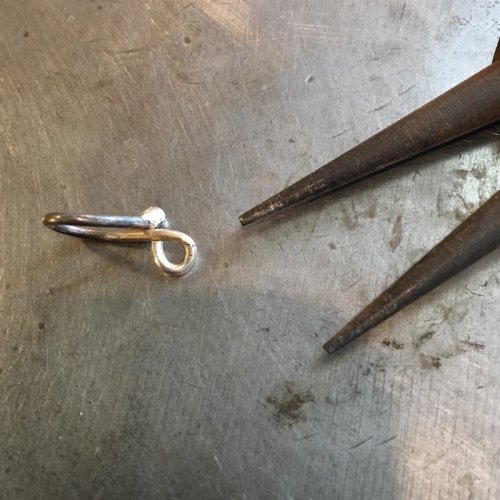
Step 2: The next step will be to make a loop as shown. You can do this by using your round nosed pliers or a mandrel. The loop shown here has an inside diameter of around 1cm.

Step 3: Solder the ball end at the spot it crosses over the other end of the loop and then make another, smaller, loop and cut off the extra length of wire.

Step 4: This loop is then turned and soldered just under the first soldered join.
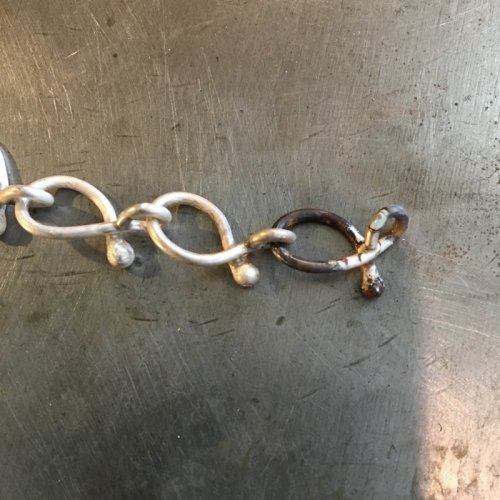
Step 5: Take the remaining length of wire, ball up the end, and make another loop. This time you will thread the larger loop into the smaller loop of the first link before soldering it together.
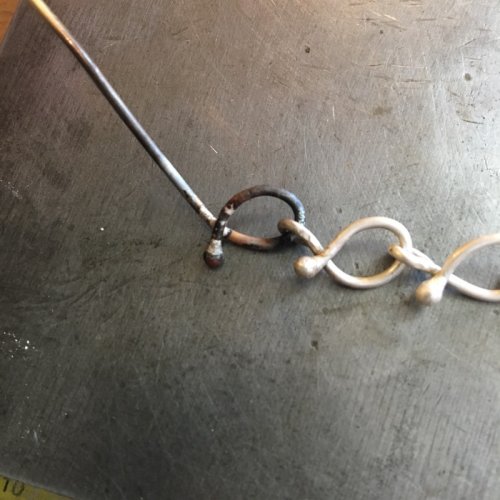
Step 6: Now make the smaller loop and solder it as before. Continue until you have the length of chain you desire.
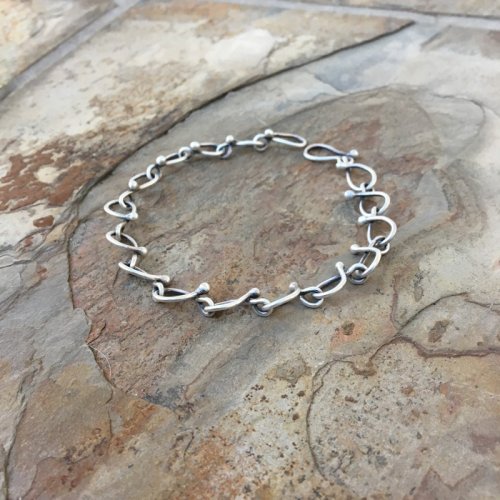
Step 7: Now you can put a catch on it, put it in pickle to clean up the residue from soldering, and then buff or polish it to your desired finish. And you have a Fish Tail bracelet.
Happy Wrapping!
![]()
Click to Receive Daily Tips by Email
One Comment

Wire Jewelry Ideas
-
 See Yourself as a Creative Thinker-Part IV By Karen Meador, PhD
Wire Jewelry Article for September 27th, 2017 If...
- September 27, 2017
-
 See Yourself as a Creative Thinker-Part III By Karen Meador, PhD
Wire Jewelry Article for September 20th, 2017 If...
- September 20, 2017
-
 See Yourself as a Creative Thinker-Part II By Karen Meador, PhD
Wire Jewelry Article for September 13th, 2017 If you...
- September 13, 2017
-
 See Yourself as a Creative Thinker By Karen Meador PhD
Wire Jewelry Article for September 6th, 2017 This is...
- September 6, 2017

Design & Inspiration
-
 Free Pattern: Smile Cluster Necklace by Karen Meador
by Judy Ellis, Wirejewelry.com Wire Jewelry Pattern for August...
- August 7, 2017
-
 Free Pattern: Long crystal round maille earrings by Kylie Jones
by Judy Ellis, Wirejewelry.com Wire Jewelry Pattern for August...
- August 3, 2017
-
 Free Pattern: Stone Twist Wrap by Karen Meador
by Judy Ellis, Wirejewelry.com Wire Jewelry Pattern for July...
- July 31, 2017
-
 Free Pattern: Floating Bead Earrings By Kimberly Newman
by Judy Ellis, Wirejewelry.com Wire Jewelry Pattern for July...
- July 27, 2017
Featured Tools
-
 Get to Know Your Hand Tools – Tube-Cutting Jig By Helen I. Driggs
by Judy Ellis, Wirejewelry.com Wire Jewelry Tip for August...
- August 4, 2017
-
 Wire Jewelry Video: Using Punch Pliers by Judy Freyer Thompson
by Judy Ellis, Wirejewelry.com Wire Jewelry Tip for August...
- August 2, 2017
-
 Wire Jewelry Video: Aligning a Hole Punch by Judy Freyer Thompson
by Judy Ellis, Wirejewelry.com Wire Jewelry Tip for July...
- July 26, 2017
-
 Get to Know Your Hand Tools – Wire Cutters – Helen I. Driggs
by Judy Ellis, Wirejewelry.com Wire Jewelry Tip for July...
- July 25, 2017
Gail Chambers
June 12, 2017 at 7:44 am
That’s a great little tutorial!!!