


- NEW DVD Series – Stone Setting with Bezels
- Tube Set Charm by Kim St. Jean
- Prong Basket Pendant by Kim St. Jean
- NEW DVD Series – Stone Setting with Cold Connections
- New DVD Series – Stone Setting with Wire
- NEW DVD Series: Introduction to Stone Setting by Kim St. Jean
- Featured Tool: Bracelet Bending Plier
- NEW Dvd by Eva Sherman
- Fun, Fast Fold Forming DVD Series
- Double Band Ear Cuff from Alex Simkin
Free Pattern: Sterling Silver Chain Maille Bridal Earrings

by Judy Ellis, Wirejewelry.com
Wire Jewelry Pattern for June 8th, 2017
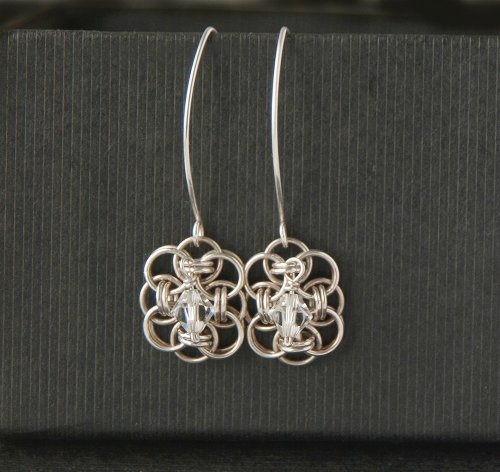
Sterling Silver Chain Maille Bridal Earrings
by Kylie Jones
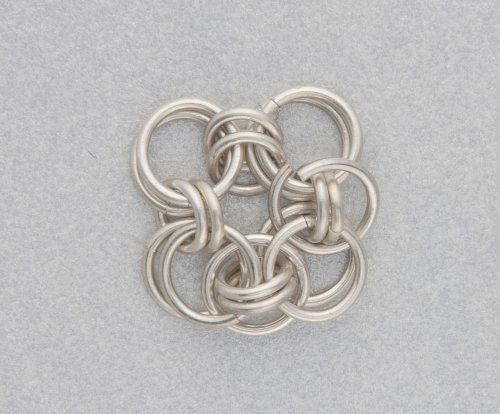
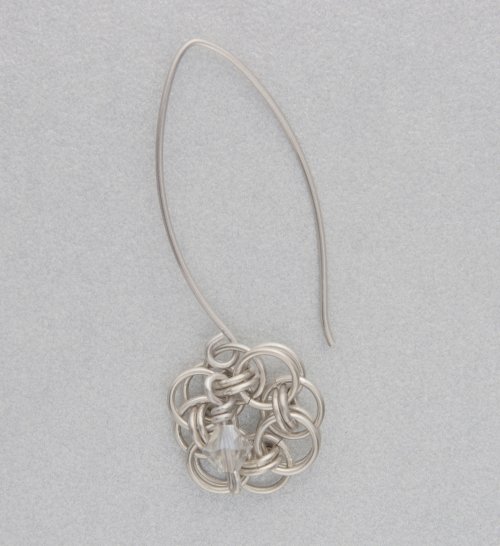
This chain maille weave is called helm chain. It is a decorative chain in a flower like pattern to which I’ve added a reflective central Swarovski crystal. The ear wires are large and add a touch of elegance.
Materials:
- 20 gauge sterling silver 3.2mm jump rings (Pattern Quantity – 16 Pieces)
- 20 gauge sterling silver 5mm jump rings (Pattern Quantity – 24 Pieces)
- 20 Gauge Round Half Hard .925 Sterling Silver Wire (Pattern Quantity – 9 Inches, Product ID: H8-20H)
- Swarovski 5mm clear crystal bicone (Pattern Quantity – 2 Pieces)
Tools:
- Flat Nose Wire Plier (Pattern Quantity – 2 Pieces, Product ID: G2-506)
- Round Nose Wire Plier (Pattern Quantity – 1 Piece, Product ID: G2-507)
- 5 inch Plato Slim Flush Cutters for Wire Working or Beading – Pack of 1 (Pattern Quantity – 1 Piece, Product ID: G35-3 )
- 6 Inch Metal Ruler – in Inches And Centimeters (Pattern Quantity – 1 Piece, Product ID: G7-7 )
Directions:
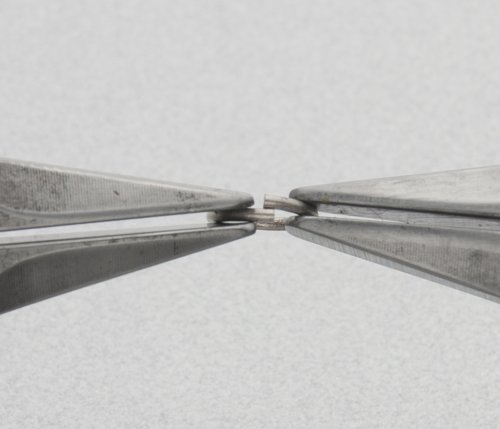
Step 1: For chain maille, particularly jewelry made with fine jump rings like these, the jump rings need to be closed under tension. To do this use 2 flat-nose pliers and gripping both sides of the ring push the ends of the ring a little further than closed so the ends overlap, then bring the ends back to meet. There is usually a little clicking sound when they go from overlapped to meet perfectly. Check by feel or use magnification. If your rings aren’t right keep adjusting and overlapping till you get a perfect ring.
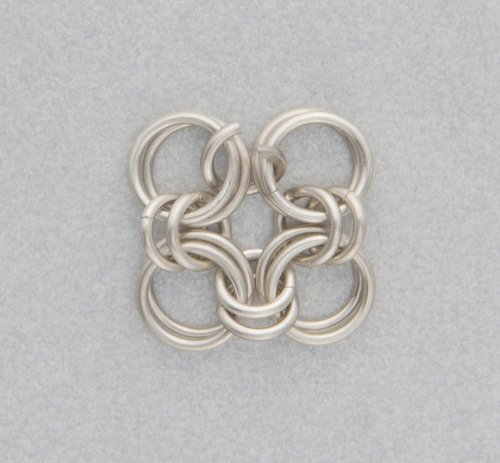
Step 2: Place 4 closed large rings on a small ring and close the ring. Add another small ring in the same place as the first small ring.
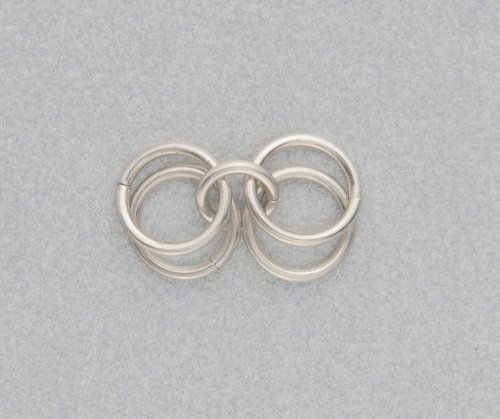

Step 3: Take an open small ring and go through 2 of the 4 large rings, add 2 closed large rings and close the small ring. Add another small ring in the same place.


Step 4: Add another link of 2 large rings in the same way as before, make sure to add the second small ring.

Step 5: Join both ends of the chain together with a small ring. Add a second small ring in the same place. You now have a square looking chain shape.
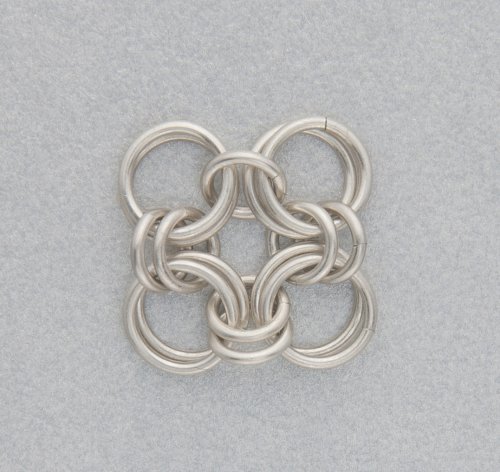

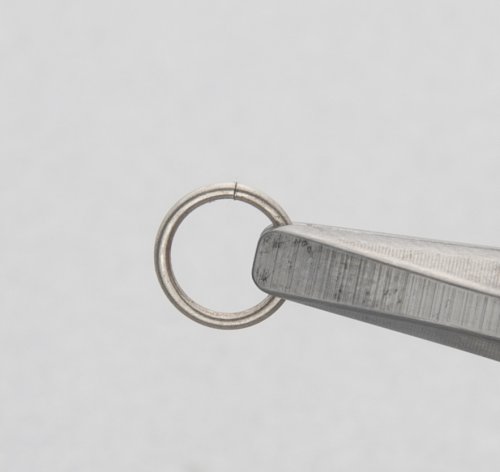
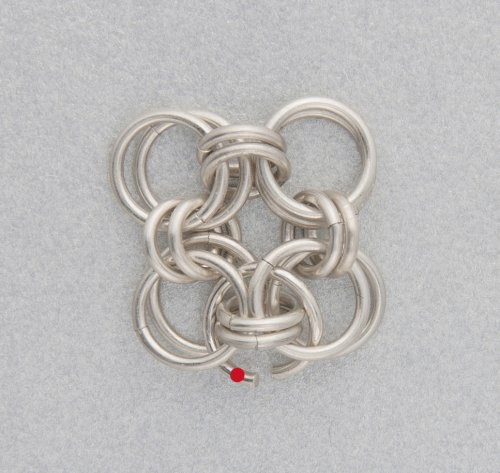
Step 6: Now we add 4 decorative rings, these rings don’t go through any rings. They sit between the 2 large rings and go around the 2 small rings to create the pattern. The first ring will go around the 2 small rings at the bottom of the square. Take an open large ring, if you open it a little more than you usually do it will make it easier to manipulate. To make it easy to see I have marked this ring with a red dot. Starting at the bottom of the square, weave the ring up between the 2 large rings on the left of the bottom 2 small rings. Take this ring around the 2 small rings and down between the 2 large rings on the right. Close the ring.

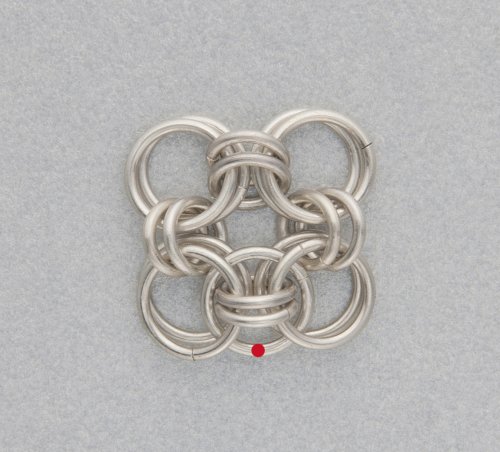
Step 7: To add the 2nd decorative ring move on to the next 2 small rings. Take an open large ring, weave this ring up between the 2 large rings on the left of the small rings, around the top of the small rings and down between the 2 large rings on the right. Close the ring.
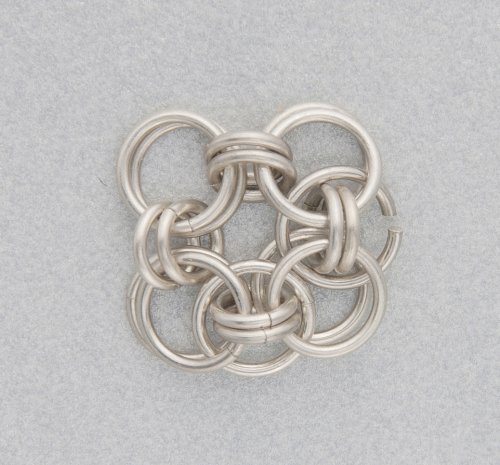
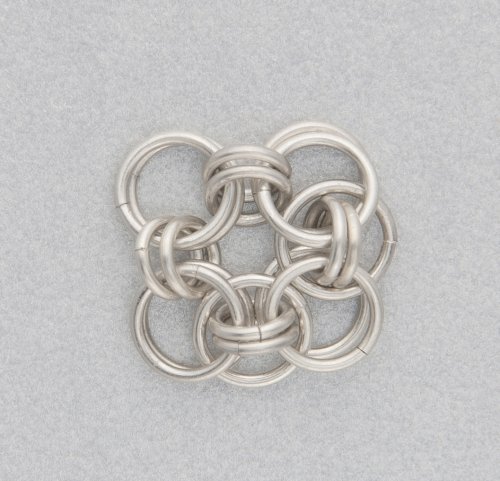
Step 8: Add 2 more decorative rings around the 2 remaining small ringed links. Make 2.

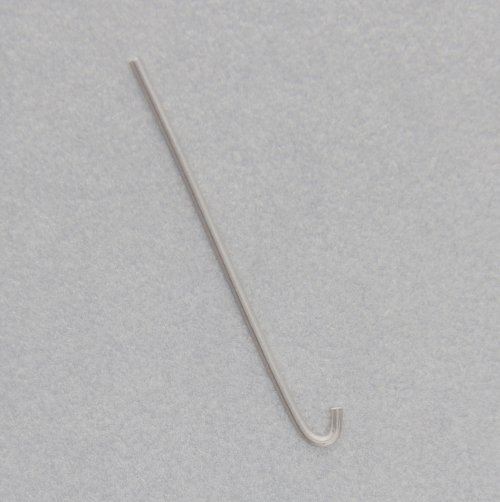
Step 9: To add the crystal cut a piece of wire about 1.2″ (3cm) long. Place the edge of your flat-nose pliers about 2mm from the end of the wire and turn it back on itself to form a hook shape. With your pliers flatten the hook so the 2 sides are next to each other. Place a crystal bicone on the wire and with your round-nose pliers make a wrapped loop.

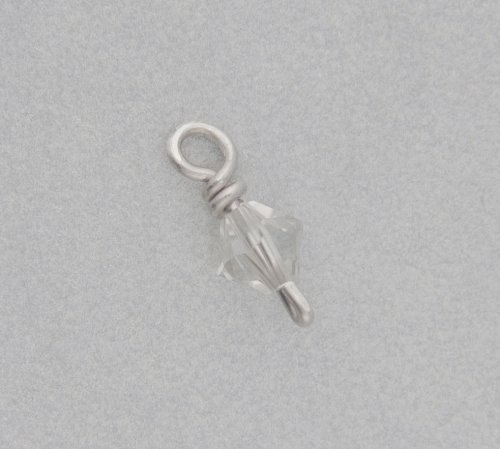
Step 10: Take your chain maille shape and position one of the small 2 ringed links at the top. Attach the wrapped loop of the crystal drop to both of these small rings.


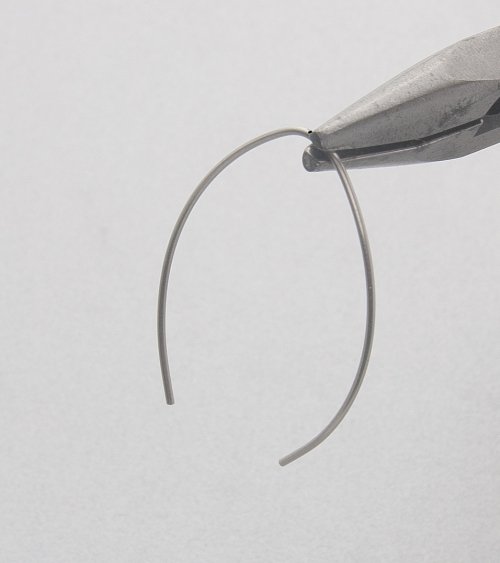
Step 11: To make the ear wire I find it easiest to make both ear wires at the same time, so doing each step for both rather than making one then trying to make the second look the same. For each ear wire cut a piece of wire about 3.15″ (8cm) long. Mark the middle of the wire. Hold the middle mark on your mandrel and bend the wire to the shape of the circle. It will spring back a little and end up a bit larger than the mandrel shape.


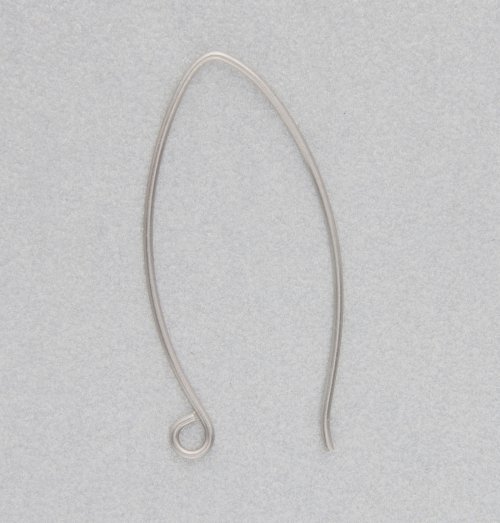
Step 12: Place the side edge of your flat-nose pliers next to the middle mark, bend both sides of the half circle towards each other to make the ear wire shape. On one of the ends, with round-nose pliers make a loop that curves away from the main shape. If you like you can put a slight bend in the other end. The ear wires need to be work hardened so they maintain their shape. You can do this by hammering them with a rawhide or plastic mallet, or put them in a jewelry tumbler.
Step 13: Attach the ear wire to the large ring above the crystal.
Happy Wrapping!
![]()
Click to Receive Daily Tips by Email
2 Comments

Wire Jewelry Ideas
-
 See Yourself as a Creative Thinker-Part IV By Karen Meador, PhD
Wire Jewelry Article for September 27th, 2017 If...
- September 27, 2017
-
 See Yourself as a Creative Thinker-Part III By Karen Meador, PhD
Wire Jewelry Article for September 20th, 2017 If...
- September 20, 2017
-
 See Yourself as a Creative Thinker-Part II By Karen Meador, PhD
Wire Jewelry Article for September 13th, 2017 If you...
- September 13, 2017
-
 See Yourself as a Creative Thinker By Karen Meador PhD
Wire Jewelry Article for September 6th, 2017 This is...
- September 6, 2017

Design & Inspiration
-
 Free Pattern: Smile Cluster Necklace by Karen Meador
by Judy Ellis, Wirejewelry.com Wire Jewelry Pattern for August...
- August 7, 2017
-
 Free Pattern: Long crystal round maille earrings by Kylie Jones
by Judy Ellis, Wirejewelry.com Wire Jewelry Pattern for August...
- August 3, 2017
-
 Free Pattern: Stone Twist Wrap by Karen Meador
by Judy Ellis, Wirejewelry.com Wire Jewelry Pattern for July...
- July 31, 2017
-
 Free Pattern: Floating Bead Earrings By Kimberly Newman
by Judy Ellis, Wirejewelry.com Wire Jewelry Pattern for July...
- July 27, 2017
Featured Tools
-
 Get to Know Your Hand Tools – Tube-Cutting Jig By Helen I. Driggs
by Judy Ellis, Wirejewelry.com Wire Jewelry Tip for August...
- August 4, 2017
-
 Wire Jewelry Video: Using Punch Pliers by Judy Freyer Thompson
by Judy Ellis, Wirejewelry.com Wire Jewelry Tip for August...
- August 2, 2017
-
 Wire Jewelry Video: Aligning a Hole Punch by Judy Freyer Thompson
by Judy Ellis, Wirejewelry.com Wire Jewelry Tip for July...
- July 26, 2017
-
 Get to Know Your Hand Tools – Wire Cutters – Helen I. Driggs
by Judy Ellis, Wirejewelry.com Wire Jewelry Tip for July...
- July 25, 2017
Anja Roers
June 8, 2017 at 9:56 am
I have made these earrings many times, without the Swarovski Crystal. I’ve usually used a combination of silver plated, brass, and copper jumprings, and they come out beautiful!
Sandi
June 8, 2017 at 11:27 am
Those are beautiful! And once you see it done, easy to do. I’ve always gotten lost in my chain mail let rings, so I gave it up, but I might make these…..I think I might do it with a small baroque pearl in the centre. Thank you for sharing this!