- NEW DVD Series – Stone Setting with Bezels
- Tube Set Charm by Kim St. Jean
- Prong Basket Pendant by Kim St. Jean
- NEW DVD Series – Stone Setting with Cold Connections
- New DVD Series – Stone Setting with Wire
- NEW DVD Series: Introduction to Stone Setting by Kim St. Jean
- Featured Tool: Bracelet Bending Plier
- NEW Dvd by Eva Sherman
- Fun, Fast Fold Forming DVD Series
- Double Band Ear Cuff from Alex Simkin
Tool Tip: The Jeweler’s Saw
by Judy Ellis, Wirejewelry.com
Wire Jewelry Tool Tip for February 8th, 2017
Get to know your hand tools
Tool Tip Five: The Jeweler’s Saw
Today we bring you another great tool tip from Helen Driggs: Choosing and using the Jeweler’s Saw
A little about Helen:
HELEN I. DRIGGS is an experienced metalsmith, lapidary and studio jewelry instructor and has appeared in 6 instructional jewelry technique videos. Her book, The Jewelry Maker’s Field Guide was published in 2013.
Follow her blog: materialsmithing.wordpress.com, Instagram: hdriggs_fabricationista and Twitter feed @fabricationista for news, her teaching schedule and for other jewelry-related information.
Helen Says:
A Jeweler’s saw can strike fear in the heart of any beginning metalsmith. I will never forget my first sawing class way back when and the curses of frustration, moans of despair and sound of breaking blades.
What makes your first sawing session the worst is that your instructor probably makes it look so easy — and then you just can’t get the knack.
Know this: mastering proper sawing skills takes a lot of practice and that’s why your teacher does it so well. But, even experienced jewelers sometimes have a bad day of sawing too, so don’t ever give up, because sawing is one of the most important skills for any jeweler to learn.
Choosing a saw frame:
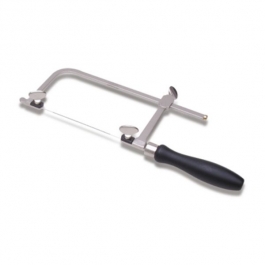
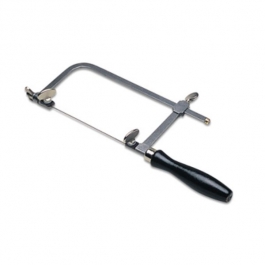
There are inexpensive and expensive saw frames. In my opinion, a saw is never the place to go cheap, because you will use it nearly every day you work. Look for a well-made hard steel frame with a snug and comfortable grip. The set screws and pads should be tight and well machined with sharp threads.
There are two types of frame: adjustable and stationary. Most makers prefer an adjustable frame because short lengths of broken blade can be strung and used until completely worn out — a good feature when you break them a lot. A stationary saw will only fit full length blades.

Jeweler’s saws come in standard throat depths ranging between three to eleven inches in depth. The four inch frame is a good starter size and will allow you to cut typical sheet sizes available from most suppliers.
My 5 favorite sawing tips:
- Get a good start: If your blade slips out of position on the first stroke, saw into the wood of the bench pin and create a notch. Just cut one or two strokes to stabilize the blade and then position the metal on the pin and against the blade at the start of the first line. The wood will hold the blade in position, as you saw the first few strokes.
- Make sure to use the right size blade: most of the time, if your blade is breaking or jumping around a lot, it’s too big. A good rule of thumb is three or more teeth per thickness of the metal. Too few teeth contacting the metal will result in choppy, jumpy motion. Too many teeth may result in broken blades.
- Make sure the blade is tight: the saw blade must be under tension. A loose blade won’t get you anywhere, so be sure to “spring” the frame before tightening the bottom nut. Test the blade by “pinging it” before sawing. It should produce a clear high note and have zero wobble.
- Intricate cuts call for smaller blades – you will also find that curves and sharp direction changes are easier to saw when the blade is fine.
- For inside saw piercings – create a dimple with a center punch and then drill a pilot hole in the sheet to ensure the chosen saw blade has enough clearance to move freely in the drilled hole.
I hope you’ve enjoyed this tool tip from Helen. For more of her tips CLICK HERE!
Happy Wrapping!
![]()
Click to Receive Daily Tips by Email


0 comments