


- NEW DVD Series – Stone Setting with Bezels
- Tube Set Charm by Kim St. Jean
- Prong Basket Pendant by Kim St. Jean
- NEW DVD Series – Stone Setting with Cold Connections
- New DVD Series – Stone Setting with Wire
- NEW DVD Series: Introduction to Stone Setting by Kim St. Jean
- Featured Tool: Bracelet Bending Plier
- NEW Dvd by Eva Sherman
- Fun, Fast Fold Forming DVD Series
- Double Band Ear Cuff from Alex Simkin
FREE Pattern: Beaded Chevron Pendant

by Judy Ellis, Wirejewelry.com
Wire Jewelry FREE Pattern for January 18th 2017
Beaded Chevron Pendant
by Helen Driggs
Today, I thought I’d share a great new metalworking pattern from one of our contributors, Helen Driggs called the Beaded Chevron Pendant. I know you’re going to love it!
A little about Helen:

HELEN I. DRIGGS is an experienced metalsmith, lapidary and studio jewelry instructor and has appeared in 6 instructional jewelry technique videos. Her book, The Jewelry Maker’s Field Guide was published in 2013.
Follow her blog: materialsmithing.wordpress.com, Instagram: hdriggs_fabricationista and Twitter feed @fabricationista for news, her teaching schedule and for other jewelry-related information.
Beaded Chevron Pendant
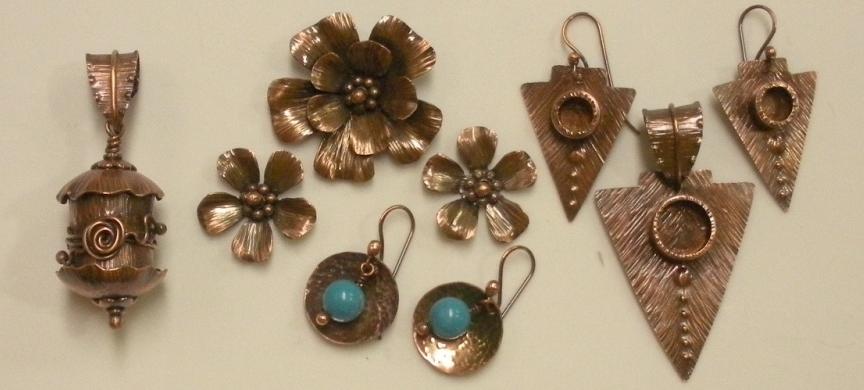
Level: Beginner to Advanced
I created this easy assembled pendant as a way for my beginning metal students to become comfortable with measuring, drilling, and weaving with small sections of patterned metal and very thin gauge wire. Take your time with the measuring and the drilling, because the more patience you have, the better your results will be. I left the pendant with a shiny finish, but you could patinate it before assembly if desired.
Materials:
- 4-inch section 5mm x 24 ga. yellow brass flat patterned wire
- 28 gauge brass or colored copper wire
- 2-4mm beads in assorted colors; I used 3mm anodized hematite rondells
- Charm, drop, or other focal element
- 3 large jump rings
- 2 small jump rings
- Eyepin
Tools:
- Marker
- Jeweler’s Saw and 2/0 blades (or metal snips if you must)
- L-Square and millimeter ruler
- Centerpunch and Scribe
- Steel block
- Ball peen or Chasing Hammer
- Flex Shaft or other rotary equipment
- #55 and #52 drill bits
- Bench pin or scrap wood drilling block
- Half Round Hand file and abrasive papers to 600 grit
- Wire snips
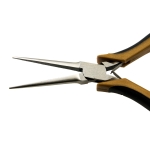
- Chain nose pliers
- Round nose pliers
Instructions:
Step 1: Measure two 50mm sections of patterned wire and saw them out. File and sand the cut surfaces smooth. Note: You can cut them with metal snips, but take care to flatten the deformed ends if you do so.
Step 2: On the back of each wire, draw a centered line down the entire section of metal. Note: I also scribe the line for accuracy.
Step 3: Create nine 5mm divisions and indicate them with the marker. Working on the steel block, use a chasing or ball peen hammer and the center punch to create a divot at each intersection. Tip: An L-Square ensures the marks are perpendicular.
Step 4: Use the #55 drill bit to SLOWLY drill the holes. The brass is very hard, and you will dull the bit if you drill too fast. Note: Don’t be tempted to use hole punching pliers! Yellow brass is very hard and will destroy the cutting edges of your pliers.
Step 5: Sand and remove the burrs from the metal, ensuring there are no sharp areas. Use a half round file to round the ends of the wire sections into a “popsicle stick” shape. Clean the metal and bring it to a 600 grit finish with the sandpaper.
Step 6: Return the sections to the steel block and use the center punch to create holes for the large jump rings at about 3mm in from the curved ends of the wire. Positioning them depends on the shape you filed at the end of the wire. Drill the holes with the larger #52 drill bit, and sand and abrade the burrs as before. Pre-polish the metal for assembly.
Step 7: Holding the wire sections back to back, insert a large jump ring into the larger hole and close it securely. Add one ring to each of the other large drilled holes. Note: Take care to close the rings neatly and tightly.
Step 8: Cut a 2-foot length of 28ga wire. Insert one end into the top hole, string 2-3 beads, and exit the wire out of the other top hole. Carry the wire ends down the outside of the pendant and insert them into the next lowest hole. Each row of beads will increase in number – I added one bead to each side on every row. The 28ga wire passes through the beads from each side of the pendant.
Step 9: Work down the rows in the pattern and design of your choosing. You might need to adjust the number of your particular beads per row for neatness – it may not be mathematical, so use your eye to help you decide.
Step 10: When you reach the last row, snip the exiting wires as closely to the patterned wire as possible. Take care to sand off any protruding points.
For final assembly, I created a scrap brass charm by melting it with my torch, and later drilling the blob with the smaller drill bit. I attached it to the base ring of the chevron with a bead-embellished eye pin to echo the colors in the pendant and small jump rings. Then, I suspended the top os the pendant with some fine gauge recycled vintage chain.
Have some fun with this design, and vary the color, number and size of the beads, as well as the width, length and number of holes in the patterned wire.
Congratulations! You’ve made your first Beaded Chevron Pendant.
Classes with Helen:
If you’d like to spend some one-on-one time with Helen and learn more about metalsmithing – you still have time to register to join her at JOGS in Tucson. Her classes will be offered January 30th and 31st. Click below to see what she will be teaching for our sister company JewelryTools.com.
SEATS STILL AVAILABLE!
Multi-Metal Cold Connected Bracelet

This is the bracelet that started a cold-connection renaissance, and you can learn to make it directly from the artist who created it! You will learn to texture metal, use a disc cutter, drill and punch holes with precision, and connect mixed metal circles with rubber O-Rings and micro hardware to create an unusual, adaptable bracelet or necklace.
Metal formed Botanical Pendant

Saw thin gauge metal and form it on a synclastic stake to quickly create these pretty botanical forms. You’ll be amazed at how fast these can be made and finished and you’ll have the option of forming a pendant or earrings with the option of creating several flower species. The ability to saw well will help you succeed.
Color on Metal

Learn how to add a splash of vibrant color to your jewelry metal! We’ll use colored pencils and pastels to create rich layered color on copper or brass. We will create an easy pair of earrings in class – or students have the option to create a simple riveted pendant if they are experienced at fabrication techniques like sawing and riveting. In addition to the coloring technique, instructor will demo Riveting, Sawing and delve into Color Use and Design. Don’t worry if you can’t draw – we have pre-made patterns to color, too!
I hope you’ve enjoyed and learned a little bit more about hand tools. Look for more great tips from Helen in the future.
Happy Wrapping!
![]()
Click to Receive Daily Tips by Email
Related Posts


Wire Jewelry Ideas
-
 See Yourself as a Creative Thinker-Part IV By Karen Meador, PhD
Wire Jewelry Article for September 27th, 2017 If...
- September 27, 2017
-
 See Yourself as a Creative Thinker-Part III By Karen Meador, PhD
Wire Jewelry Article for September 20th, 2017 If...
- September 20, 2017
-
 See Yourself as a Creative Thinker-Part II By Karen Meador, PhD
Wire Jewelry Article for September 13th, 2017 If you...
- September 13, 2017
-
 See Yourself as a Creative Thinker By Karen Meador PhD
Wire Jewelry Article for September 6th, 2017 This is...
- September 6, 2017

Design & Inspiration
-
 Free Pattern: Smile Cluster Necklace by Karen Meador
by Judy Ellis, Wirejewelry.com Wire Jewelry Pattern for August...
- August 7, 2017
-
 Free Pattern: Long crystal round maille earrings by Kylie Jones
by Judy Ellis, Wirejewelry.com Wire Jewelry Pattern for August...
- August 3, 2017
-
 Free Pattern: Stone Twist Wrap by Karen Meador
by Judy Ellis, Wirejewelry.com Wire Jewelry Pattern for July...
- July 31, 2017
-
 Free Pattern: Floating Bead Earrings By Kimberly Newman
by Judy Ellis, Wirejewelry.com Wire Jewelry Pattern for July...
- July 27, 2017
Featured Tools
-
 Get to Know Your Hand Tools – Tube-Cutting Jig By Helen I. Driggs
by Judy Ellis, Wirejewelry.com Wire Jewelry Tip for August...
- August 4, 2017
-
 Wire Jewelry Video: Using Punch Pliers by Judy Freyer Thompson
by Judy Ellis, Wirejewelry.com Wire Jewelry Tip for August...
- August 2, 2017
-
 Wire Jewelry Video: Aligning a Hole Punch by Judy Freyer Thompson
by Judy Ellis, Wirejewelry.com Wire Jewelry Tip for July...
- July 26, 2017
-
 Get to Know Your Hand Tools – Wire Cutters – Helen I. Driggs
by Judy Ellis, Wirejewelry.com Wire Jewelry Tip for July...
- July 25, 2017
0 comments