


- NEW DVD Series – Stone Setting with Bezels
- Tube Set Charm by Kim St. Jean
- Prong Basket Pendant by Kim St. Jean
- NEW DVD Series – Stone Setting with Cold Connections
- New DVD Series – Stone Setting with Wire
- NEW DVD Series: Introduction to Stone Setting by Kim St. Jean
- Featured Tool: Bracelet Bending Plier
- NEW Dvd by Eva Sherman
- Fun, Fast Fold Forming DVD Series
- Double Band Ear Cuff from Alex Simkin
FREE Pattern: Crystal Ring

by Judy Ellis, Wirejewelry.com
Wire Jewelry Tip for May 27th, 2016
Crystal Ring
by Lilian Chen
Today’s free pattern comes from Lilian Chen. This simple crystal and wire ring pattern is easy enough for the beginner and is perfect for anyone who loves creative wire methods.
Lilian Says:

This pattern will introduce you to my 3D style wire sculpture forming method. The original idea came from origami paper folding:
Skill Level: Beginner
Materials:
- 14gauge Silver wire with copper core.
- Swarovski Crystals of choice
- Beads of choice
Tools:
- Flat nose pliers
- Ring mandrel
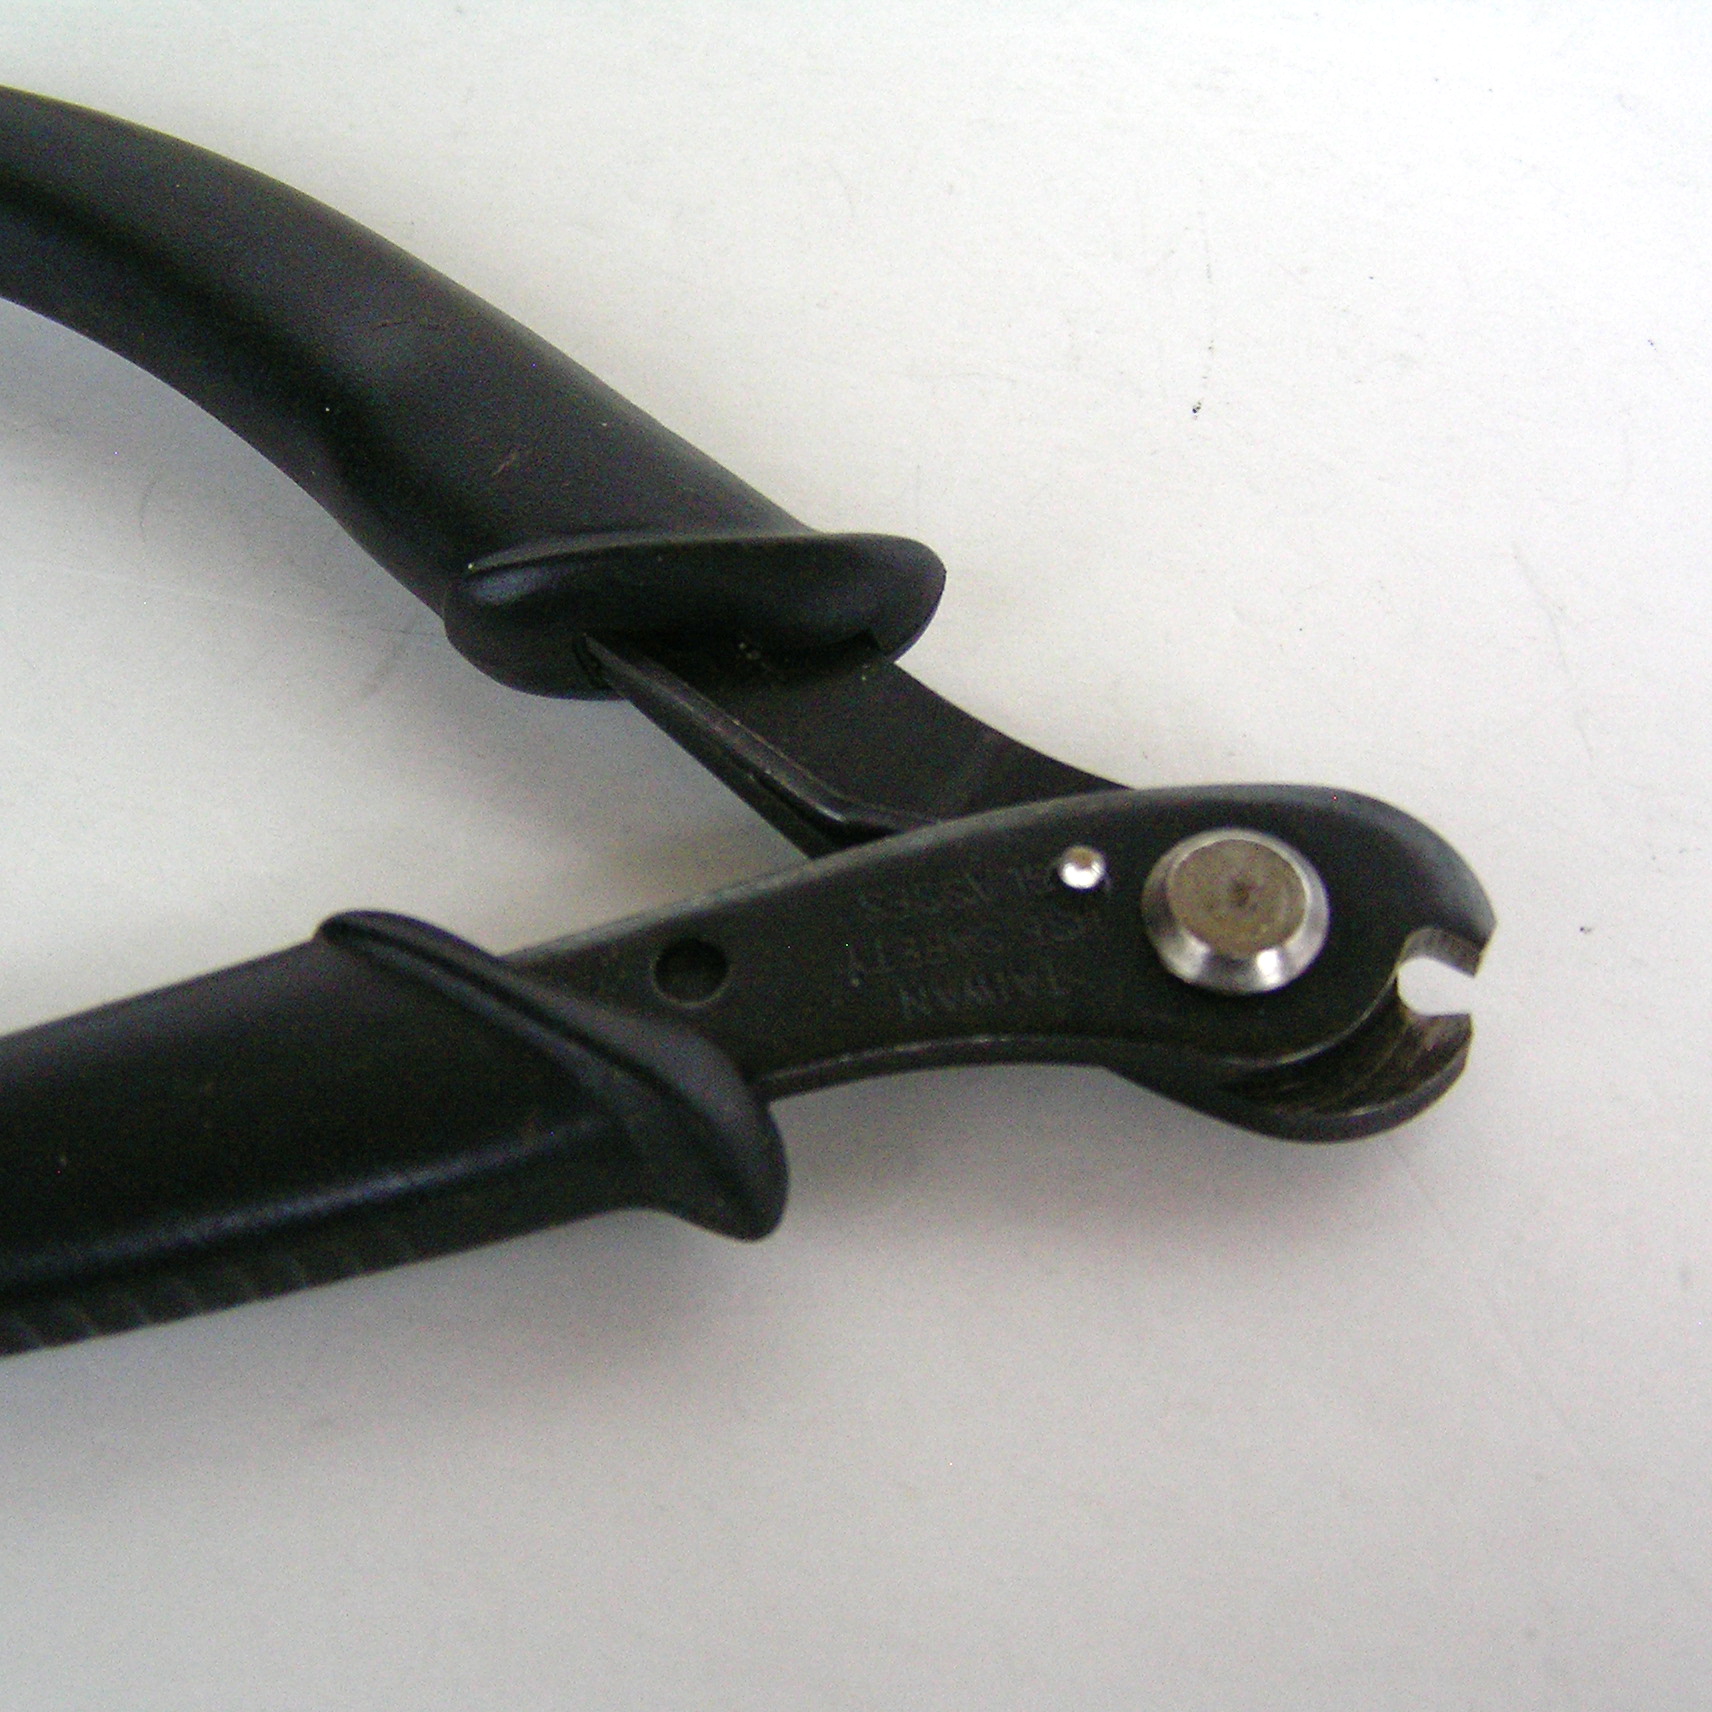
- Memory wire cutter
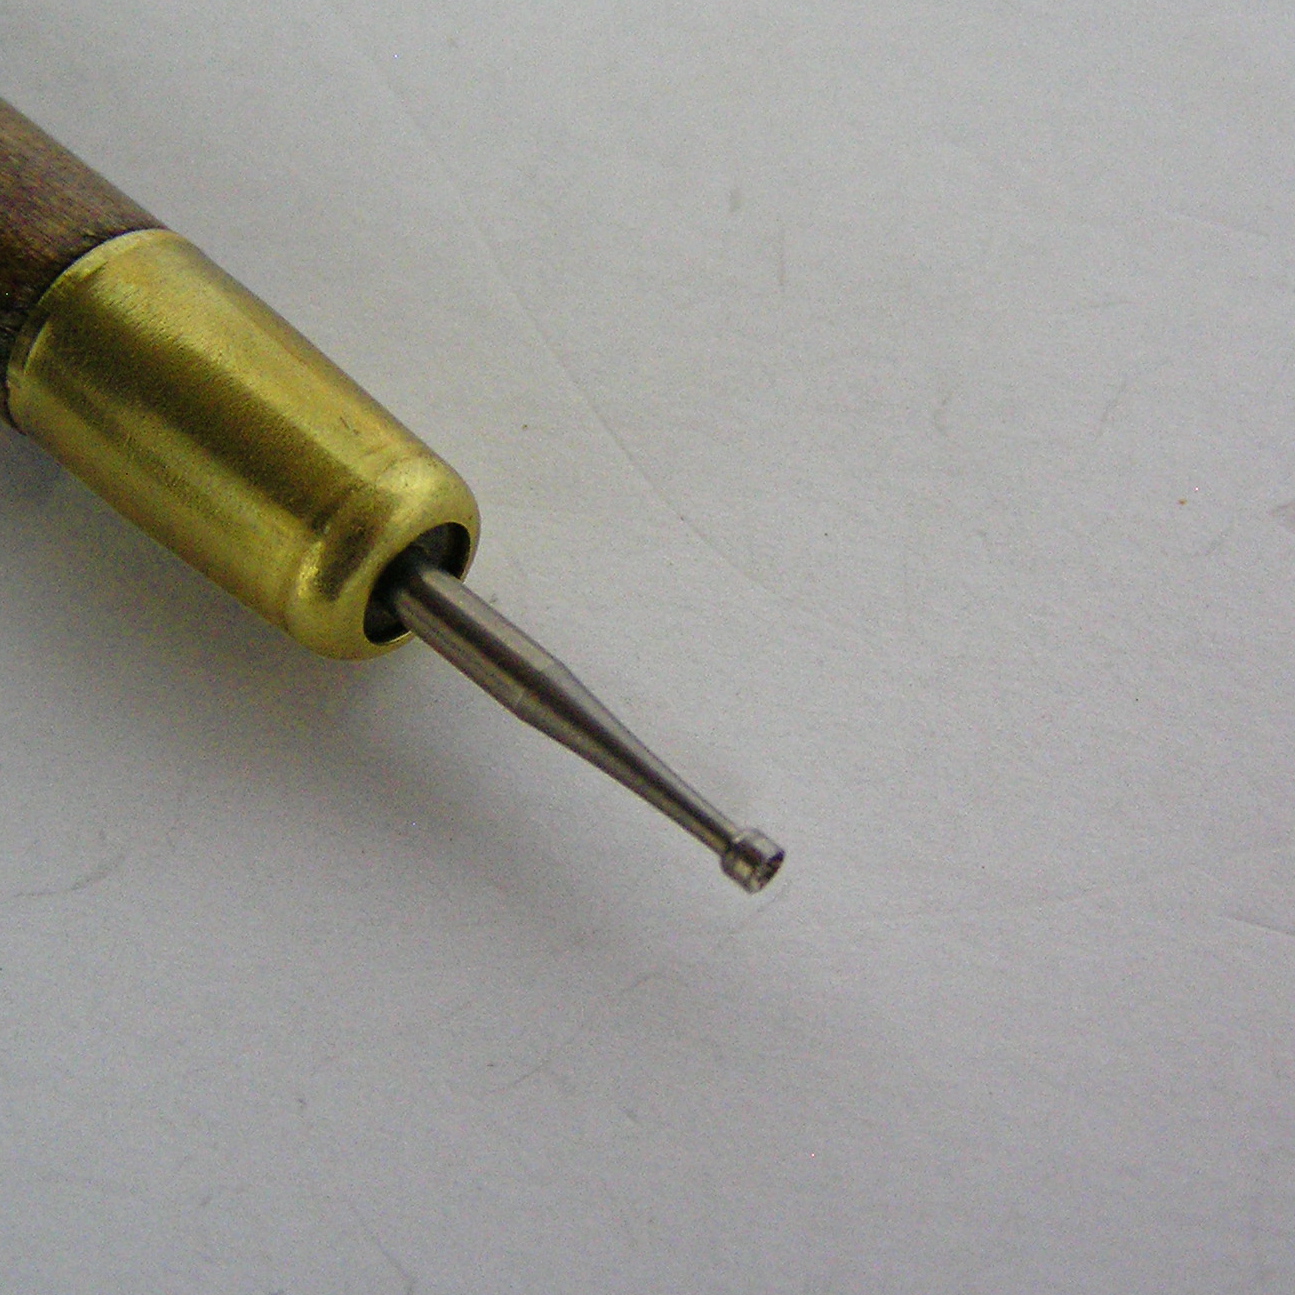
- Wire files (for large gauges)
Instructions:
- For this project you will be using the wire’s original coils directly from the spool. Depending on the size of ring that you are creating, you may need to use a smaller coil of wire such as 1/2 coil, 1/4 coil or 1/8 coil as show below. With this type of measurement, there is no need to straighten your wire to determine the length for your piece.

- Begin by using one full coil. Cut one coil from the spool.

- Measure and check the diameter and the end width, keeping them even.
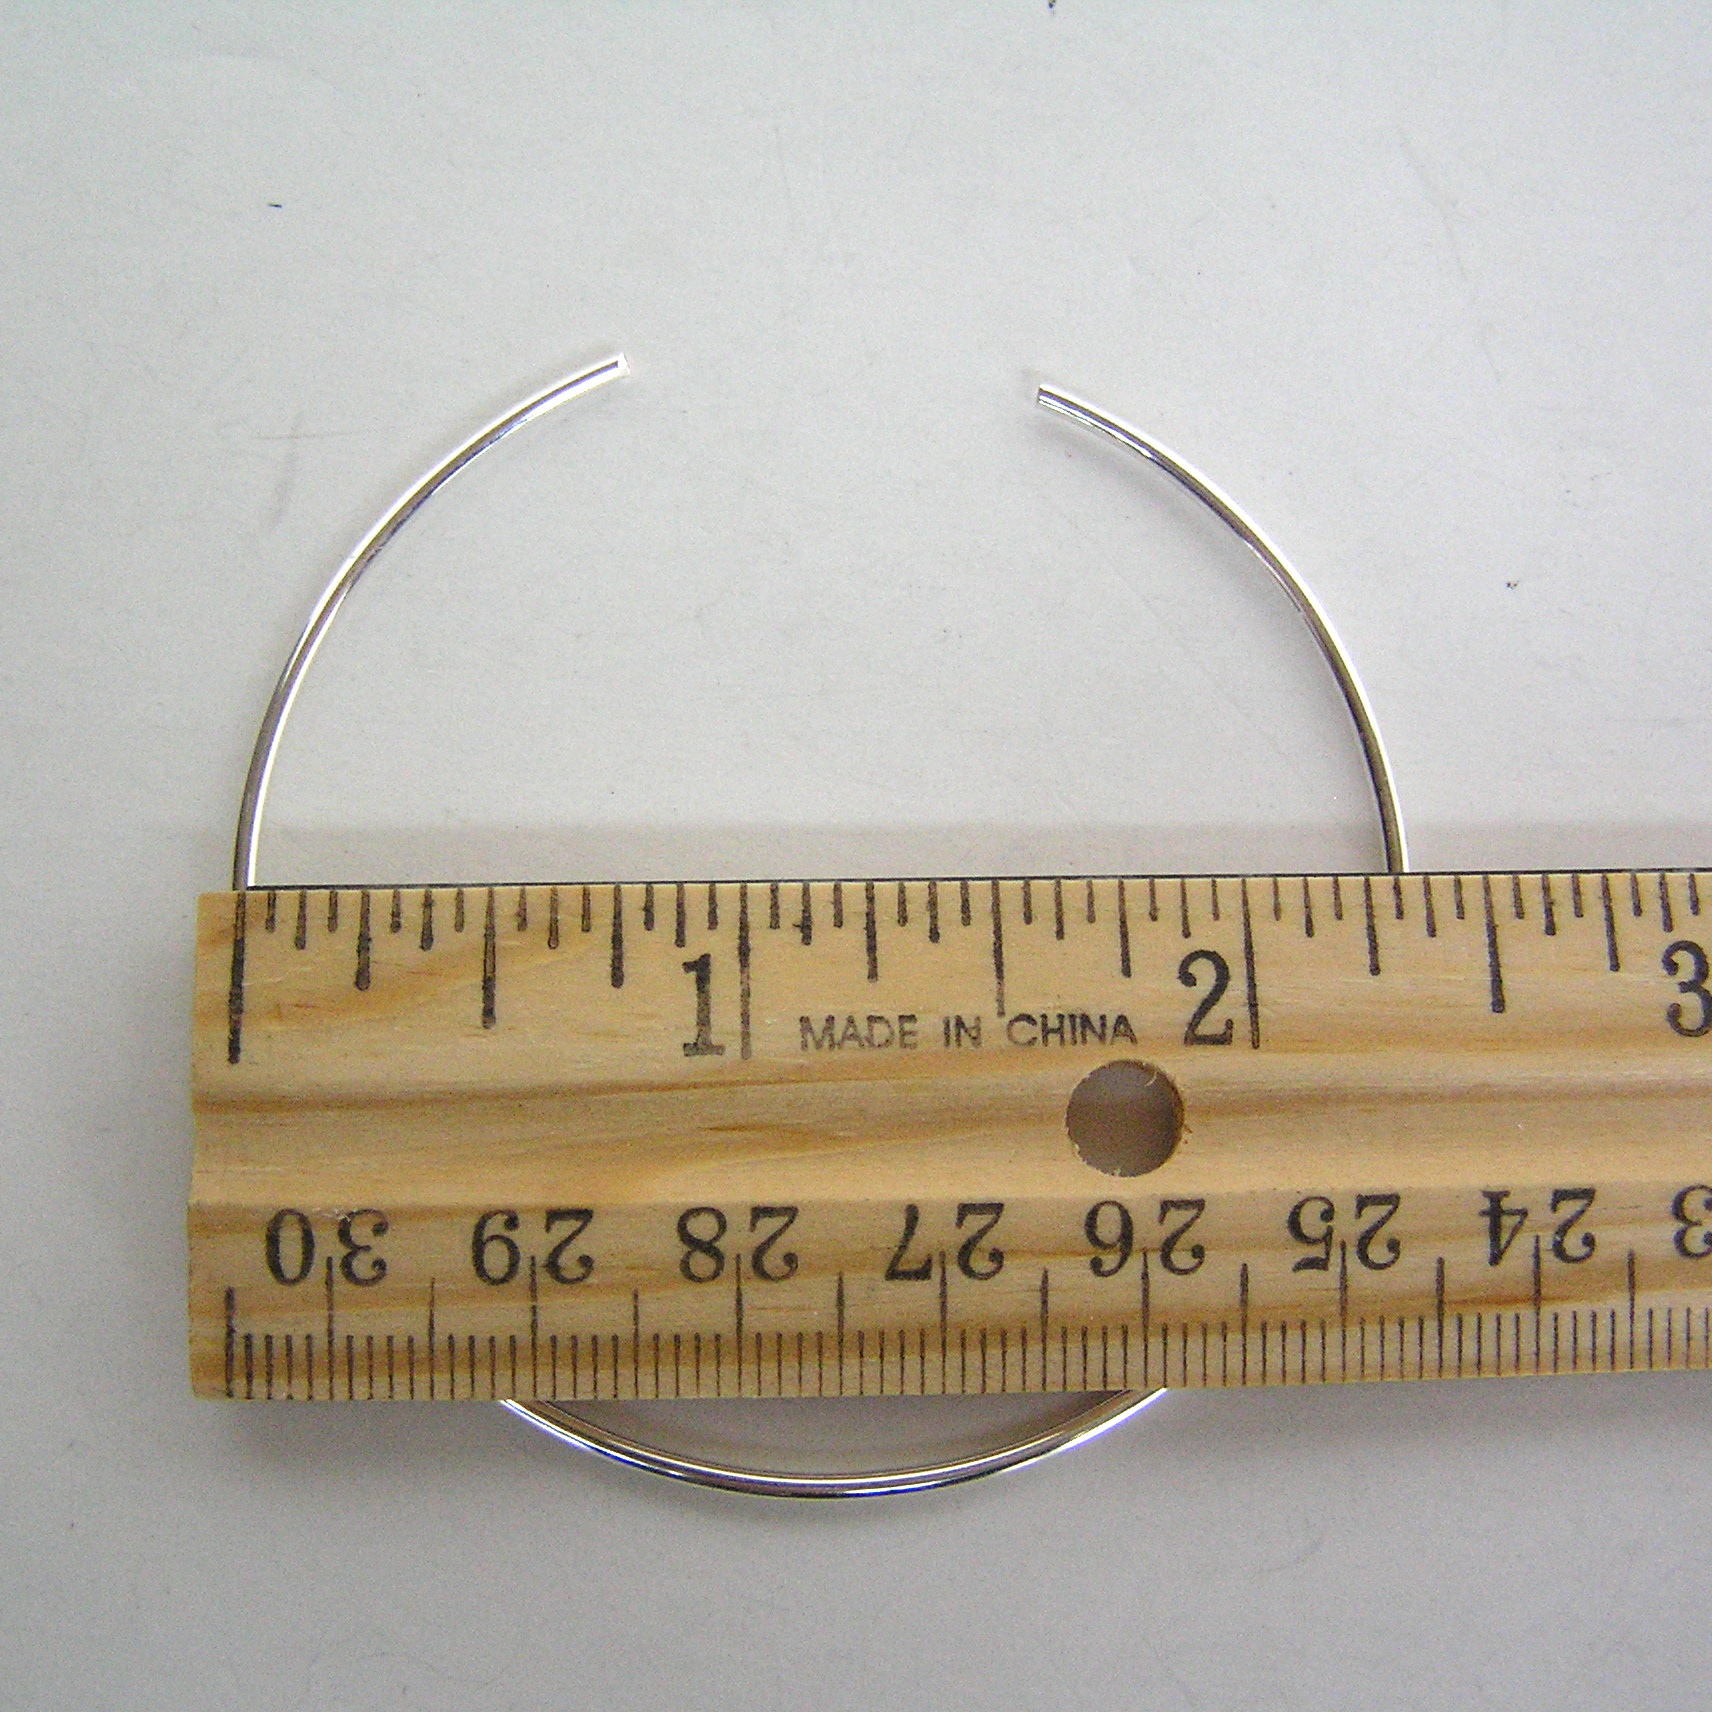
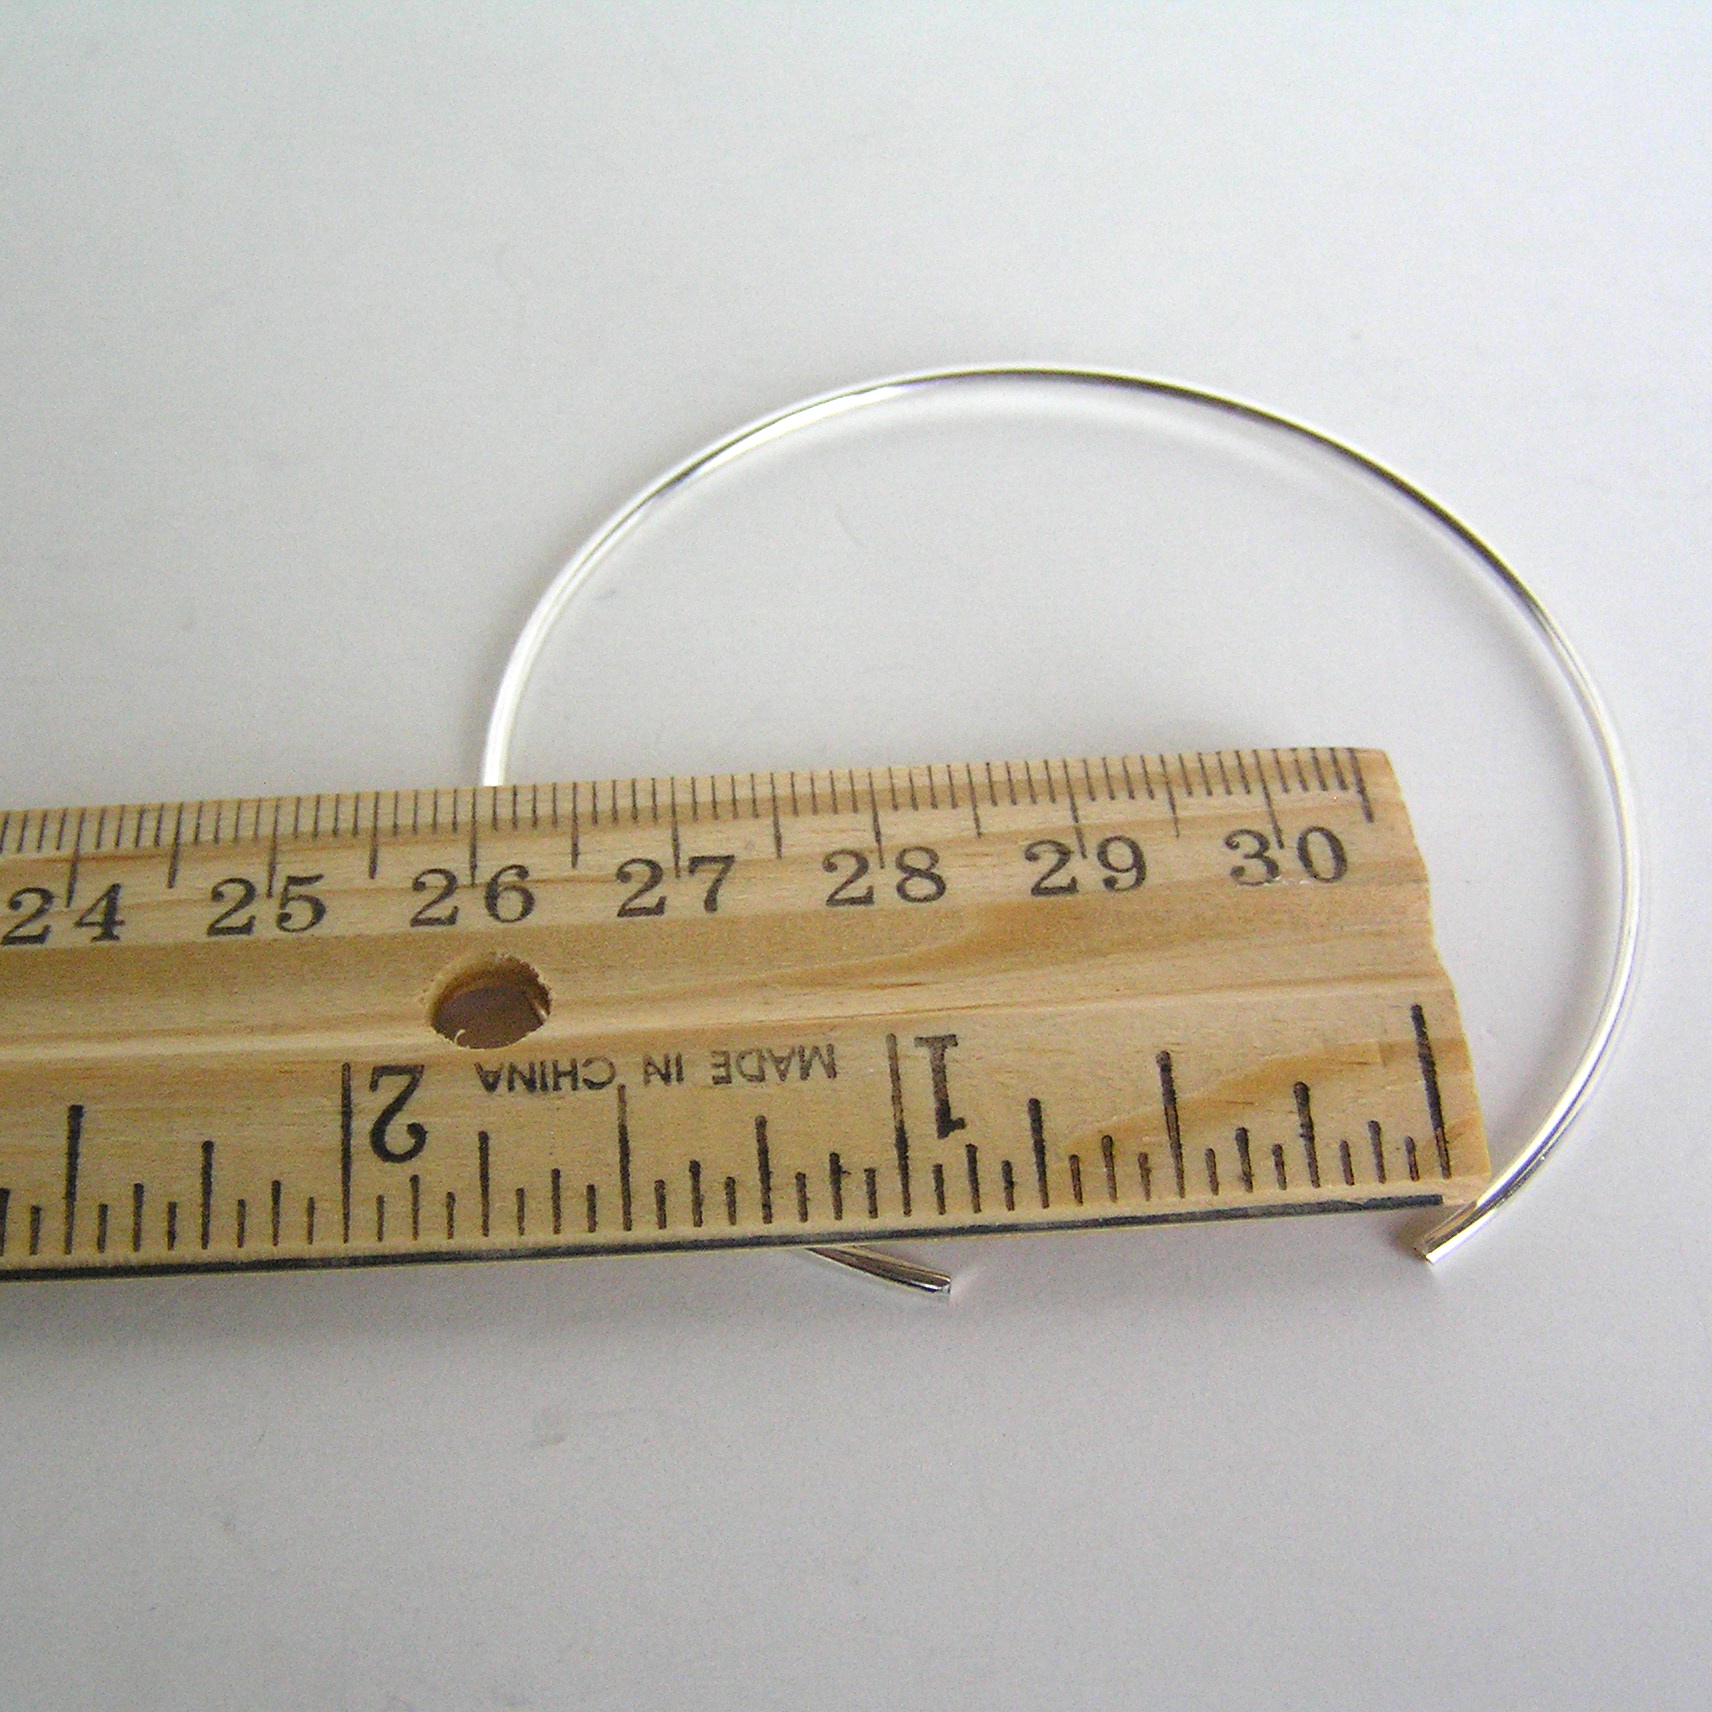
- Grasp the coil on a horizontal angle. It’s not critical to mark the center point of the wire, since you are going to be trimming off the excess wire after it’s shaped. Just make sure it’s approximately the same length from center.
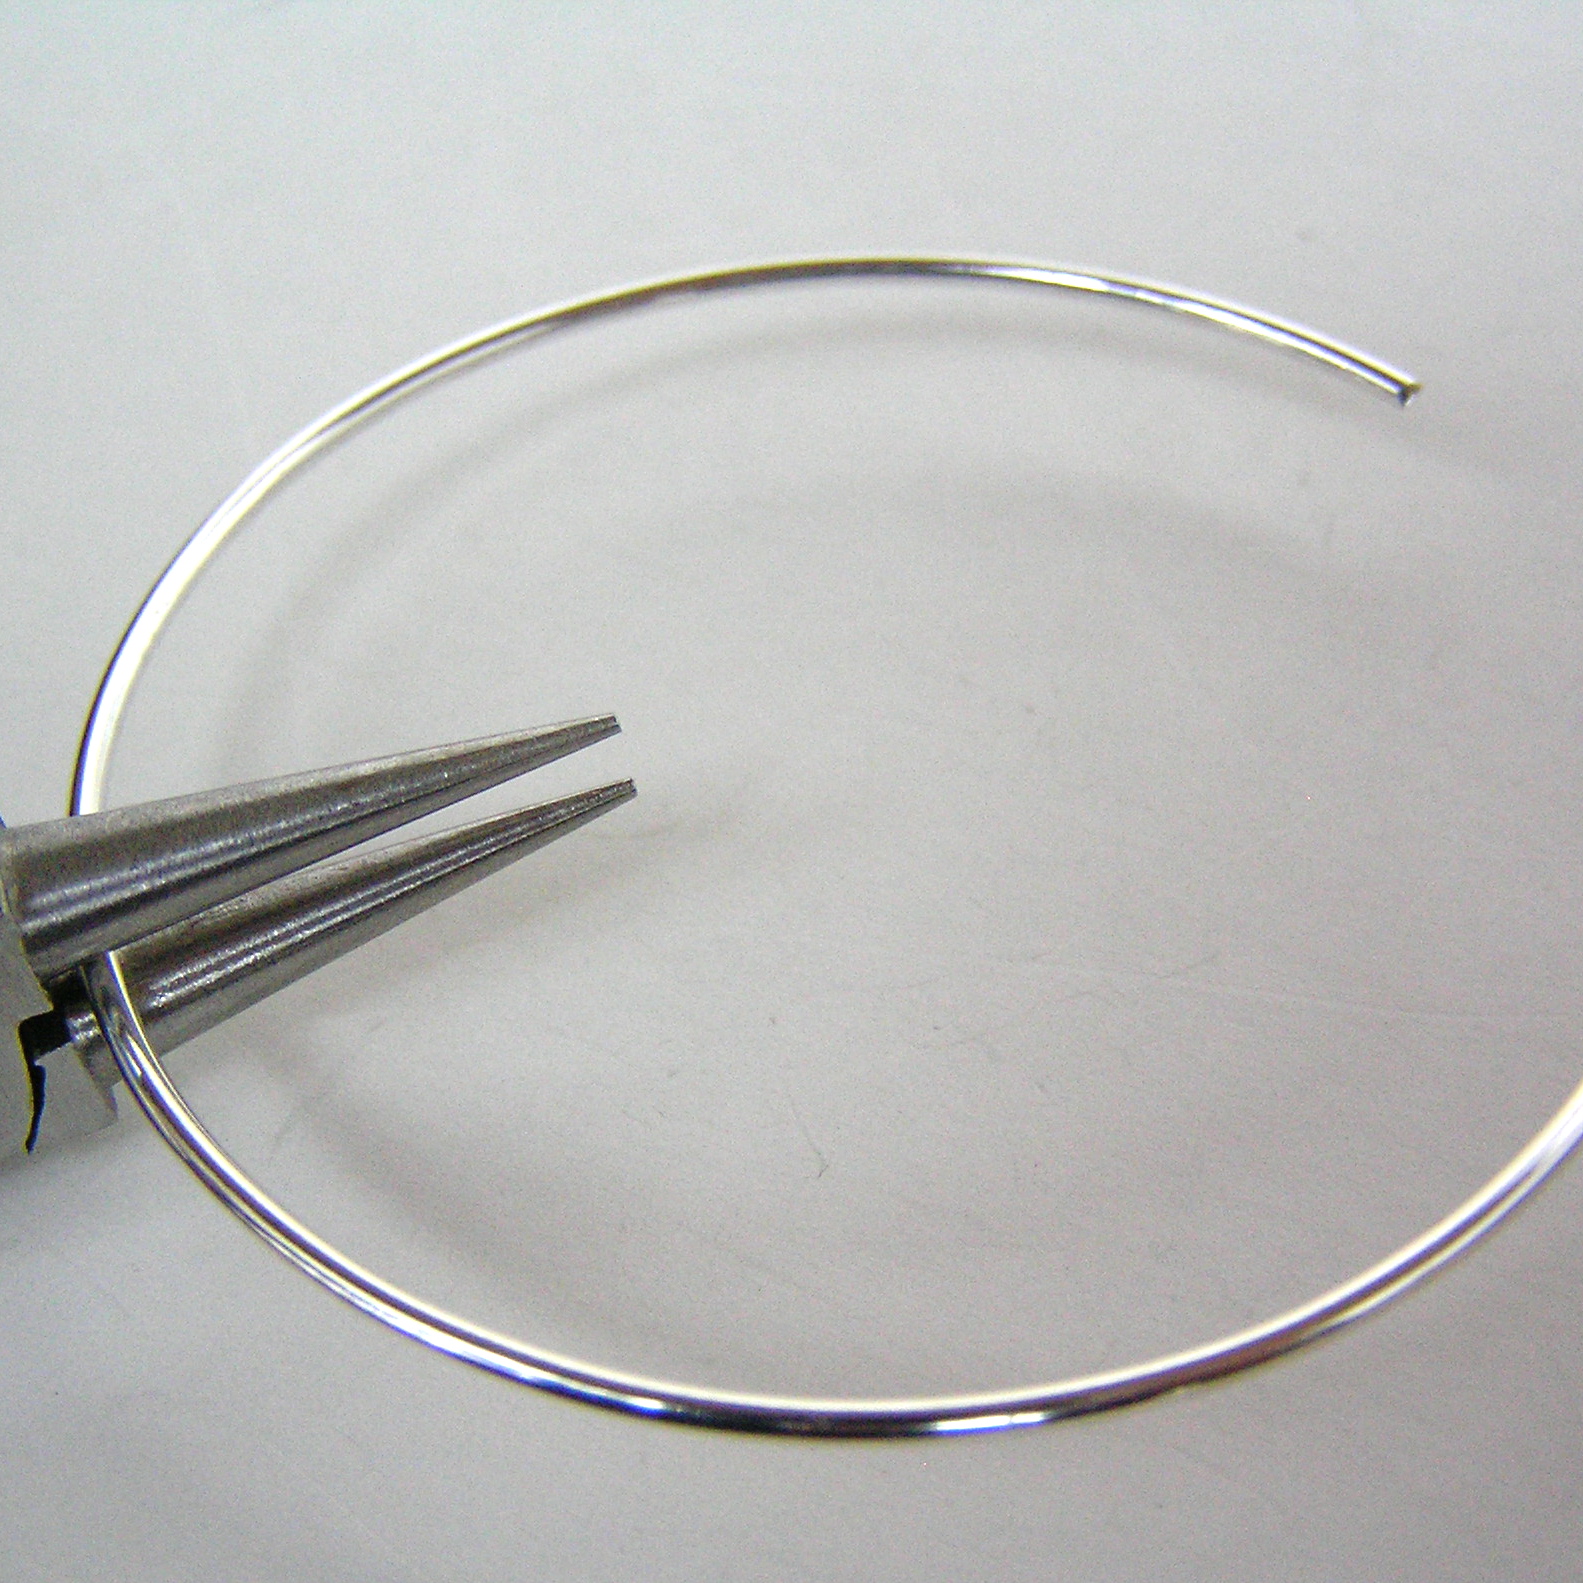
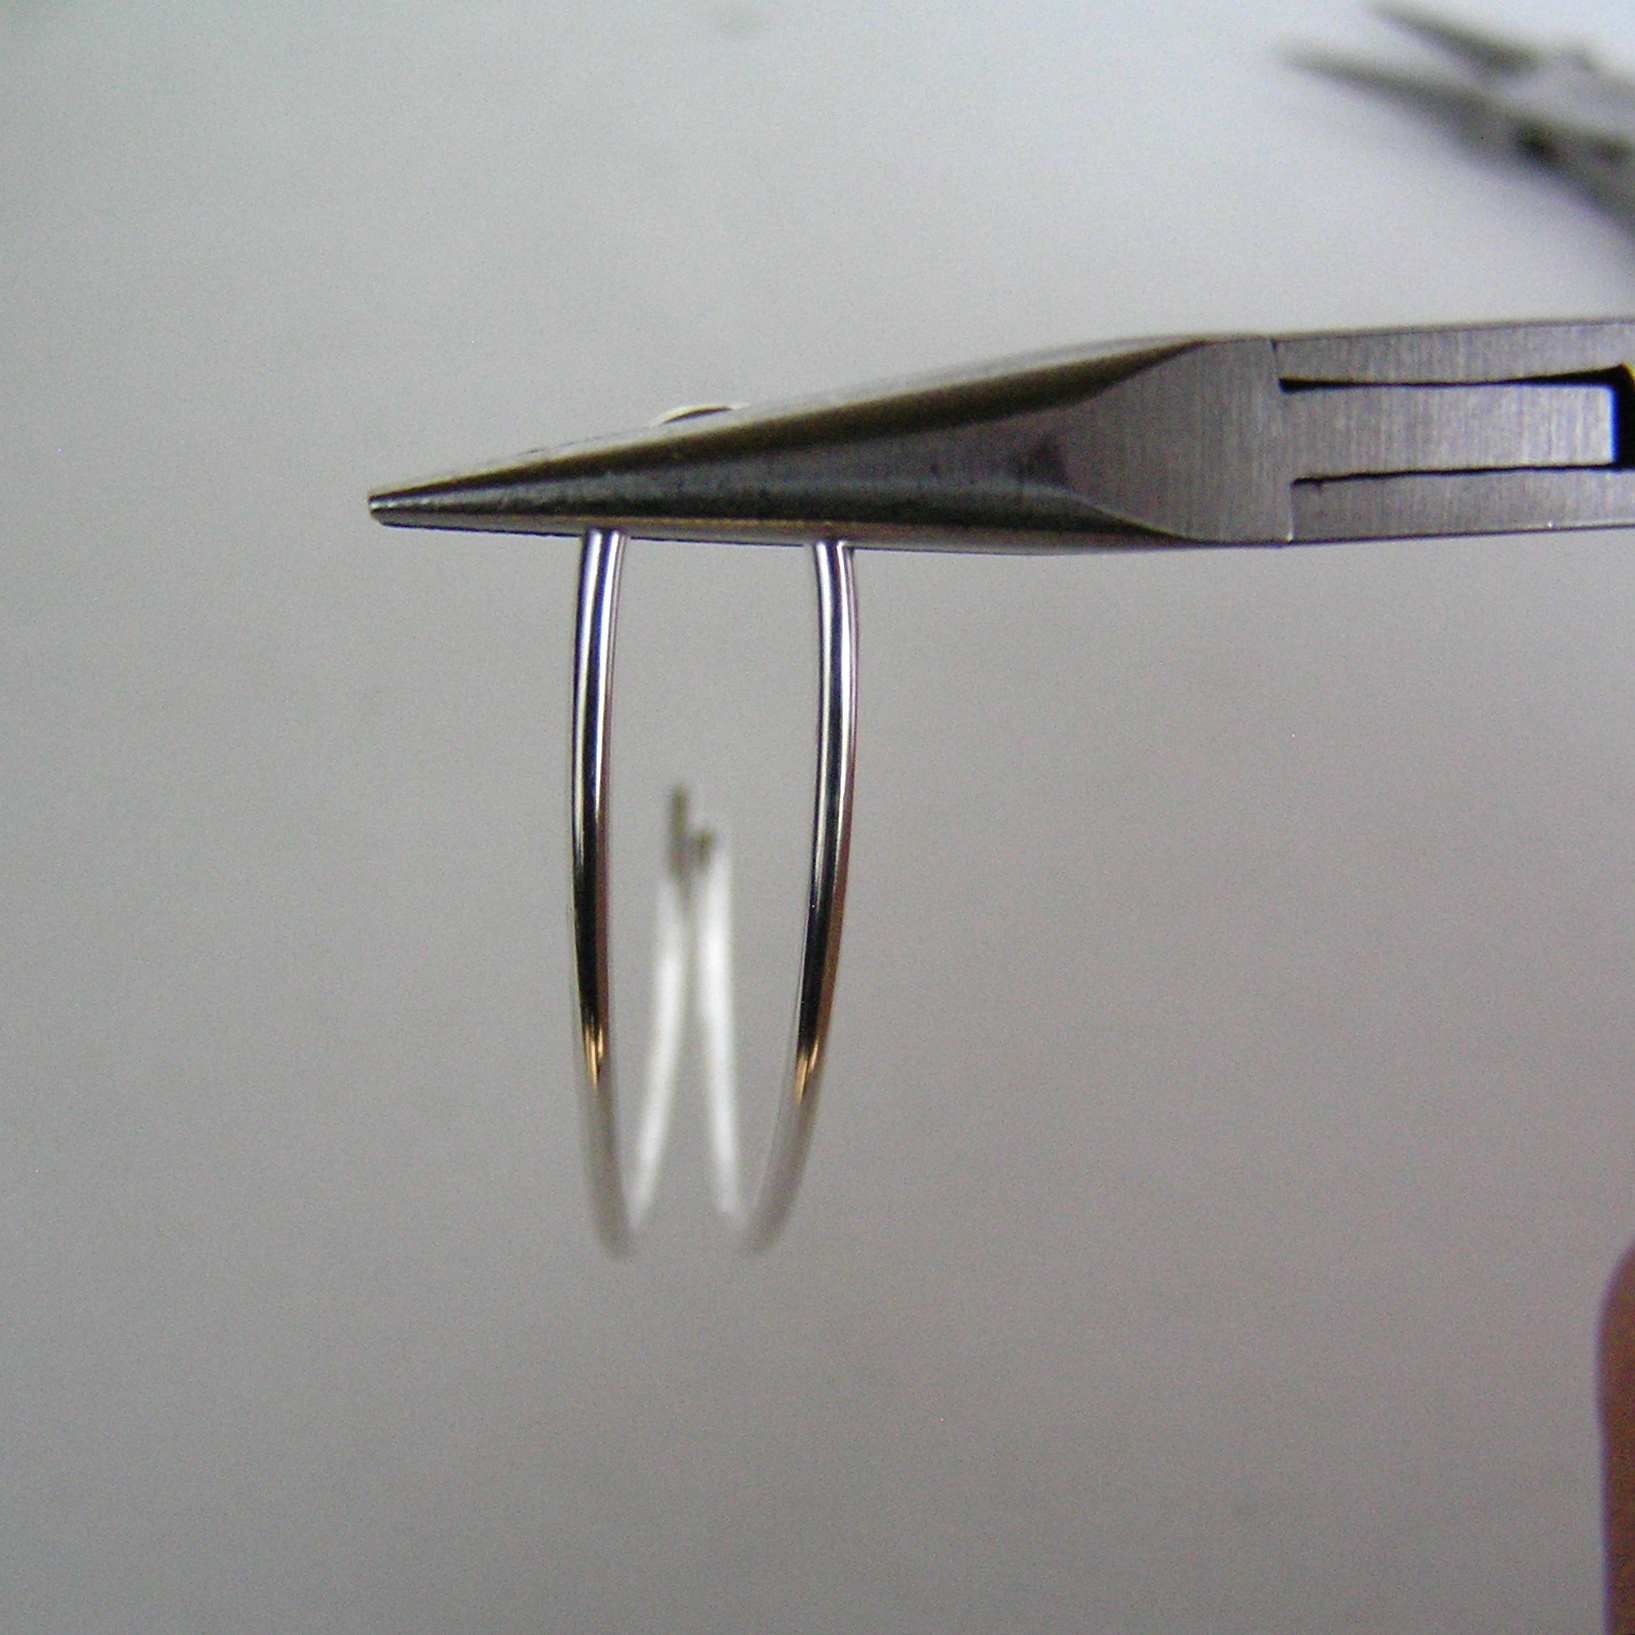
- Bend the full coil into a half coil with your round nose pliers.
- Match the curve on both sides, while you are bending the coil.
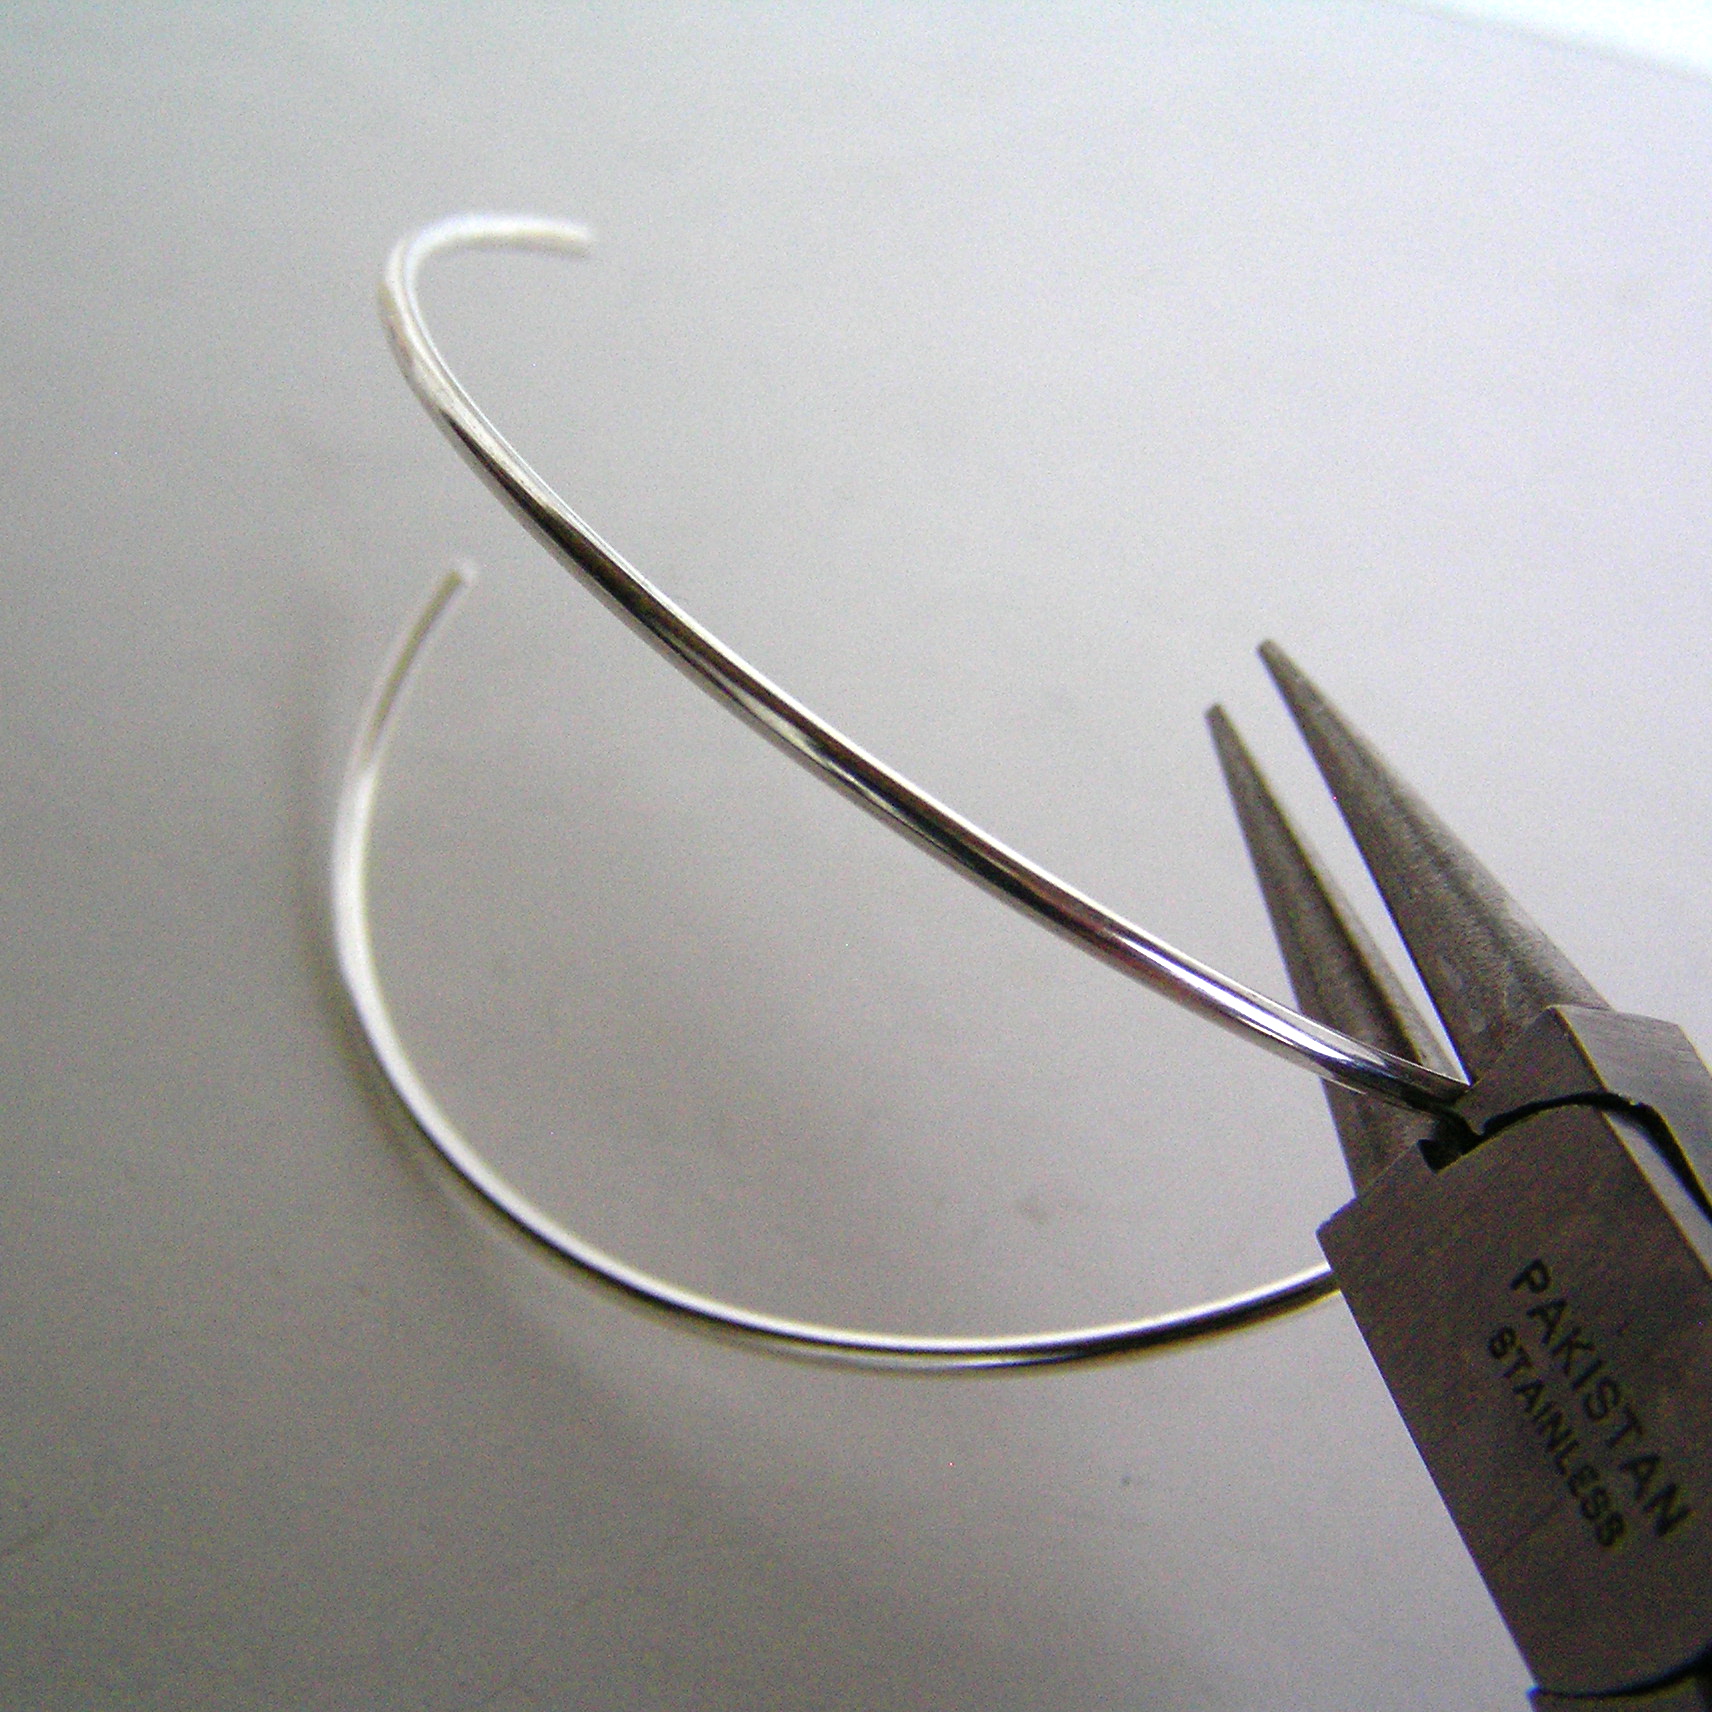

- Check the shape. Continue bending until you’ve reached a “U” shape. You want to create a perfect “U” with two parallel curves.
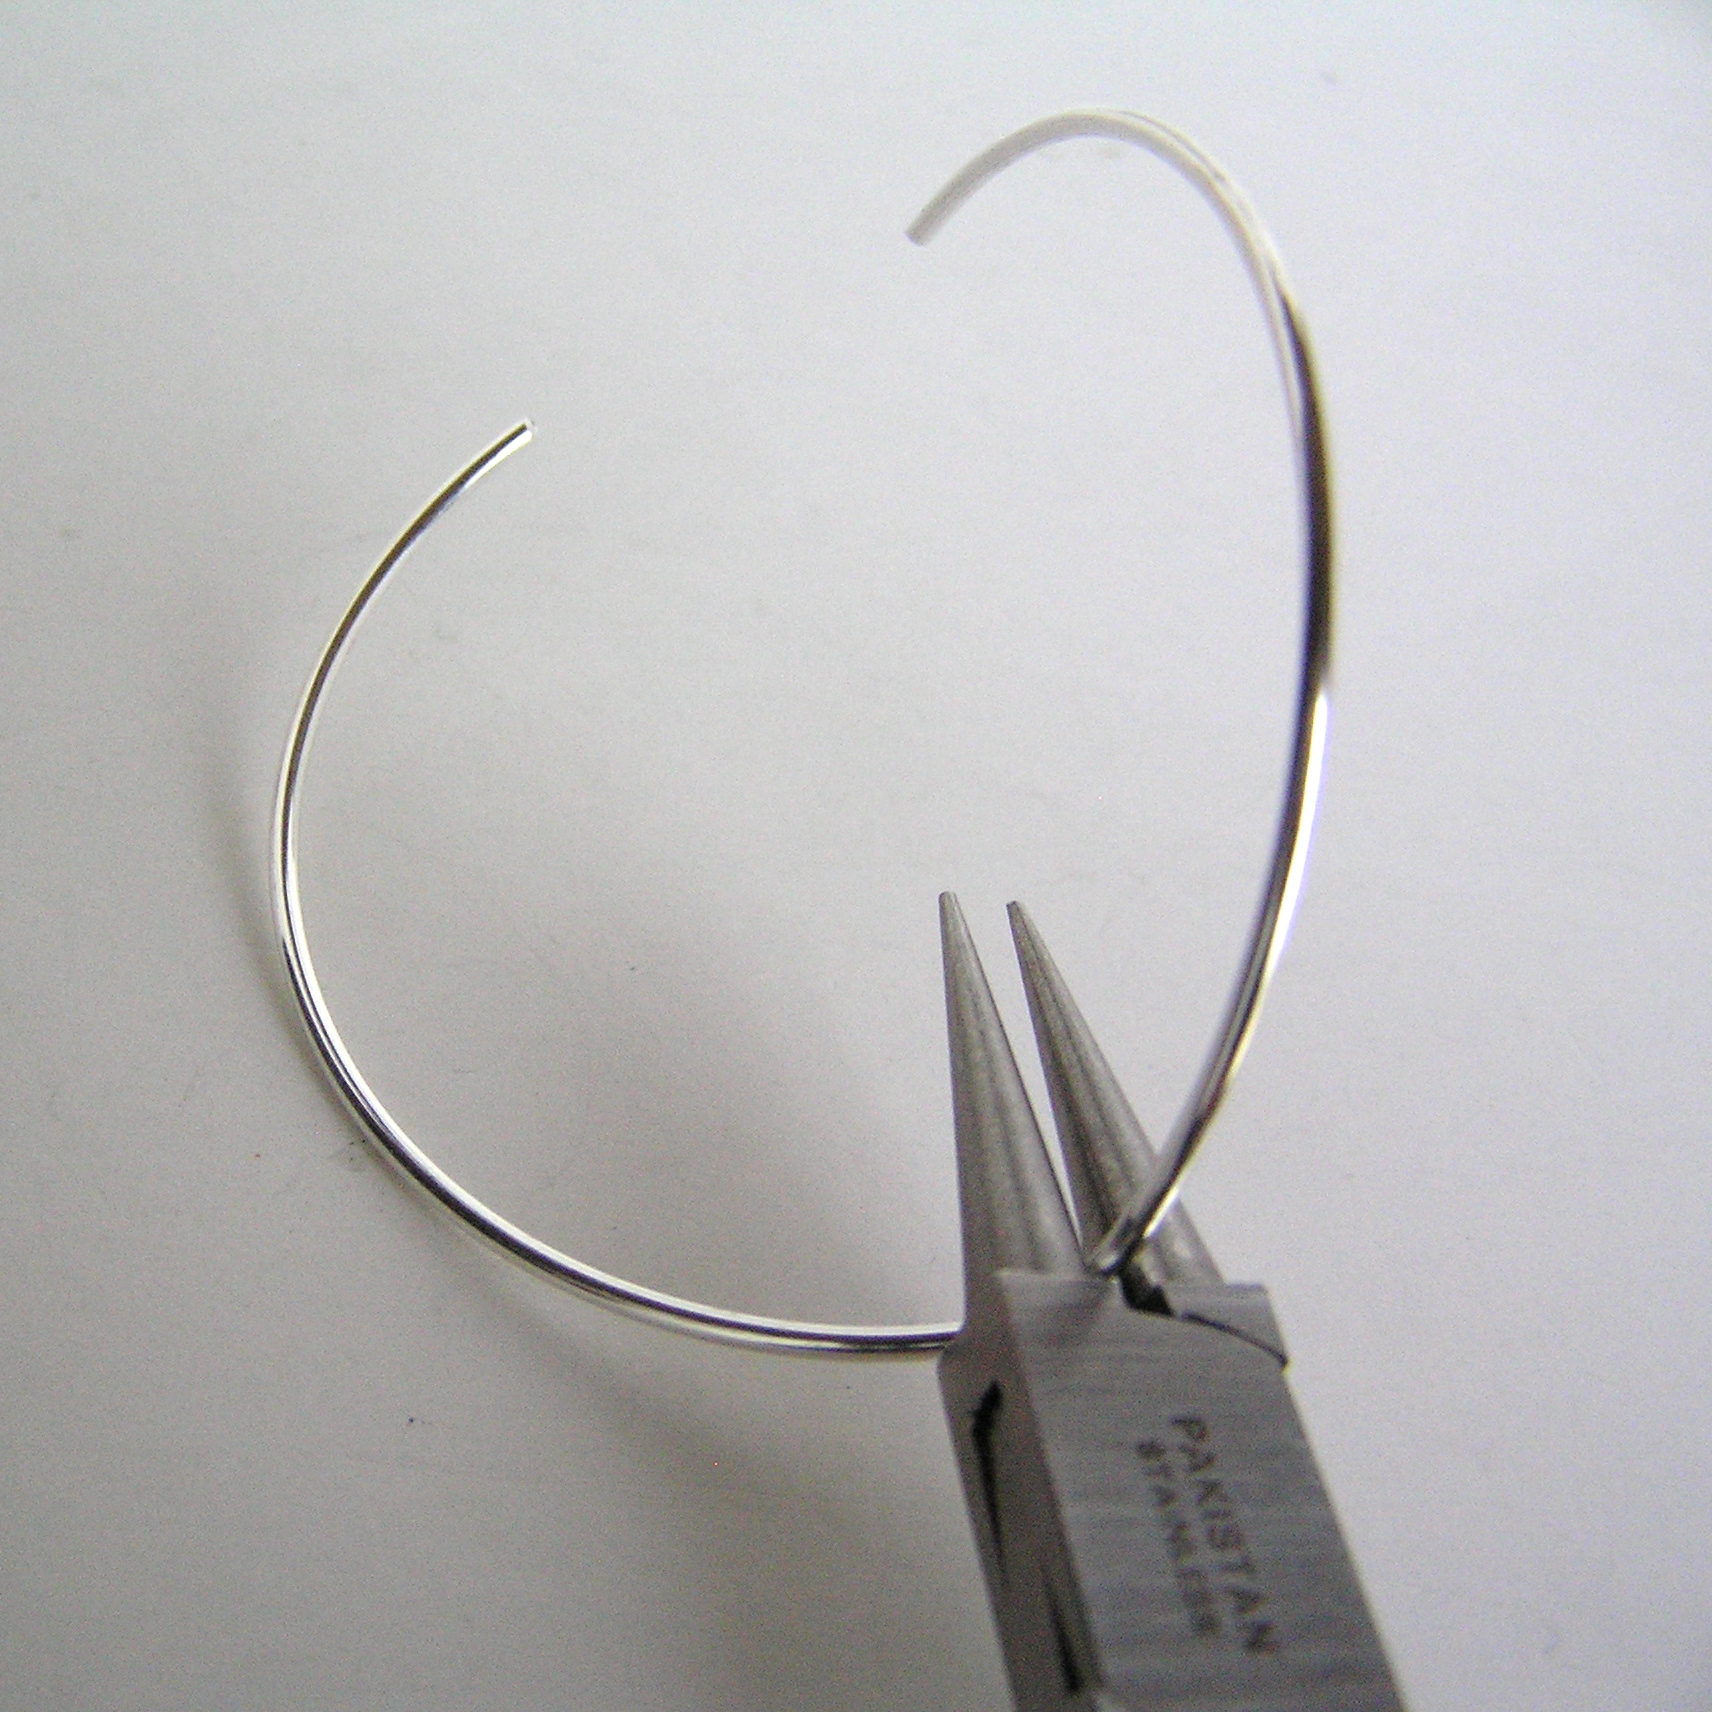
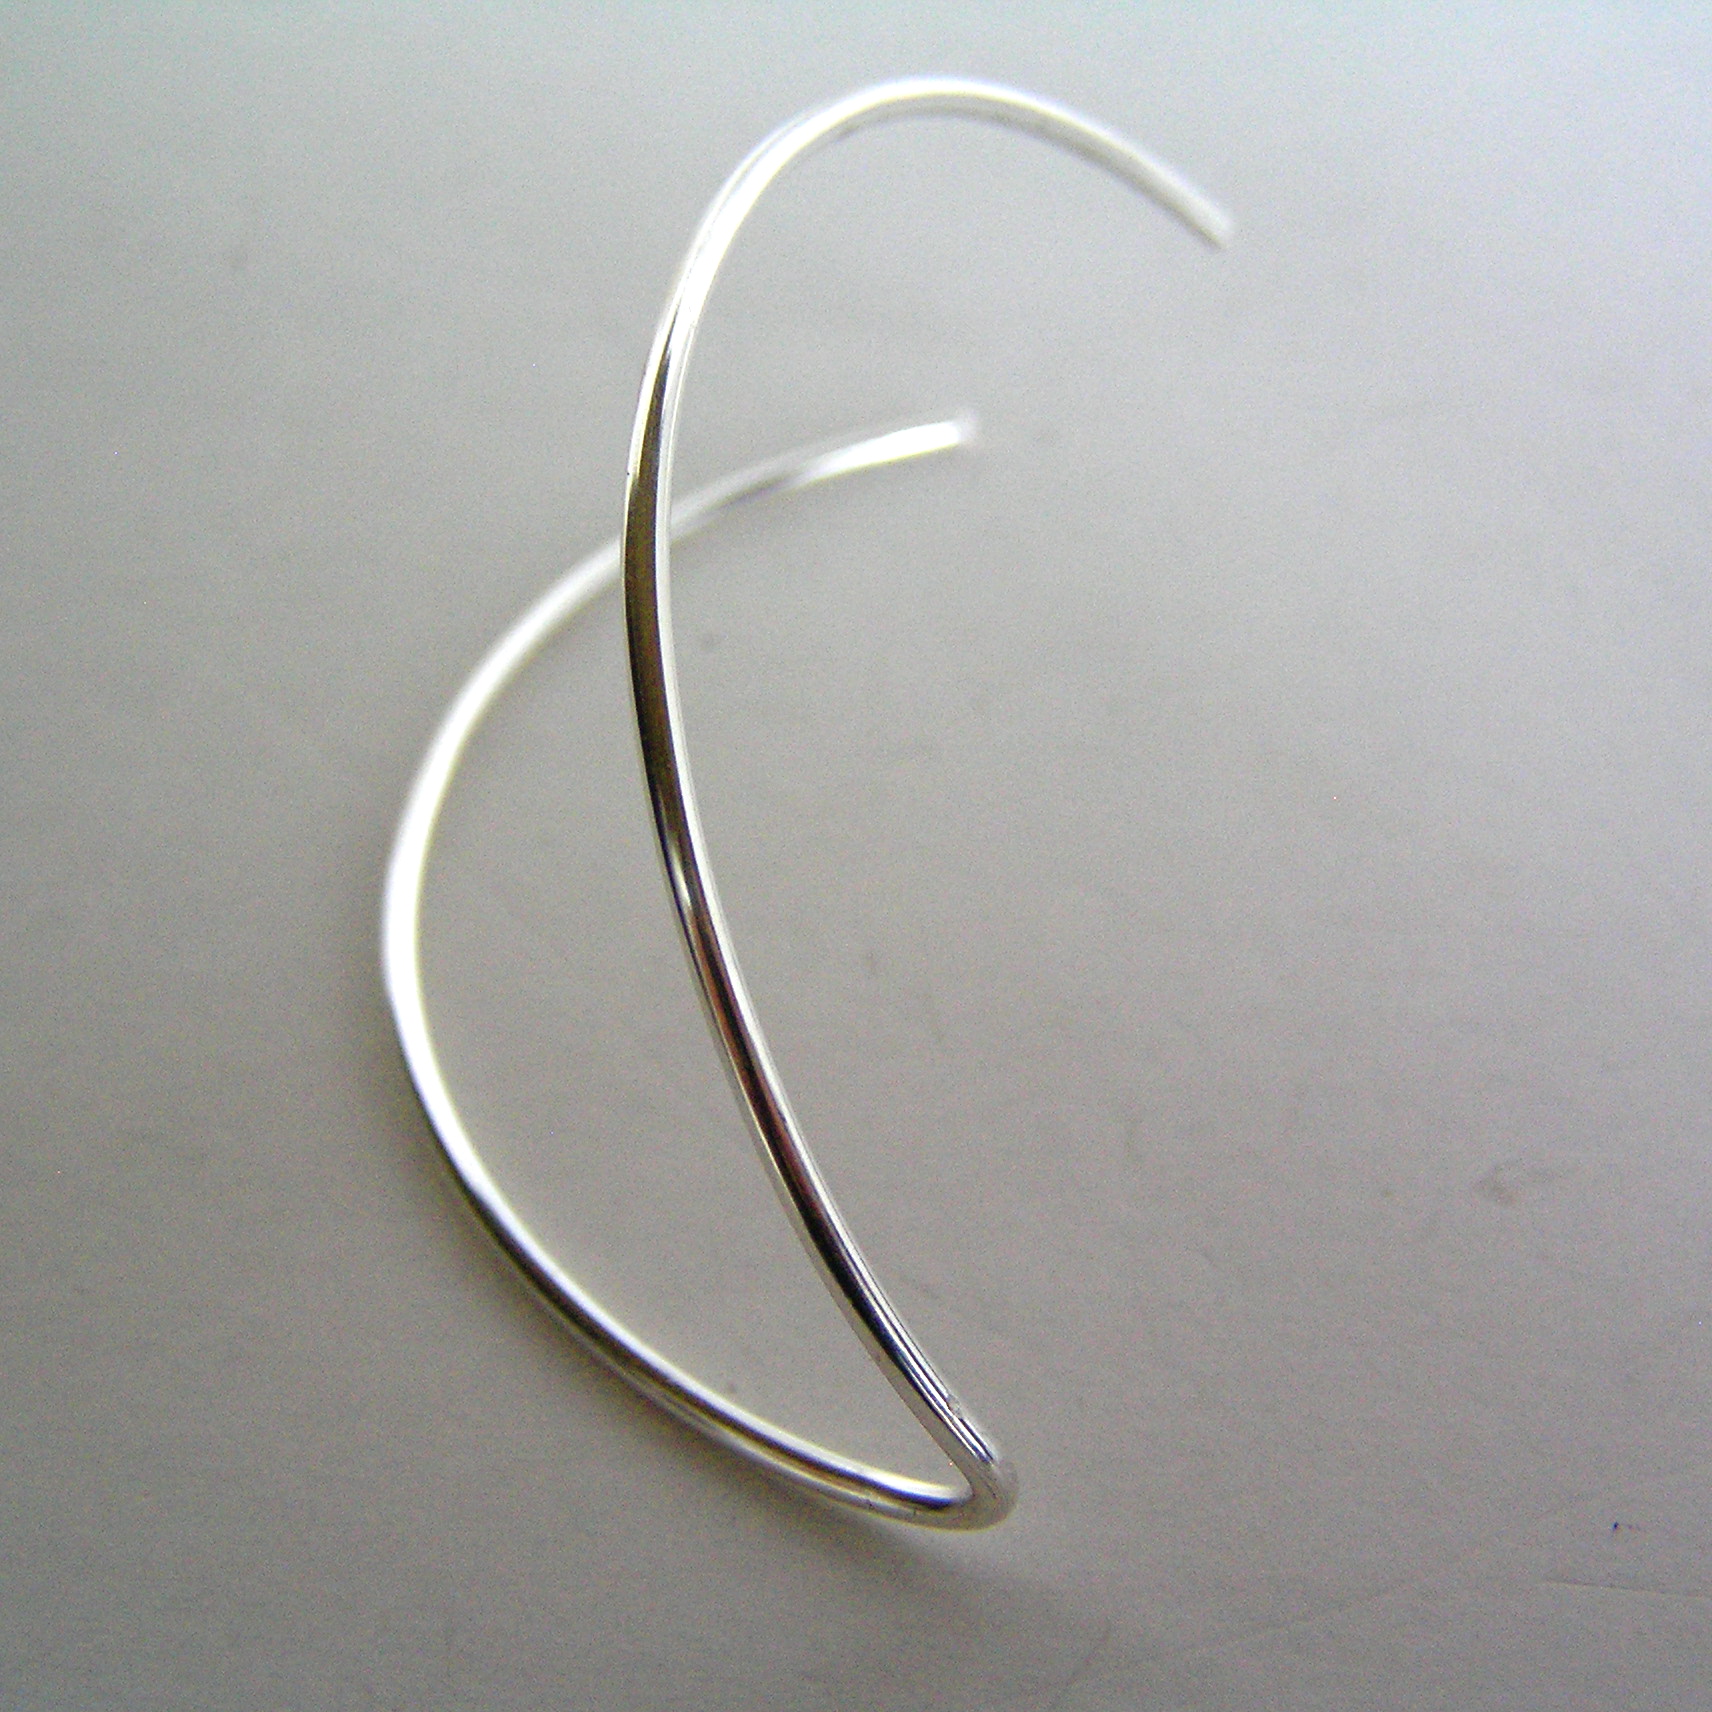
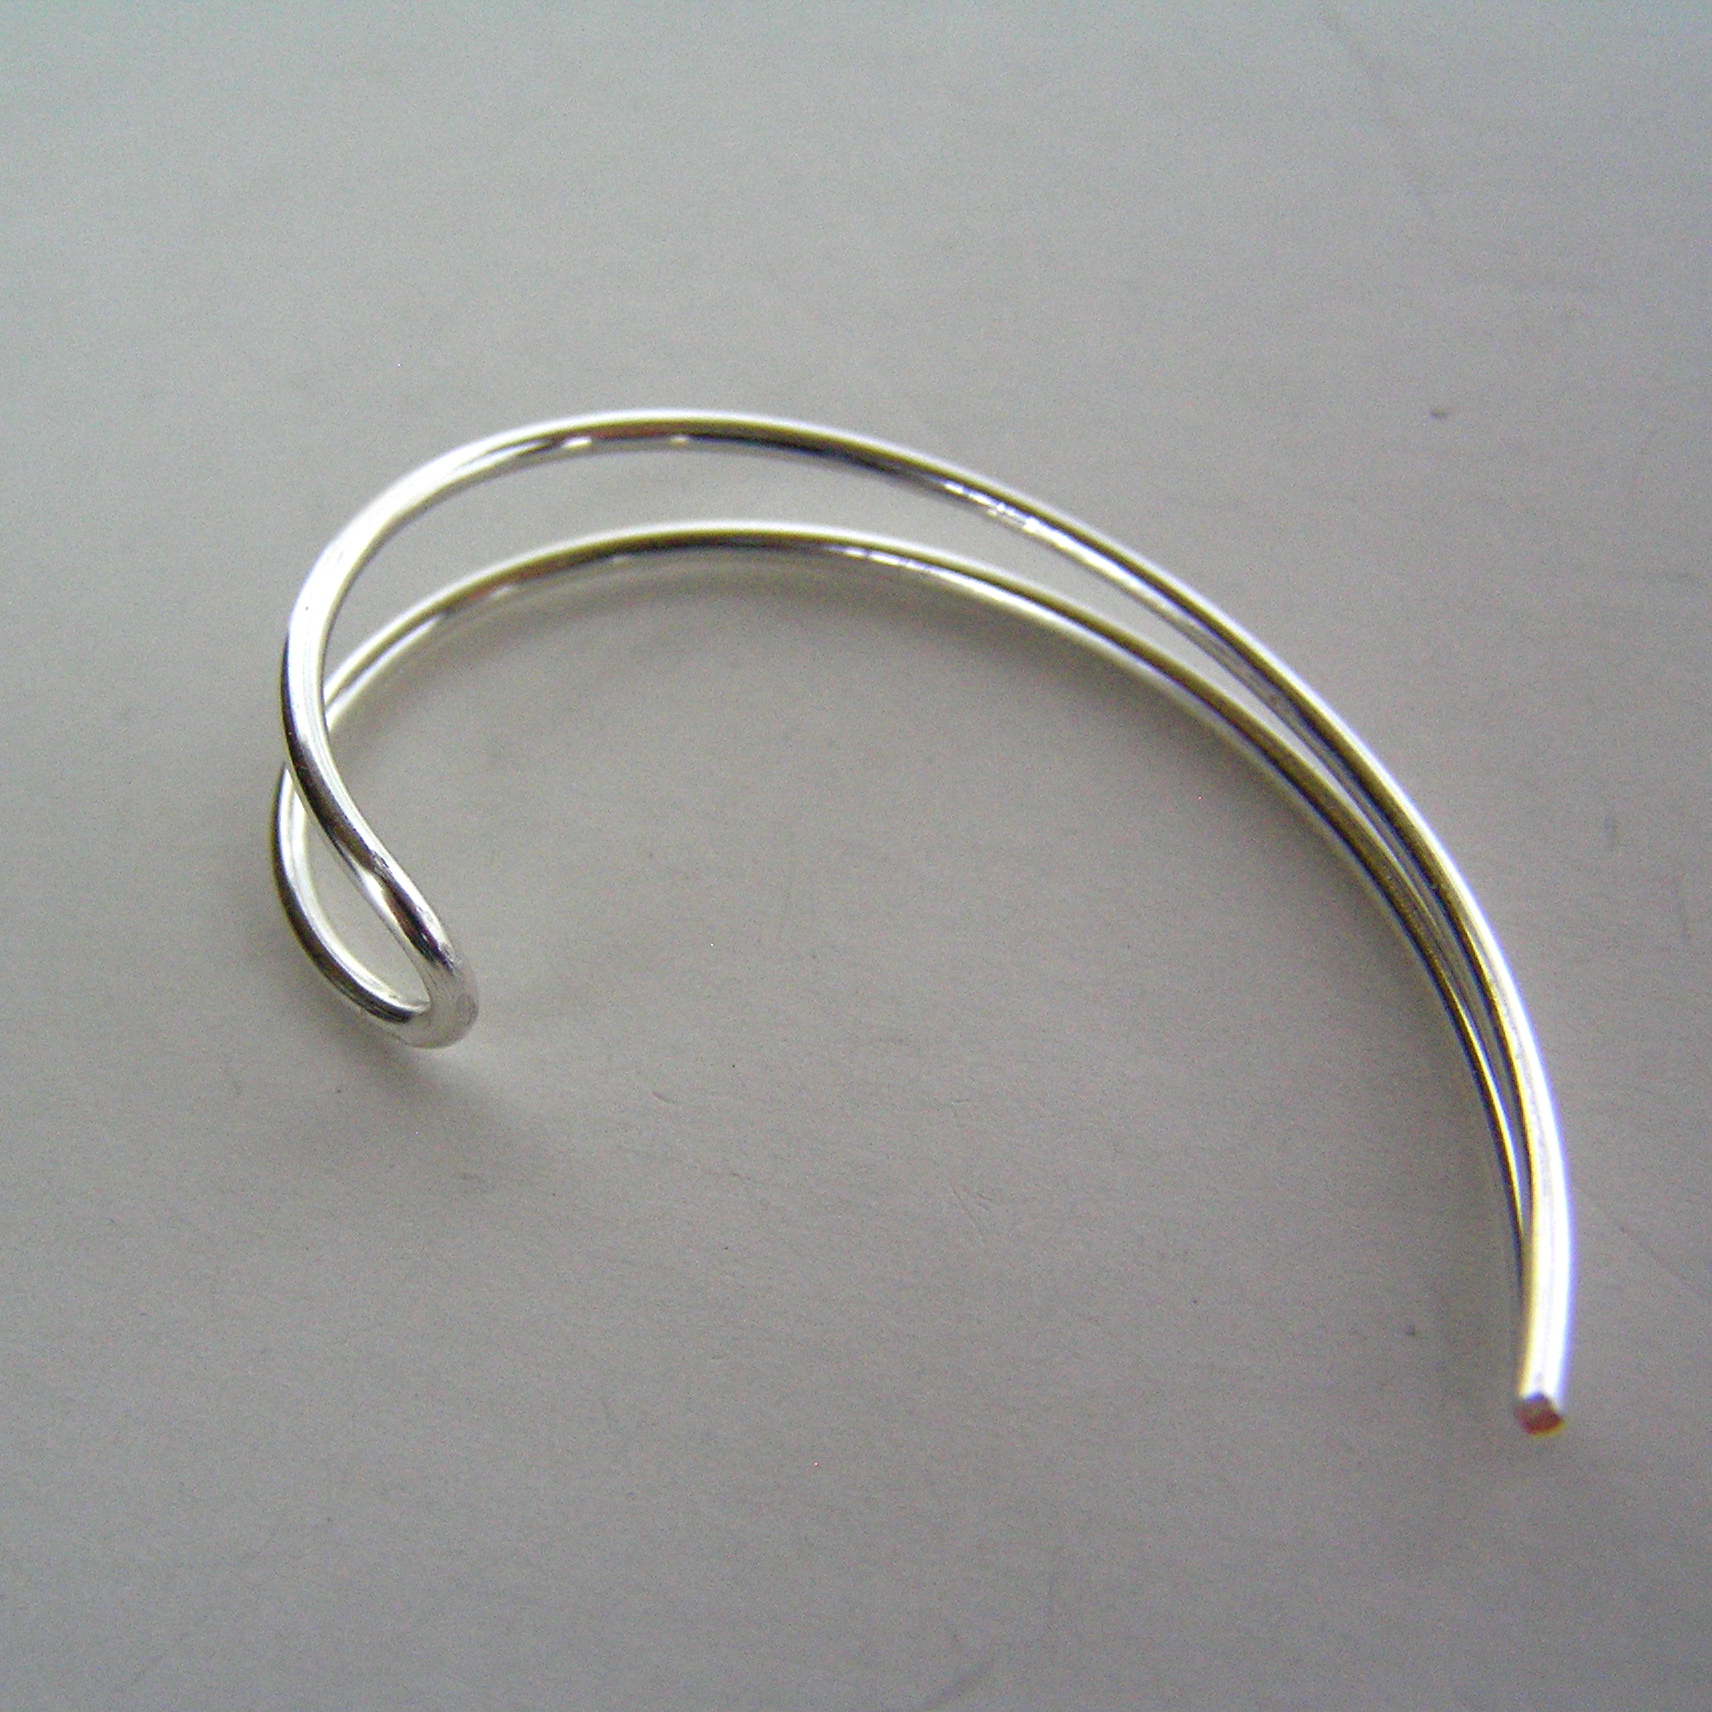
- Grasp the “U”shape tightly, and gently curve the ends of the wire near the “U” into a coil or kidney bean shape.
- This is what it should look like when fully curved.
- Now, put your curved wire onto the ring mandrel and wrap it around the mandrel to create your ring. You can use the sizing on the mandrel to help you size your ring correctly.
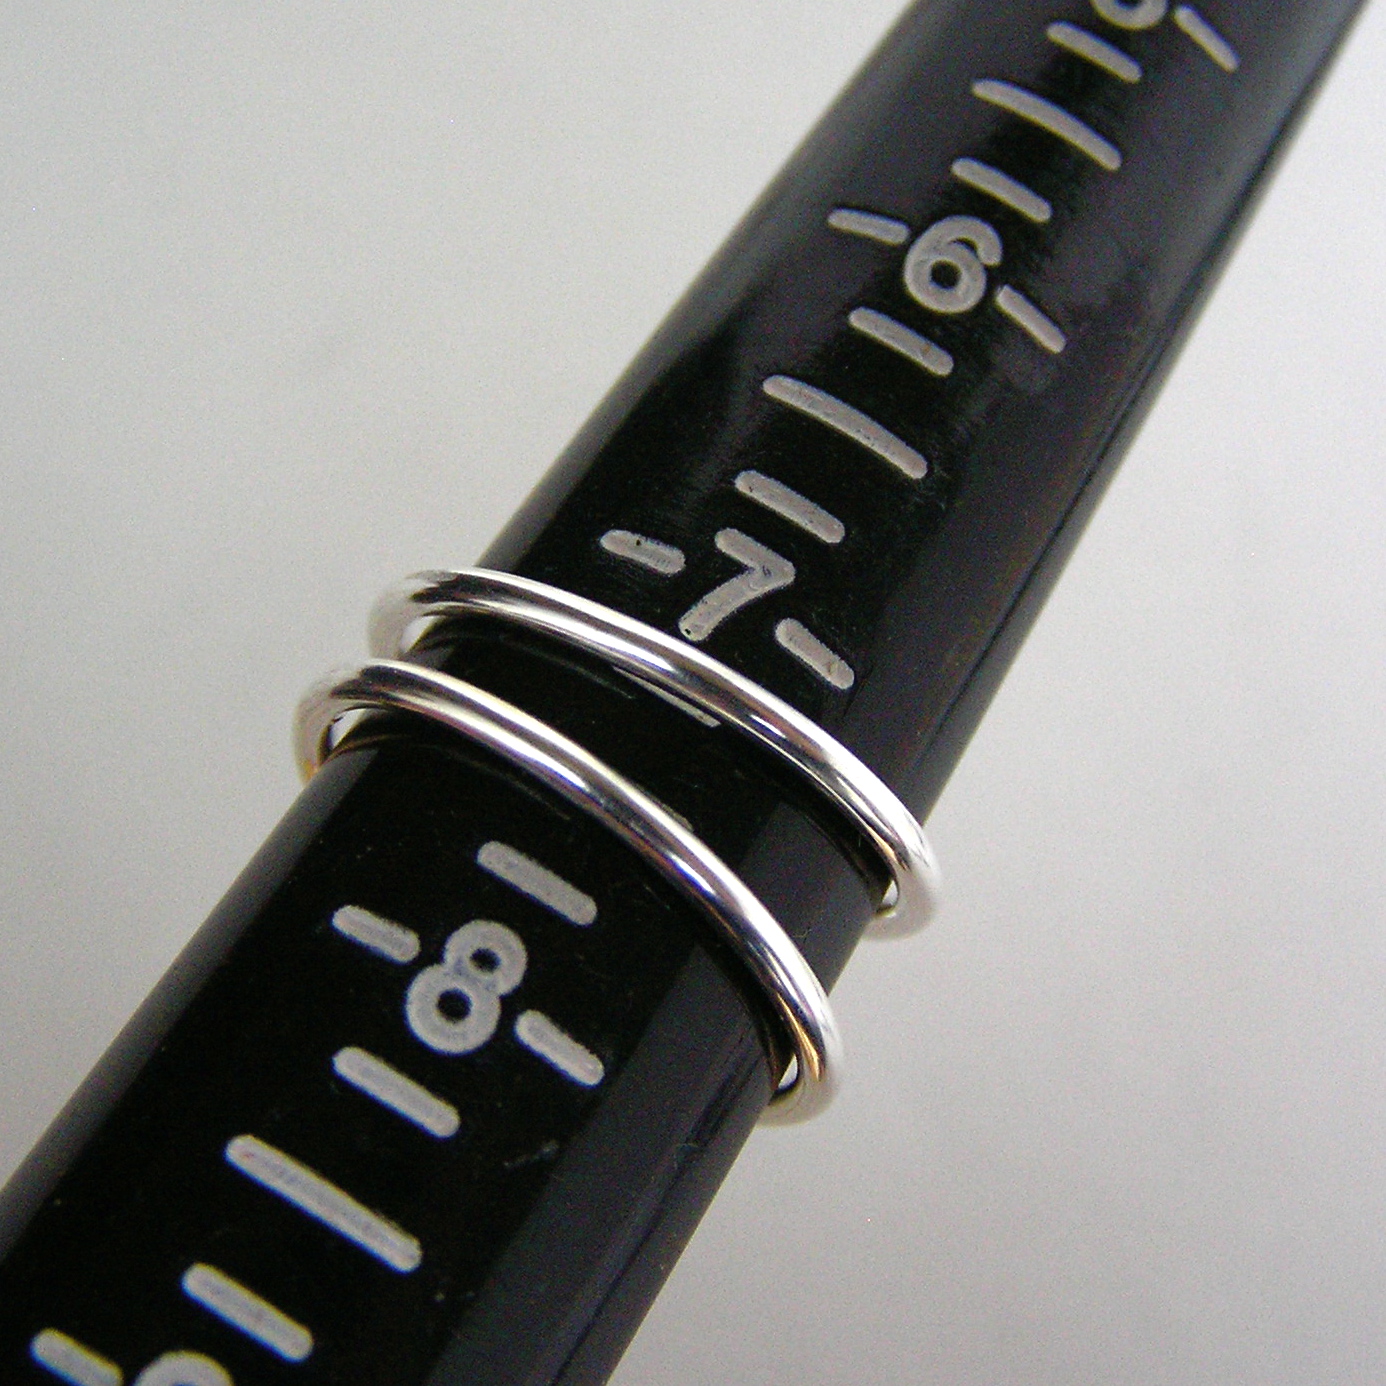
- While the wire is still on your mandrel, slip the crystal beads onto the wire, Once you have added your beds, gently slip them off of the mandrel.
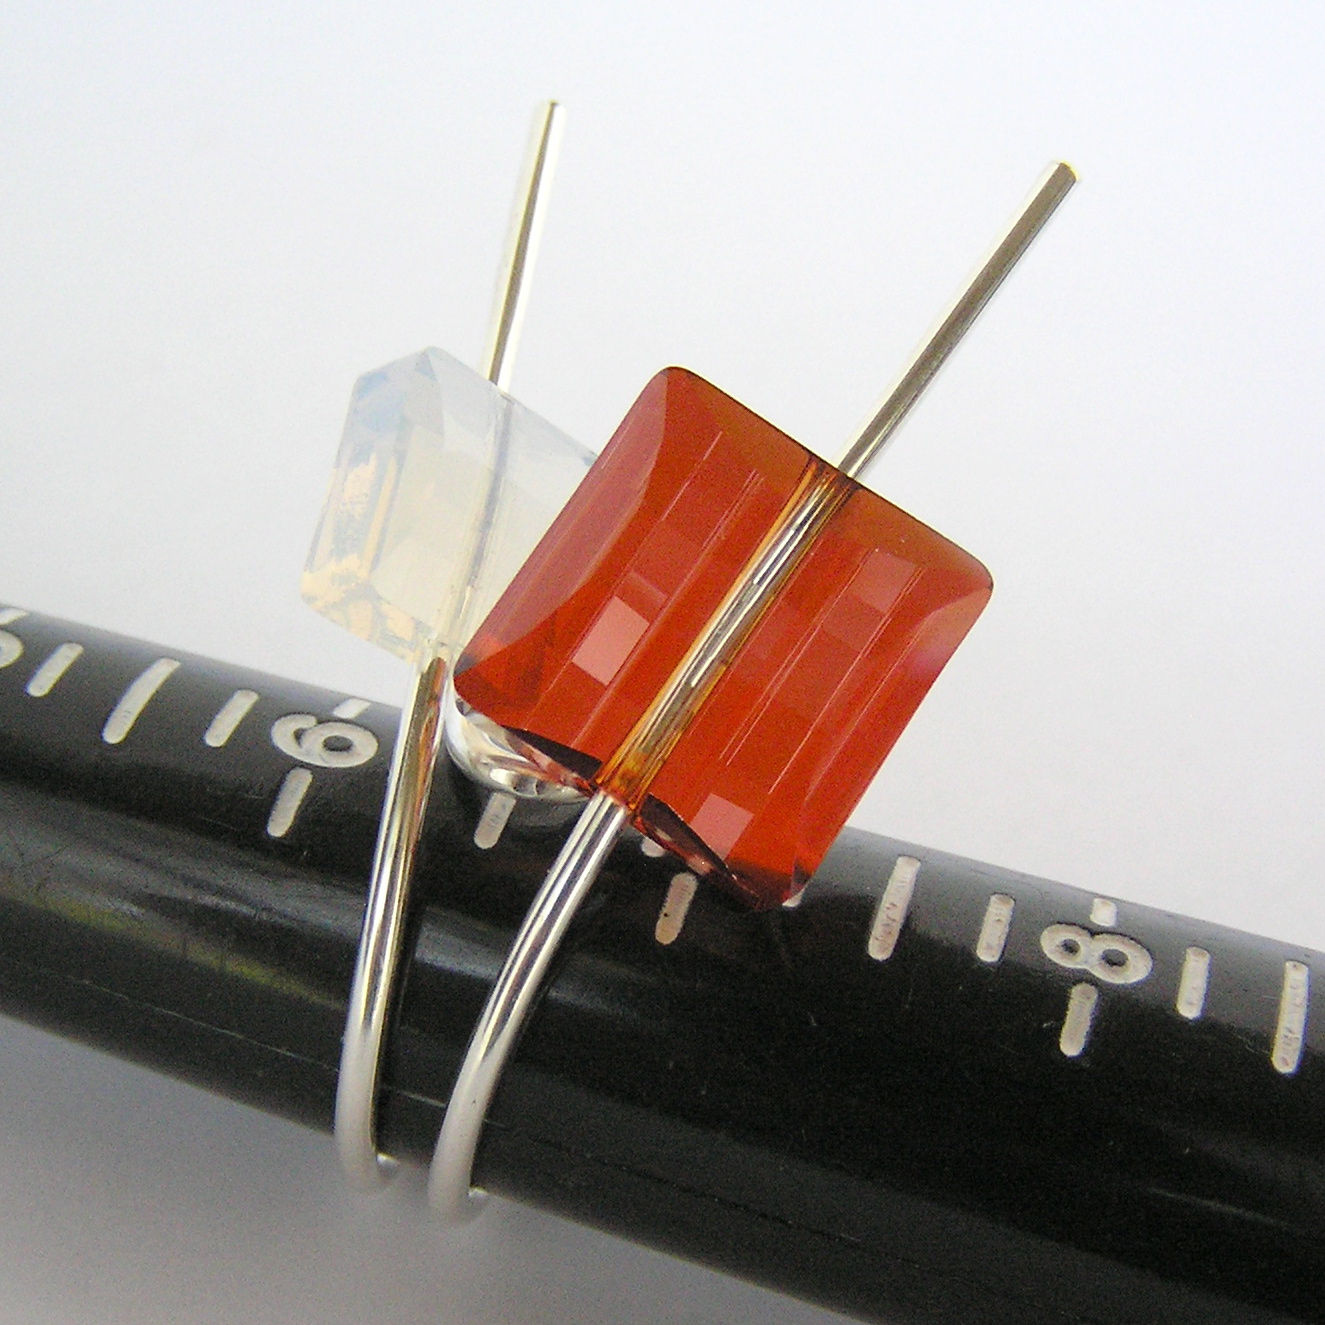
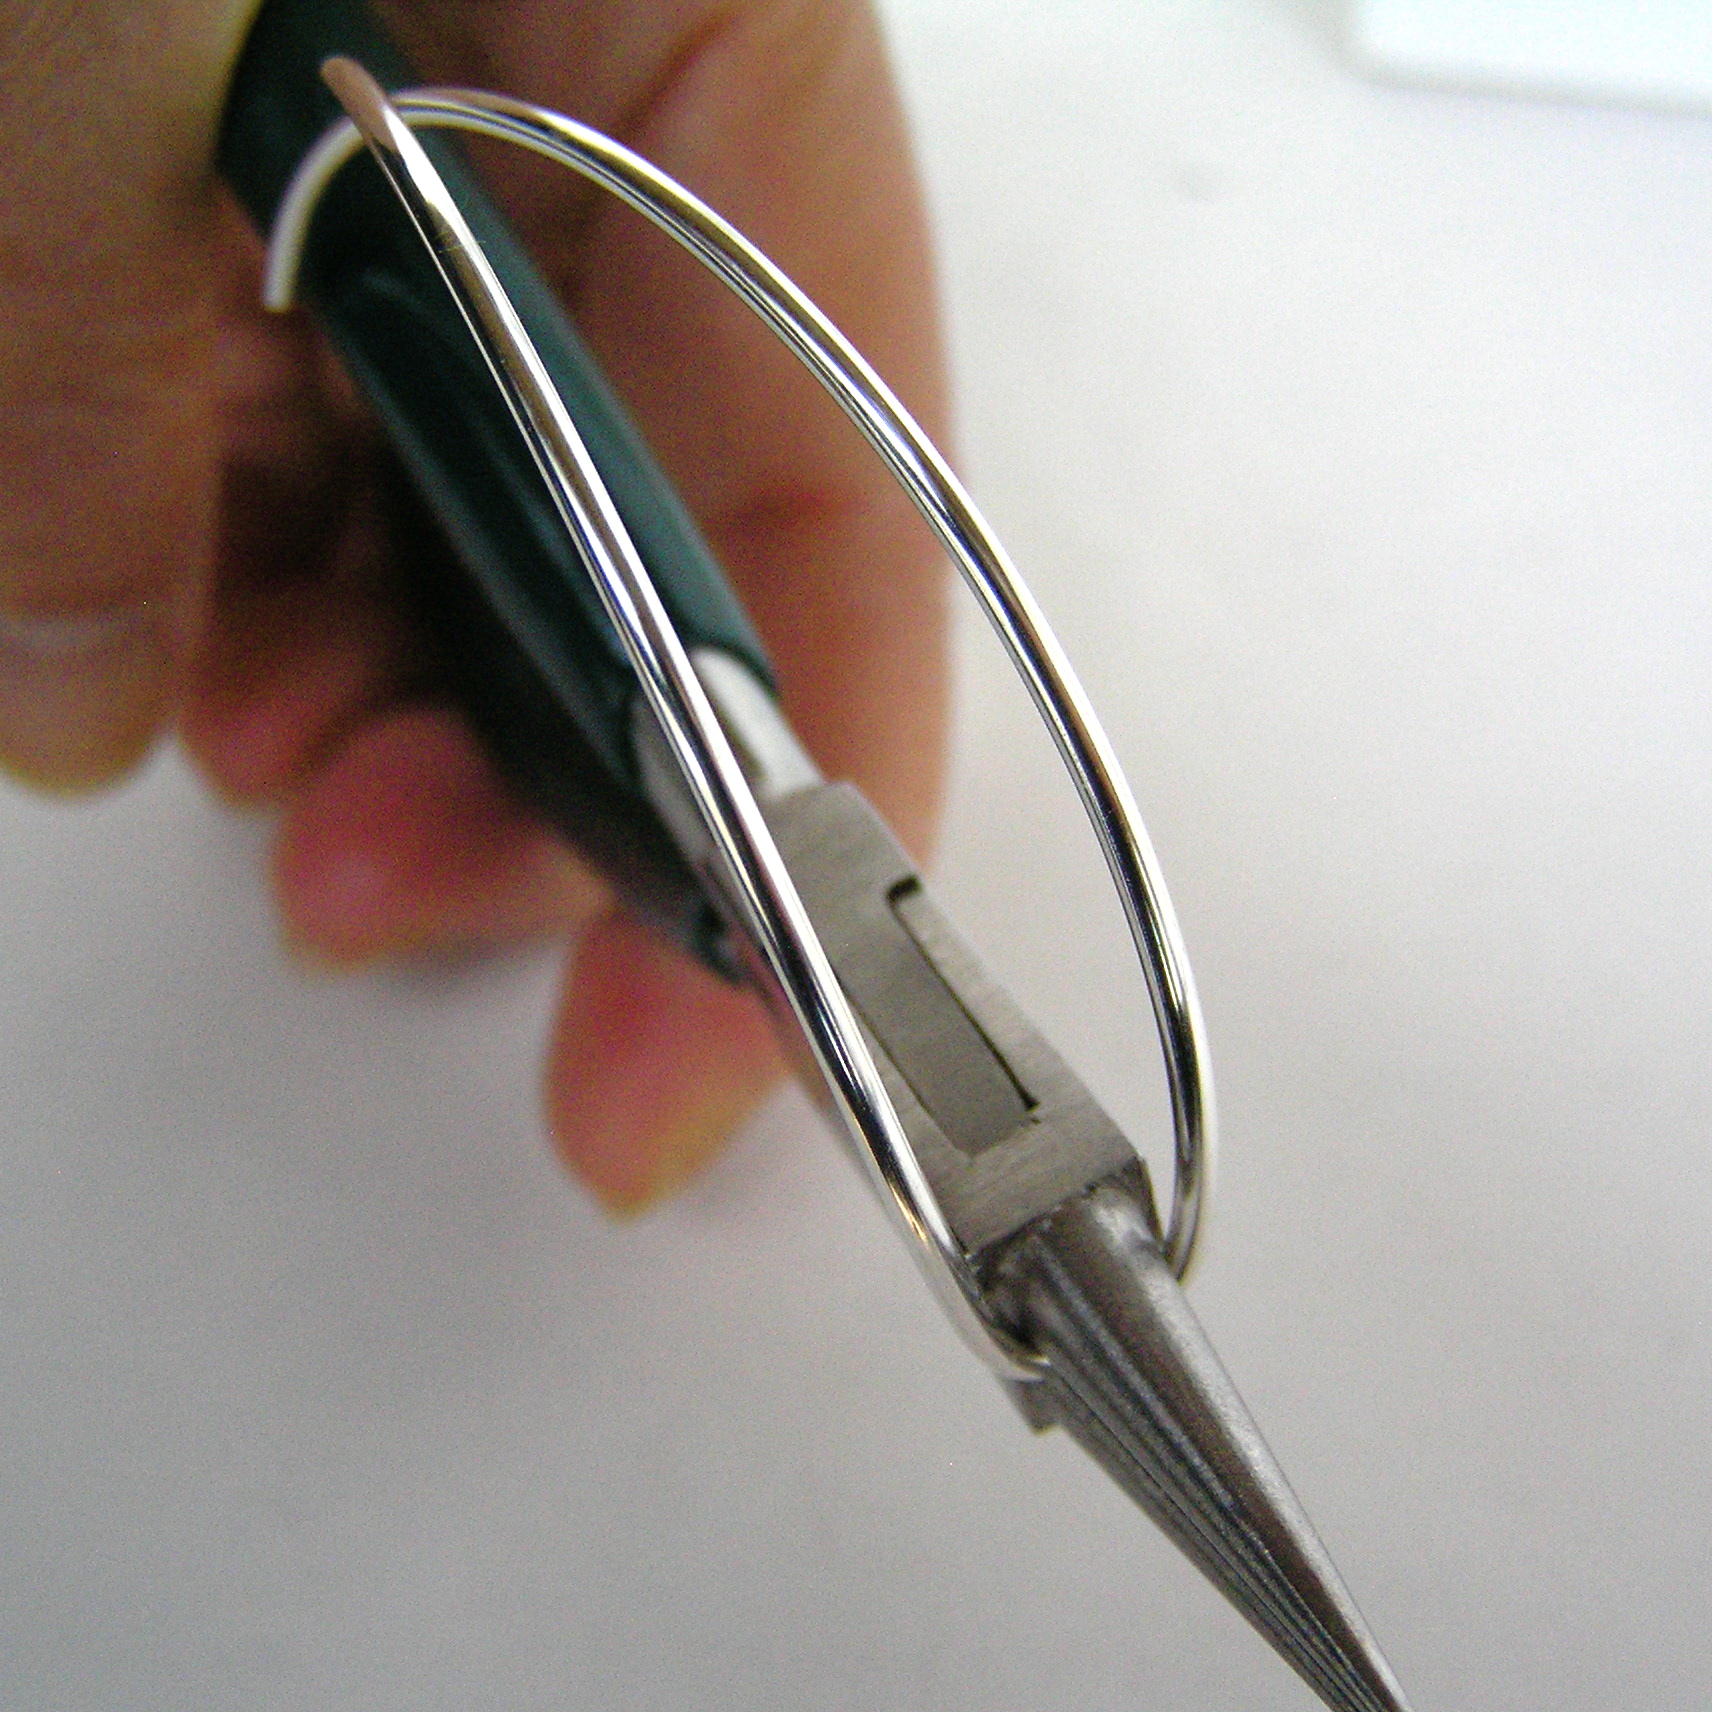
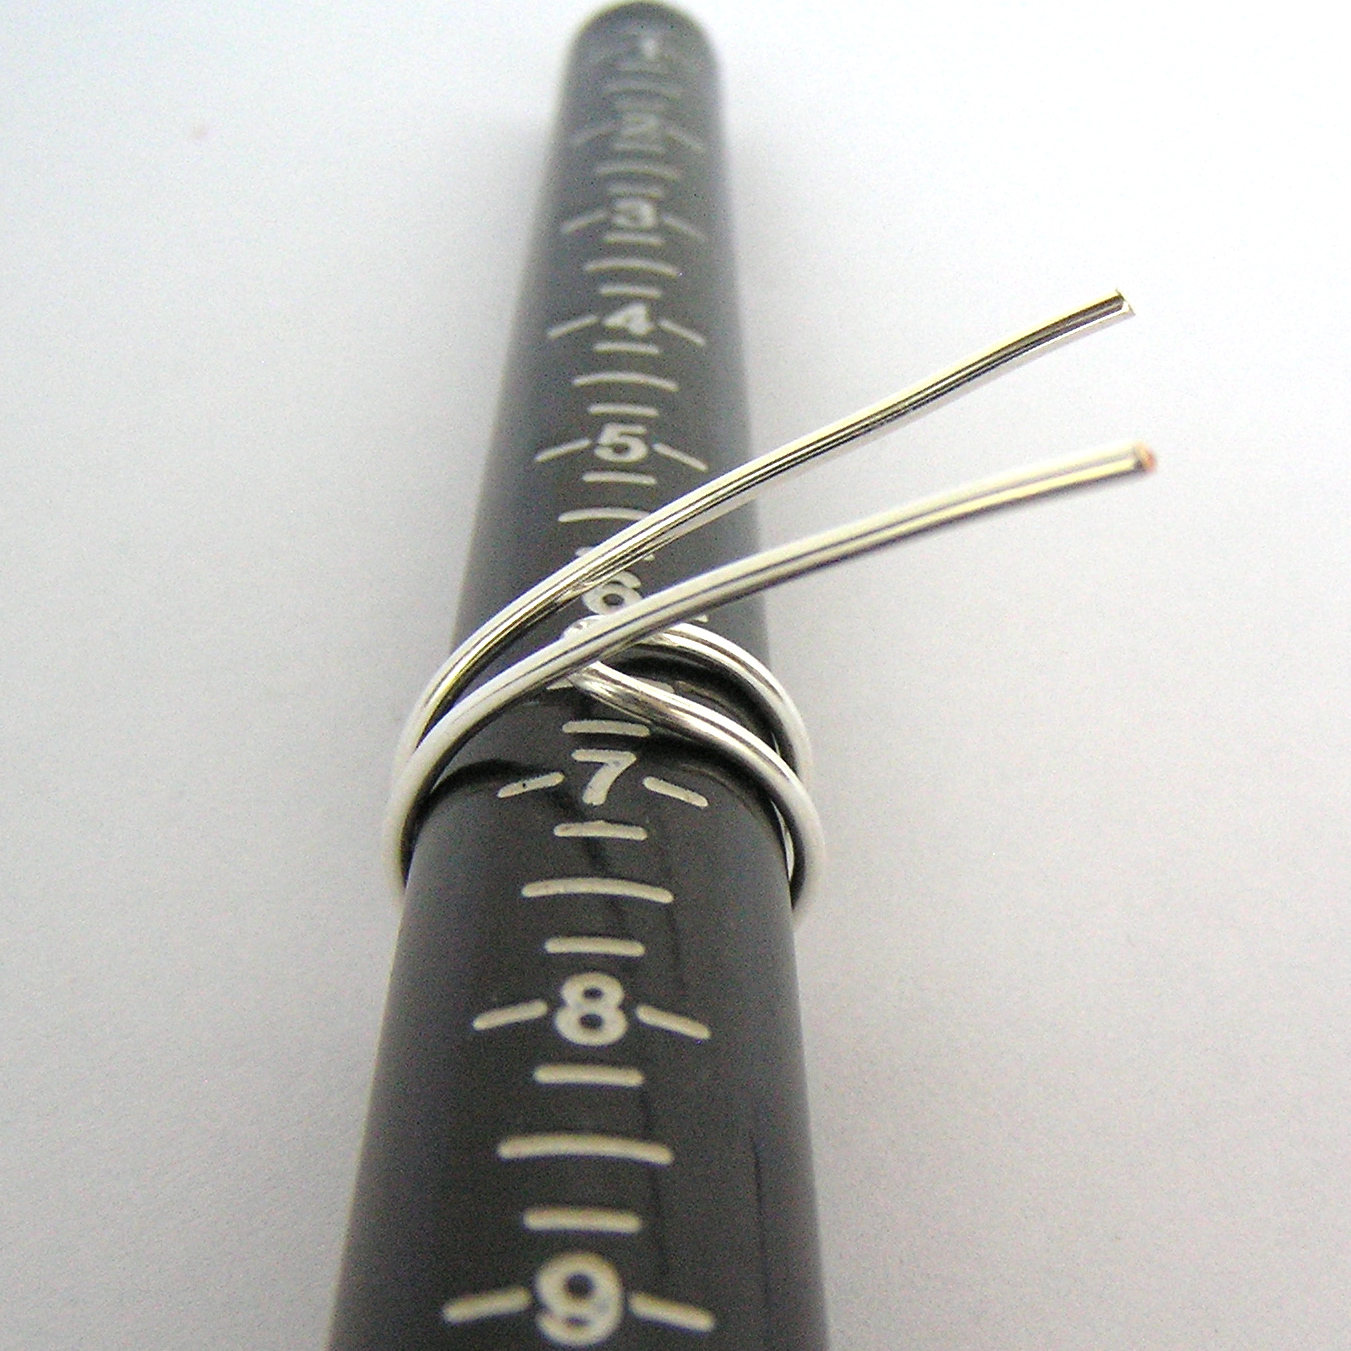
- Grasp the wire close to the hole, and make a vertical bend, about 20 degrees away from the bead side.
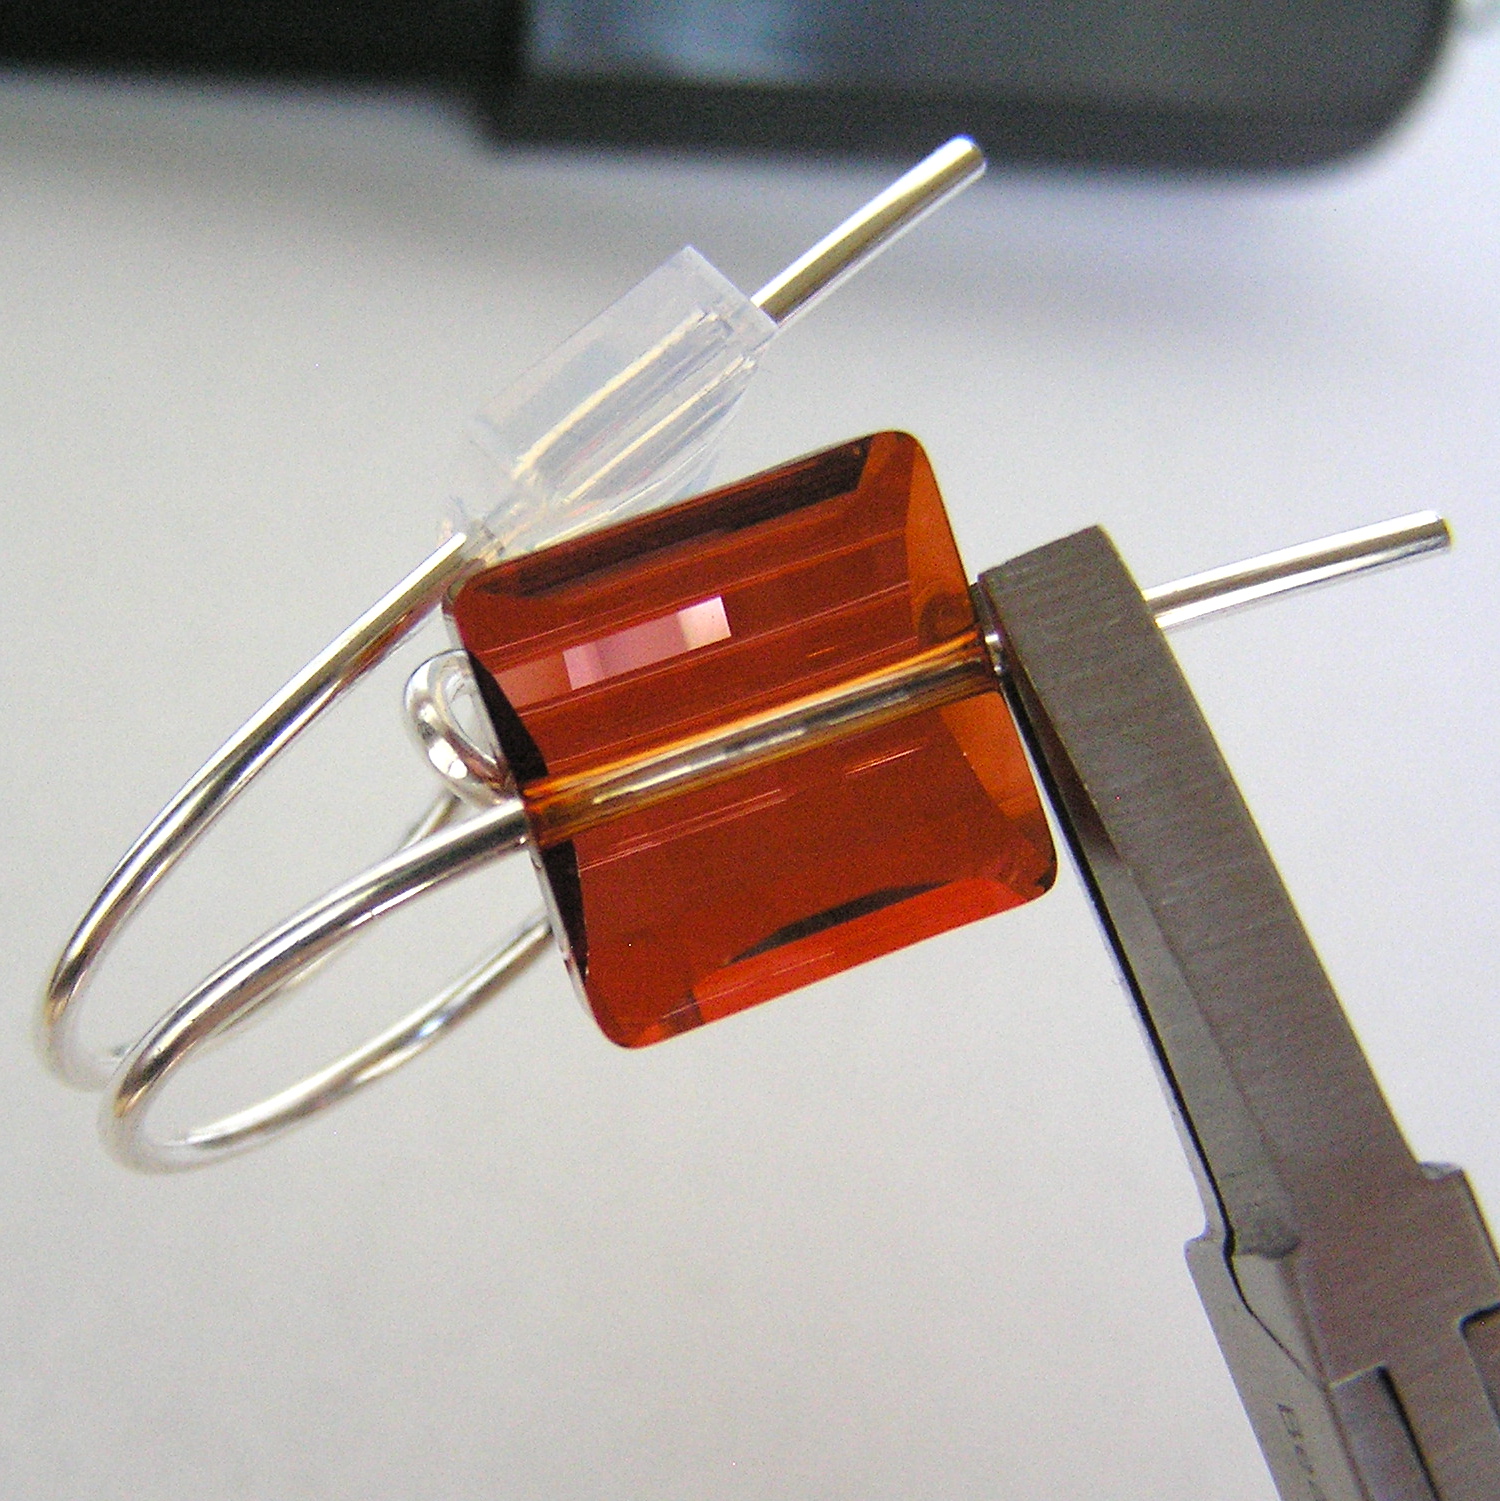
- Using a Memory Wire Cutter, cut the remainder of wire off as close to the angle as possible. The little angle will stop the beads from escaping the end of the wire.
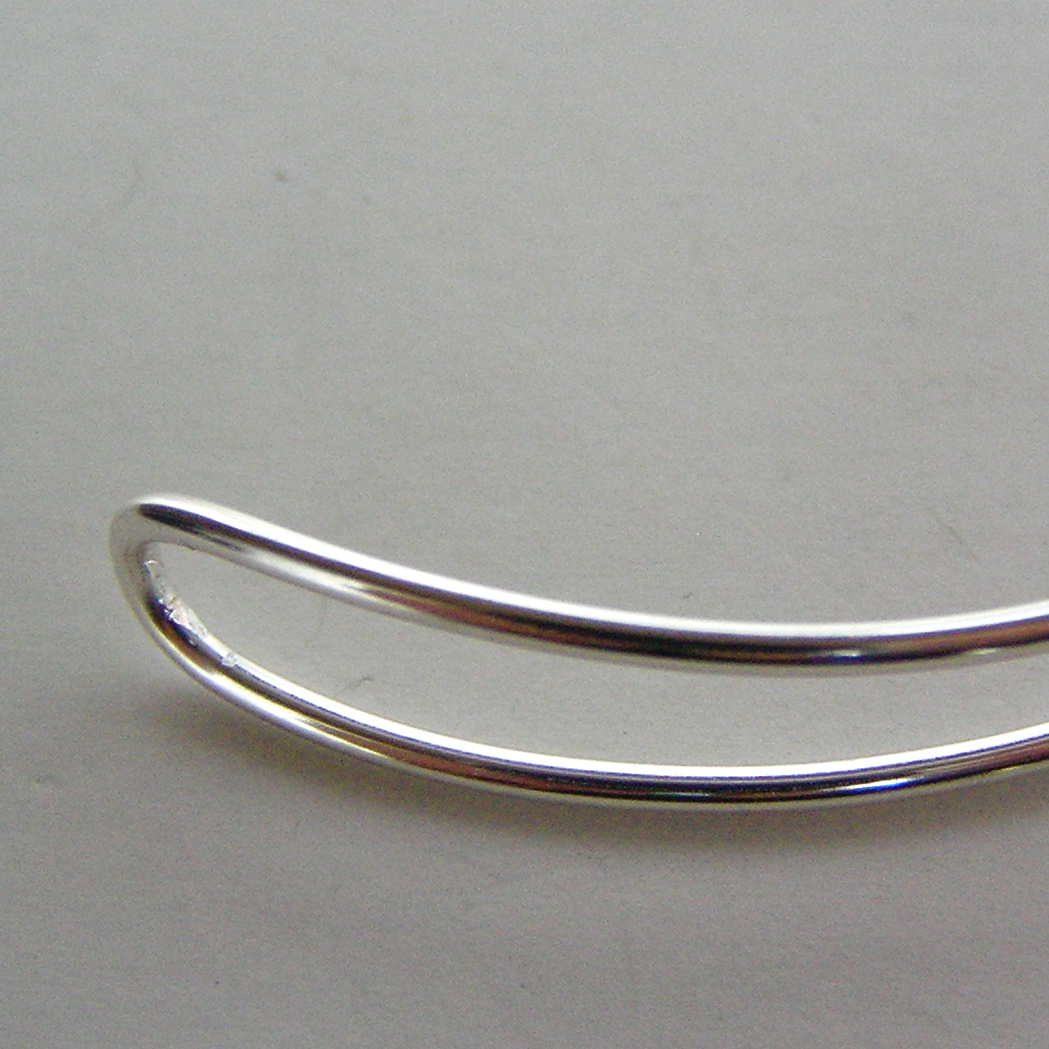
- Use a file to clean up the ends of the wire.

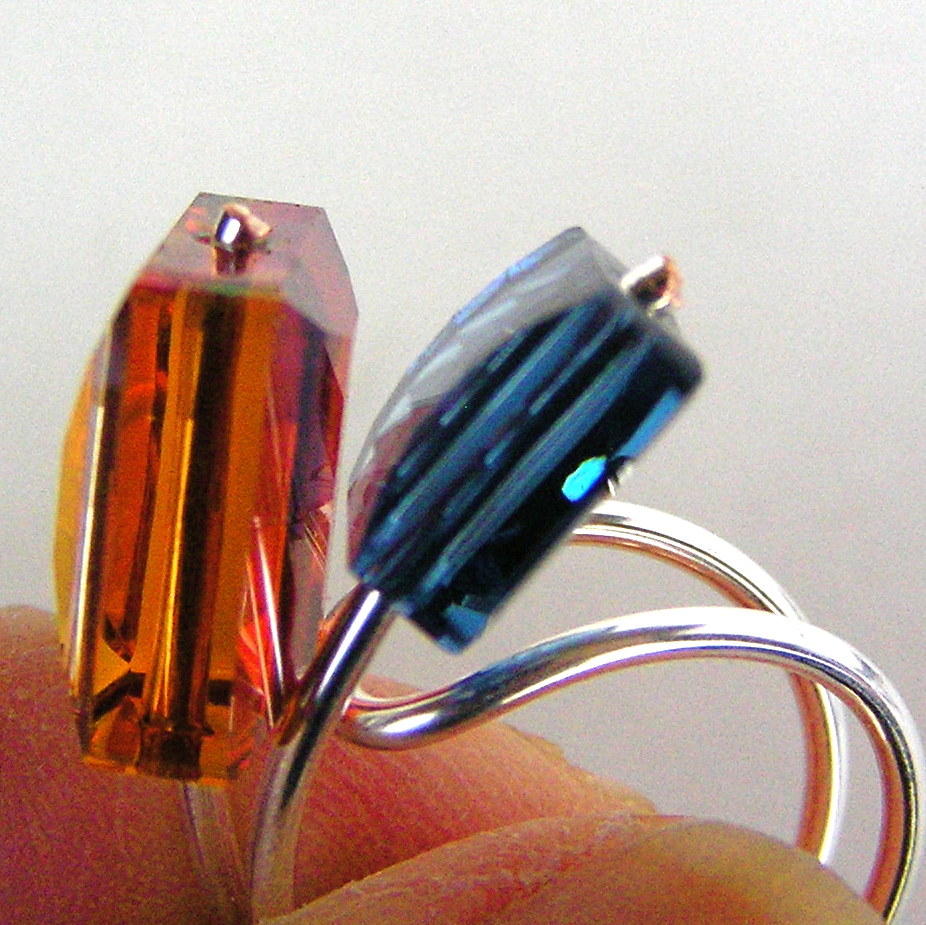
- Optional: To make your piece more interesting you can add additional beads of your choice.
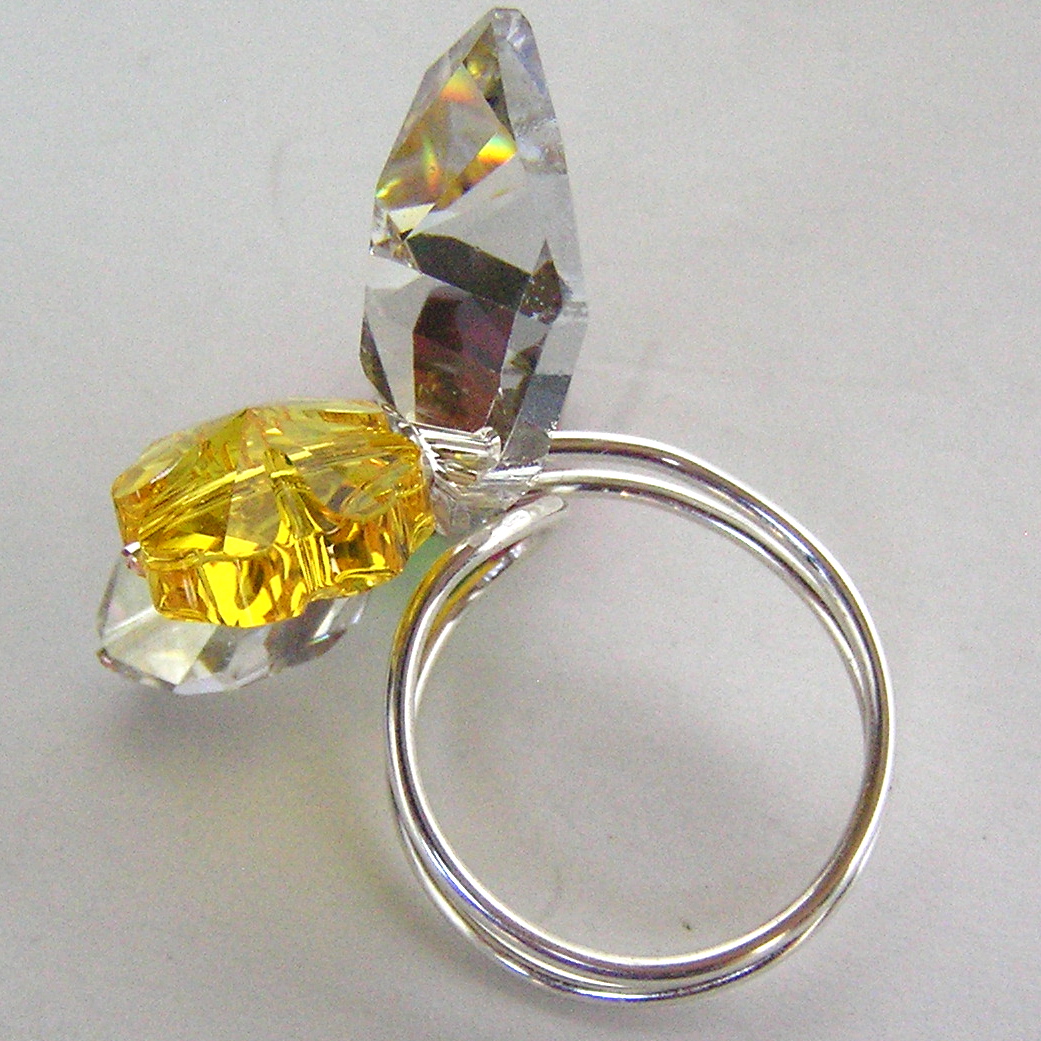
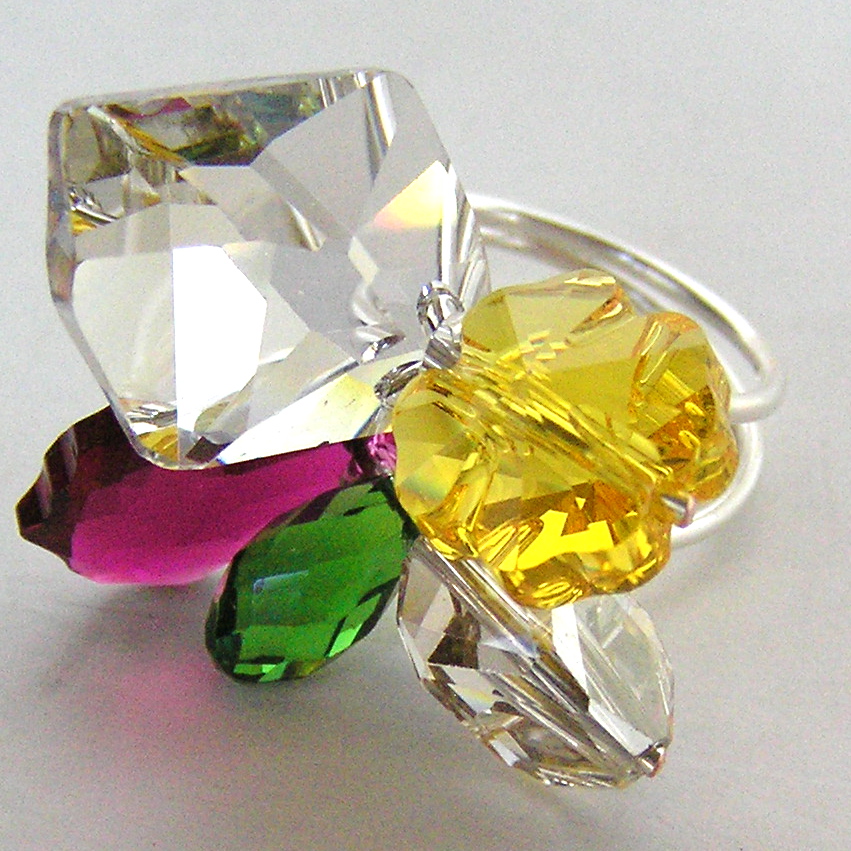
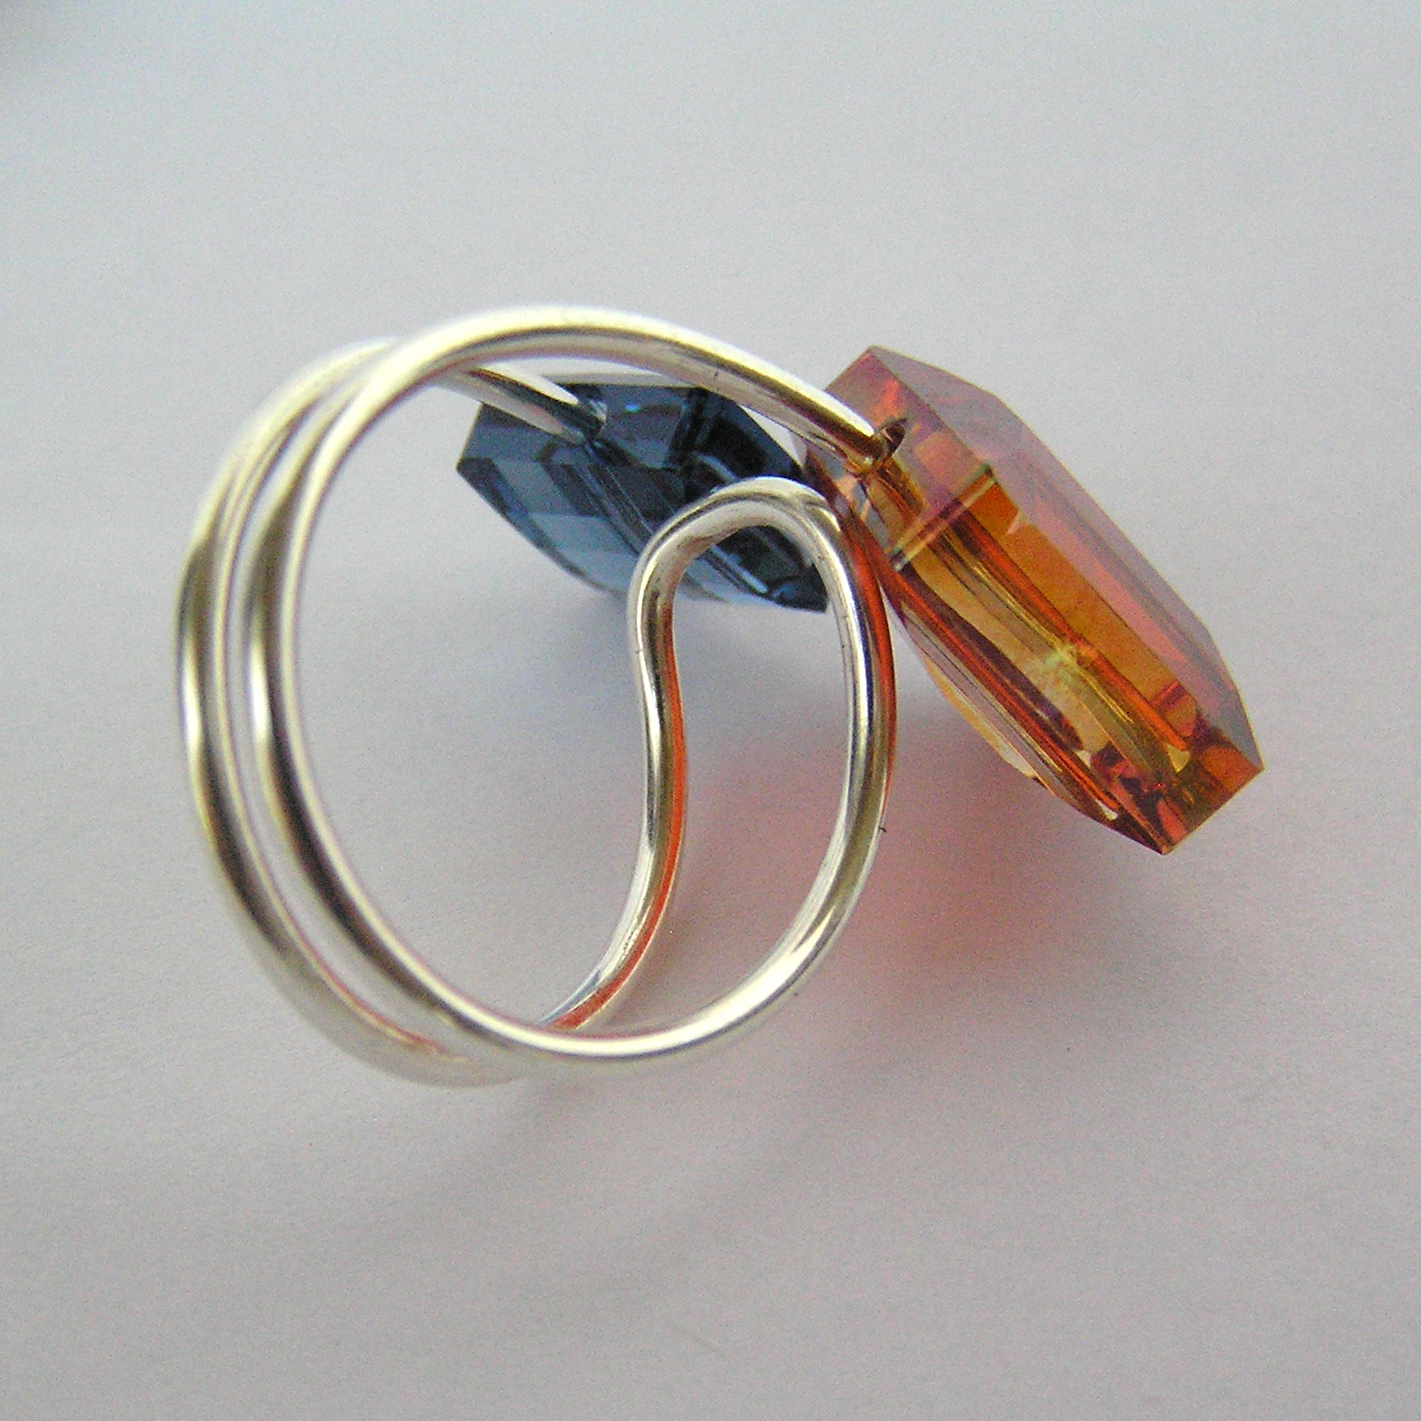
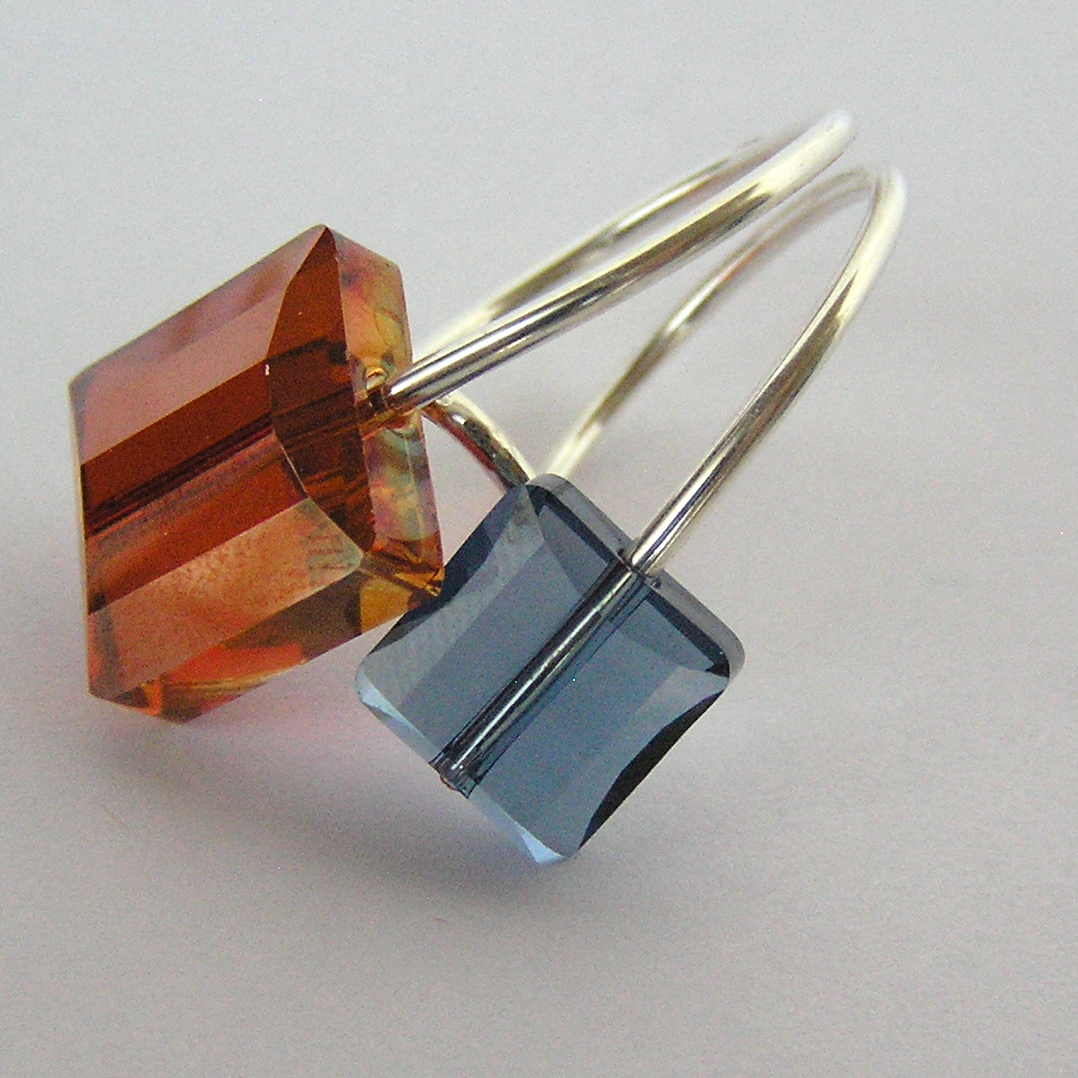
Congratulations! You’ve made your first Crystal Ring!
To learn more about Lilian Chen’s work – CLICK HERE!
Happy Wrapping!
![]()
Click to Receive Daily Tips by Email
Related Posts


2 Comments

Wire Jewelry Ideas
-
 See Yourself as a Creative Thinker-Part IV By Karen Meador, PhD
Wire Jewelry Article for September 27th, 2017 If...
- September 27, 2017
-
 See Yourself as a Creative Thinker-Part III By Karen Meador, PhD
Wire Jewelry Article for September 20th, 2017 If...
- September 20, 2017
-
 See Yourself as a Creative Thinker-Part II By Karen Meador, PhD
Wire Jewelry Article for September 13th, 2017 If you...
- September 13, 2017
-
 See Yourself as a Creative Thinker By Karen Meador PhD
Wire Jewelry Article for September 6th, 2017 This is...
- September 6, 2017

Design & Inspiration
-
 Free Pattern: Smile Cluster Necklace by Karen Meador
by Judy Ellis, Wirejewelry.com Wire Jewelry Pattern for August...
- August 7, 2017
-
 Free Pattern: Long crystal round maille earrings by Kylie Jones
by Judy Ellis, Wirejewelry.com Wire Jewelry Pattern for August...
- August 3, 2017
-
 Free Pattern: Stone Twist Wrap by Karen Meador
by Judy Ellis, Wirejewelry.com Wire Jewelry Pattern for July...
- July 31, 2017
-
 Free Pattern: Floating Bead Earrings By Kimberly Newman
by Judy Ellis, Wirejewelry.com Wire Jewelry Pattern for July...
- July 27, 2017
Featured Tools
-
 Get to Know Your Hand Tools – Tube-Cutting Jig By Helen I. Driggs
by Judy Ellis, Wirejewelry.com Wire Jewelry Tip for August...
- August 4, 2017
-
 Wire Jewelry Video: Using Punch Pliers by Judy Freyer Thompson
by Judy Ellis, Wirejewelry.com Wire Jewelry Tip for August...
- August 2, 2017
-
 Wire Jewelry Video: Aligning a Hole Punch by Judy Freyer Thompson
by Judy Ellis, Wirejewelry.com Wire Jewelry Tip for July...
- July 26, 2017
-
 Get to Know Your Hand Tools – Wire Cutters – Helen I. Driggs
by Judy Ellis, Wirejewelry.com Wire Jewelry Tip for July...
- July 25, 2017
Carmen
June 15, 2016 at 5:17 am
Thank you for the pattern. I have been trying to figure out to make coils, and now I understand the process a lot better.
Kathy
June 15, 2016 at 10:42 am
What an ingenious way of making an adjustable ring! Thank you Lillian