


- NEW DVD Series – Stone Setting with Bezels
- Tube Set Charm by Kim St. Jean
- Prong Basket Pendant by Kim St. Jean
- NEW DVD Series – Stone Setting with Cold Connections
- New DVD Series – Stone Setting with Wire
- NEW DVD Series: Introduction to Stone Setting by Kim St. Jean
- Featured Tool: Bracelet Bending Plier
- NEW Dvd by Eva Sherman
- Fun, Fast Fold Forming DVD Series
- Double Band Ear Cuff from Alex Simkin
How to Make a Briolette Wrap

by Judy Ellis, Wirejewelry.com
Wire Jewelry Tip for April 13th 2016
How to Make a Briolette Wrap
by Kate Richbourg
Today’s tips is great for anyone from the beginner to the experienced wire wrapper. Learning a new skill is just as exciting as re-learning an old one and Kate gives us simple example of how to wrap a Briolette drop. This simple pattern is useful not only for Briolette drops, but other top drilled beads as well
Introduction:
Briolette beads make a great accent at the end or wire-wrapped components in earrings and necklaces but they can be a bit of a challenge to wrap. Here is a simple way to wrap these beads with a rosary loop so you can easily add them to your wire wrapped segments. The trick to getting the loops to stay closed is using a ready-made eye pin or half-hard wire.
Skill Level: All
Materials:
- Briolette drop with top-drilled hole. Could be used with other top drilled beads as well.
- 3″ 24-gauge half hard wire or readymade eye pin (or wire to fit bead hole)
Tools:
Instructions:
Step 1. Use a ready made 3″ eye pin or make a this component by turning a loop at the end of a 3″ segment of half hard wire using round nose pliers. Place this wire through the bead hole leaving about 1/8″ of wire from the bottom of the loop to the bead hole with the remaining wire exiting the hole on the other side.
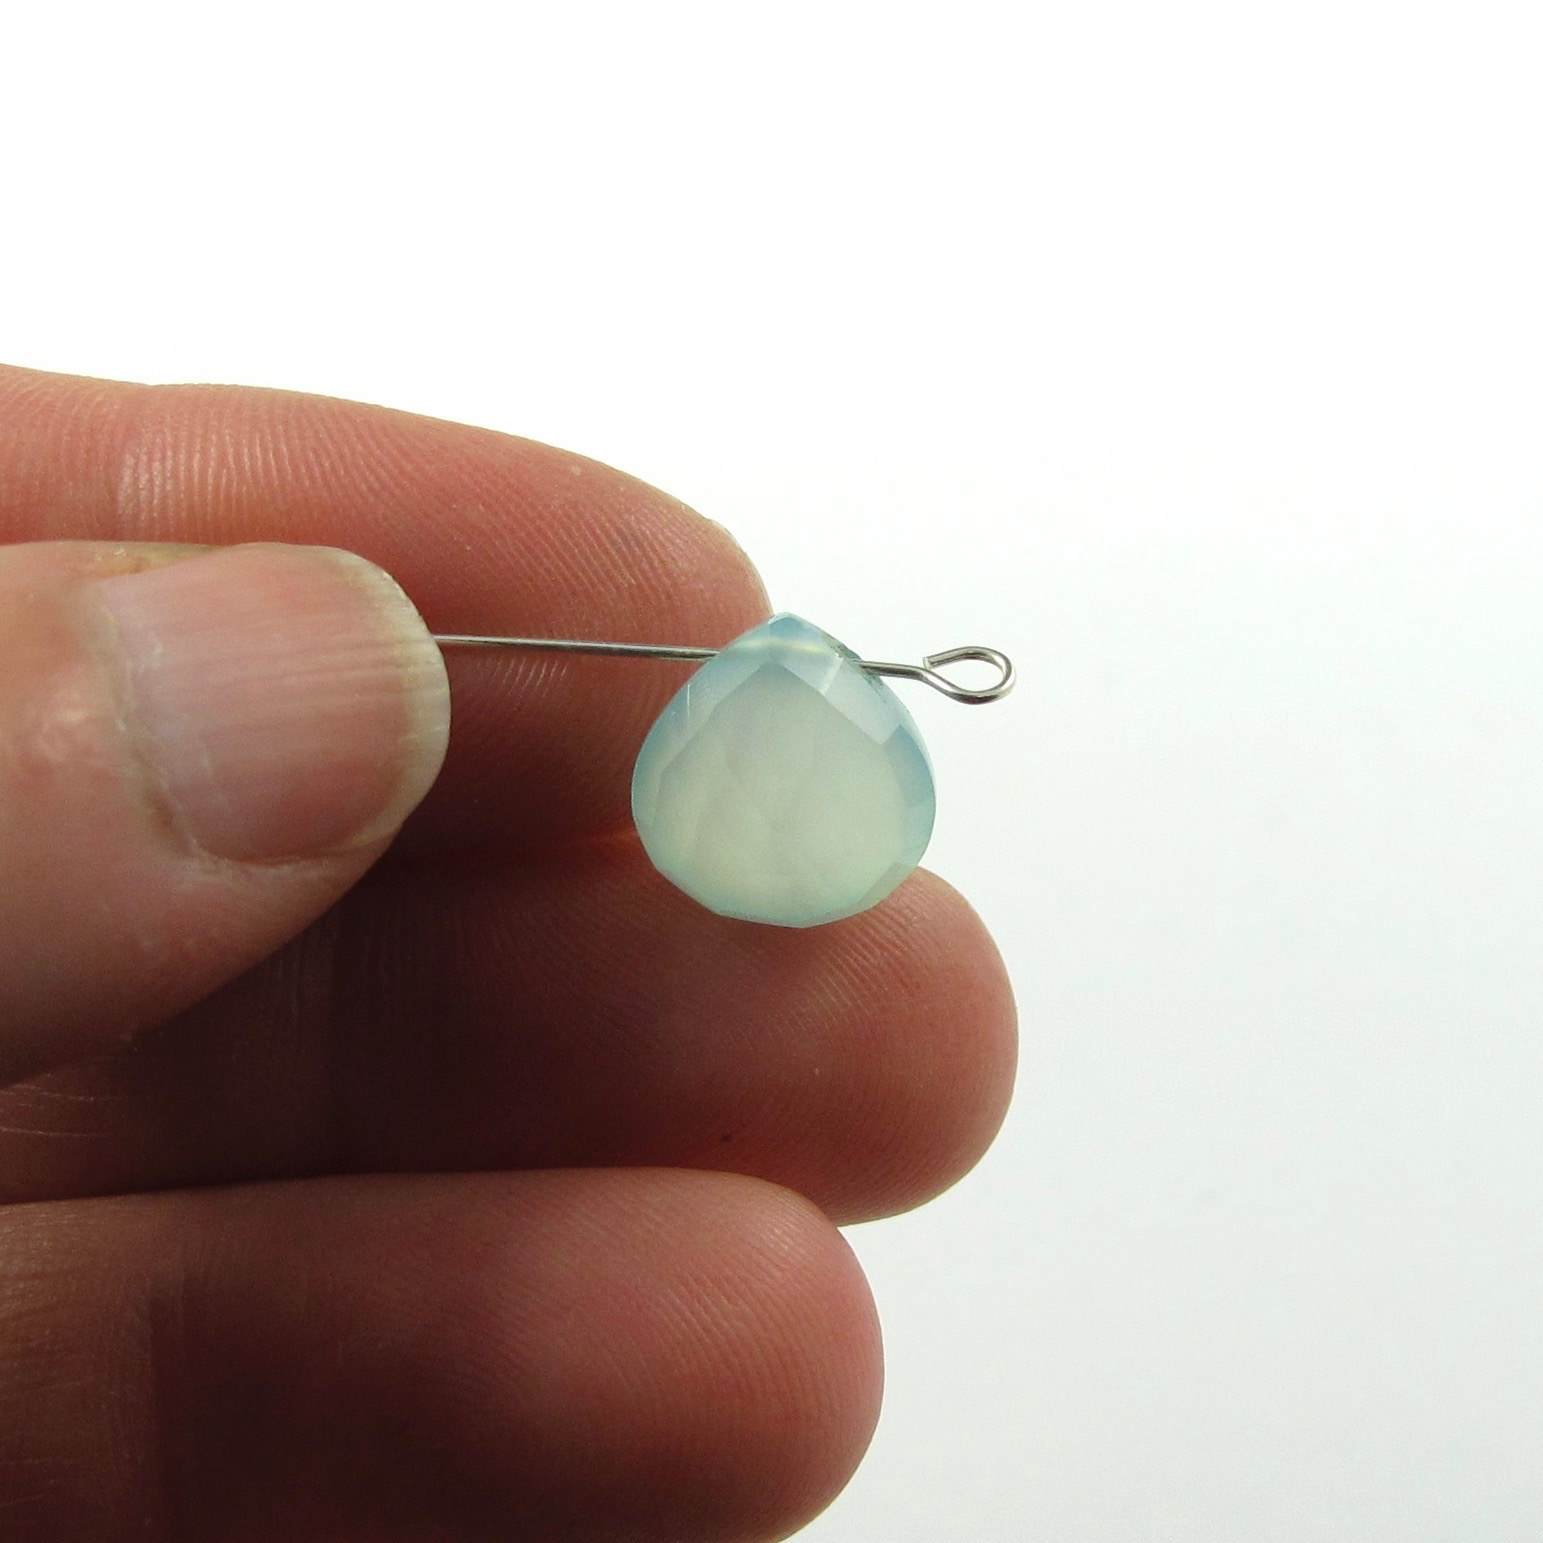
Step 2. Grasp the 1/8″ of wire using chain nose pliers and push the wire diagonally towards the point of the briolette and then straight up. The wire should conform to the shape of the briolette and leave a clear space of wire to wrap around above the point of the stone.


Step 3. Cross the remaining wire over the top of the briolette to form an “X” at the tip of the stone.

Step 4. Grip this wire with the chain nose pliers and make three tight wraps from the tip of the stone to below the loop. Use flush cutters to cut away the remaining wire and tuck in the tip.

Step 5. Open the loop using chain nose pliers and attach to your component of choice and close securely.
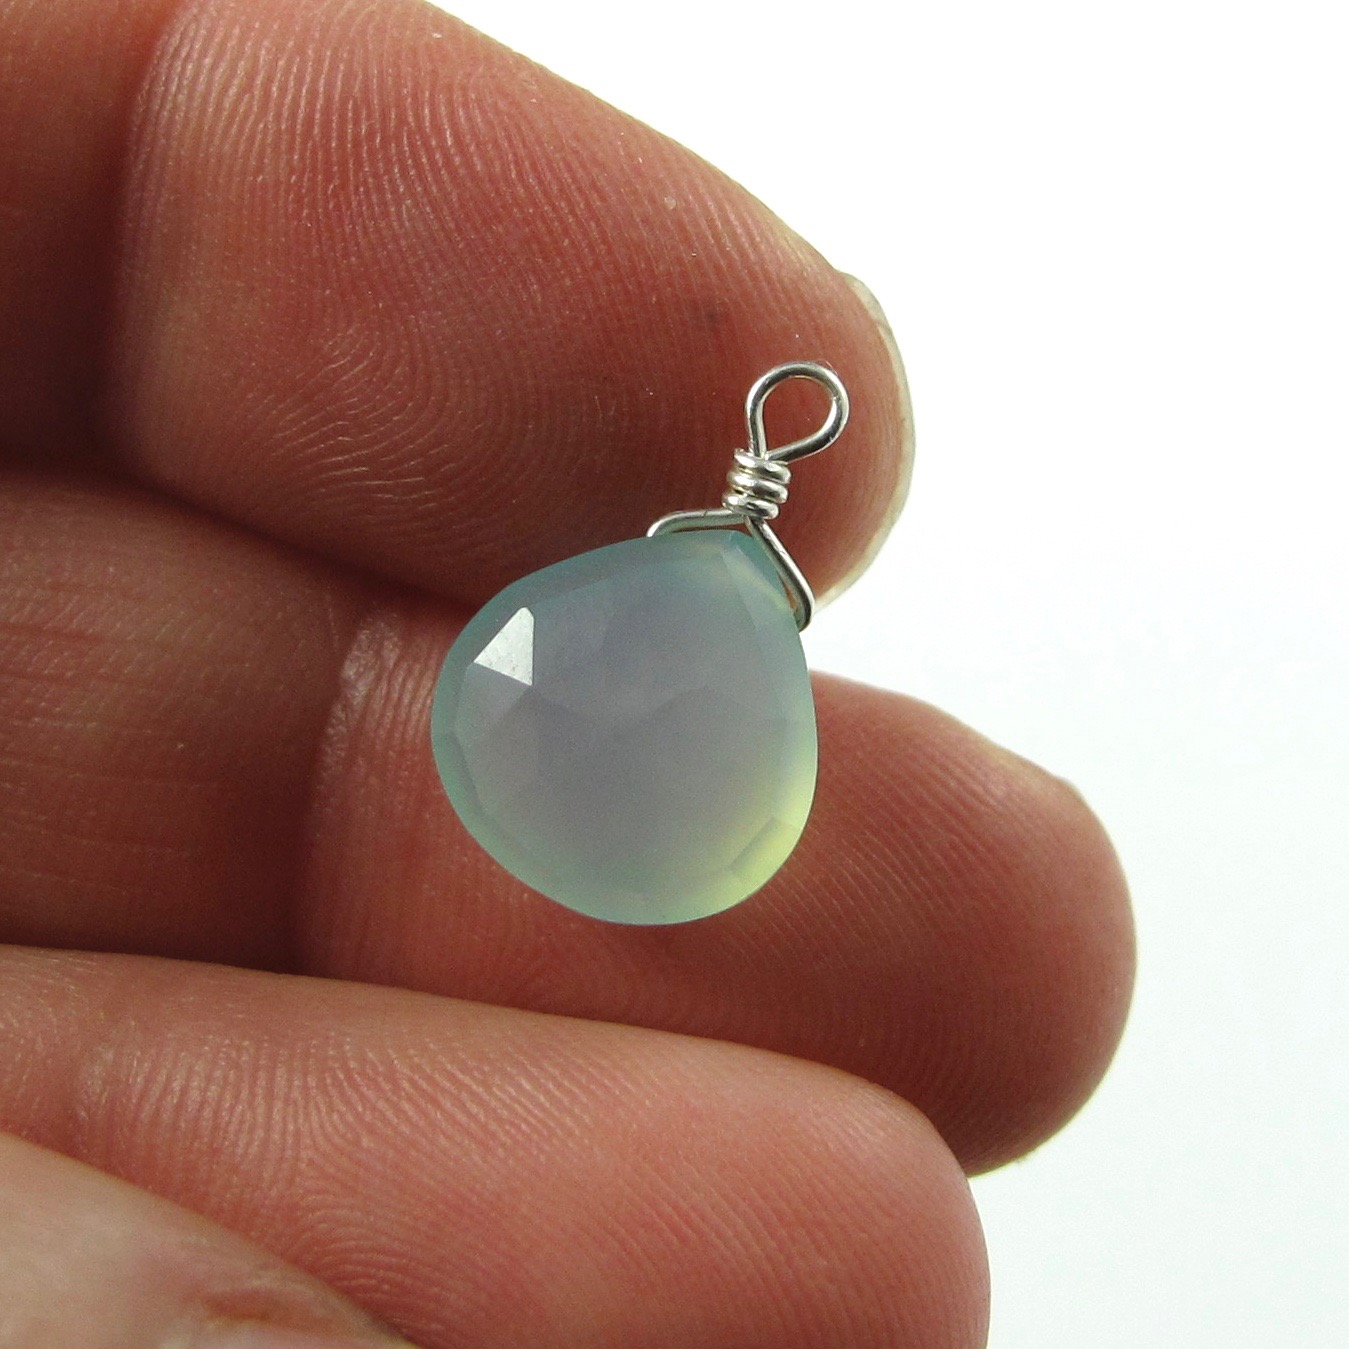
I hope you enjoyed this simple tutorial.
Happy Wrapping!
![]()
Click to Receive Daily Tips by Email
Related Posts


One Comment

Wire Jewelry Ideas
-
 See Yourself as a Creative Thinker-Part IV By Karen Meador, PhD
Wire Jewelry Article for September 27th, 2017 If...
- September 27, 2017
-
 See Yourself as a Creative Thinker-Part III By Karen Meador, PhD
Wire Jewelry Article for September 20th, 2017 If...
- September 20, 2017
-
 See Yourself as a Creative Thinker-Part II By Karen Meador, PhD
Wire Jewelry Article for September 13th, 2017 If you...
- September 13, 2017
-
 See Yourself as a Creative Thinker By Karen Meador PhD
Wire Jewelry Article for September 6th, 2017 This is...
- September 6, 2017

Design & Inspiration
-
 Free Pattern: Smile Cluster Necklace by Karen Meador
by Judy Ellis, Wirejewelry.com Wire Jewelry Pattern for August...
- August 7, 2017
-
 Free Pattern: Long crystal round maille earrings by Kylie Jones
by Judy Ellis, Wirejewelry.com Wire Jewelry Pattern for August...
- August 3, 2017
-
 Free Pattern: Stone Twist Wrap by Karen Meador
by Judy Ellis, Wirejewelry.com Wire Jewelry Pattern for July...
- July 31, 2017
-
 Free Pattern: Floating Bead Earrings By Kimberly Newman
by Judy Ellis, Wirejewelry.com Wire Jewelry Pattern for July...
- July 27, 2017
Featured Tools
-
 Get to Know Your Hand Tools – Tube-Cutting Jig By Helen I. Driggs
by Judy Ellis, Wirejewelry.com Wire Jewelry Tip for August...
- August 4, 2017
-
 Wire Jewelry Video: Using Punch Pliers by Judy Freyer Thompson
by Judy Ellis, Wirejewelry.com Wire Jewelry Tip for August...
- August 2, 2017
-
 Wire Jewelry Video: Aligning a Hole Punch by Judy Freyer Thompson
by Judy Ellis, Wirejewelry.com Wire Jewelry Tip for July...
- July 26, 2017
-
 Get to Know Your Hand Tools – Wire Cutters – Helen I. Driggs
by Judy Ellis, Wirejewelry.com Wire Jewelry Tip for July...
- July 25, 2017
Waterlilies
May 26, 2016 at 9:25 am
Awesome!! Thanks!