- NEW DVD Series – Stone Setting with Bezels
- Tube Set Charm by Kim St. Jean
- Prong Basket Pendant by Kim St. Jean
- NEW DVD Series – Stone Setting with Cold Connections
- New DVD Series – Stone Setting with Wire
- NEW DVD Series: Introduction to Stone Setting by Kim St. Jean
- Featured Tool: Bracelet Bending Plier
- NEW Dvd by Eva Sherman
- Fun, Fast Fold Forming DVD Series
- Double Band Ear Cuff from Alex Simkin
Petal Maille Pendant
by Judy Ellis, Wirejewelry.com
WireJewelry Tip for November 11th, 2015
Petal Maille Pendant
by Marilyn Gardiner
Today, as a follow up to Marilyn’s tip from last week on how to Open and Close Jump rings – I’ve decided to share a beautiful, beginner chain maille pattern called the Petal Maille Pendant. This would make a beautiful holiday gift. I hope you enjoy the pattern!
Petal Maille Pendant
Designed by Marilyn Gardiner © 2015
Skill Level: Beginner
This heart is made up of Möbius ball segments. These Möbius balls are made with 3 jump rings (5.5 mm ID), and each ring goes through every other riöng in the ball. The balls are connected together in rows with medium rings (4.5 mm ID) to create a heart shaped pendant.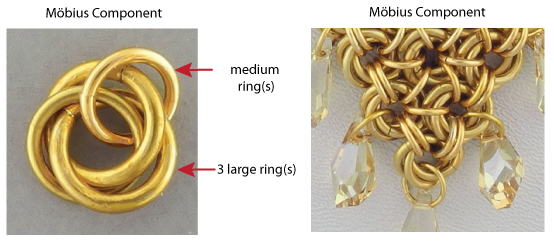
Materials:
The AWG (American Wire Gauge) jump rings for the heart are made from round metal wire. I’ve successfully used Argentium sterling, silver filled, copper, and Jeweller’s Bronze jump rings for this project.
- 16 gauge, 5.5 mm ID rings (78) LARGE for Möbius balls
- 18 gauge, 4.5 mm ID rings (75) MEDIUM to connect the balls
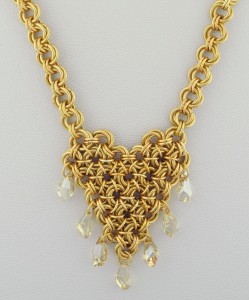
- 20 gauge, 5 mm ID rings (11) to add crystals or beads
- 16 gauge, 4.5 mm ID rings (2) to attach side chains
Tools:
- 2 pairs of smooth jawed jewelers’ pliers (flat nose, chain nose, bent nose)
- Super fine emery board
The Weave: Möbius Balls
- Use pliers to insert a large ring through the closed large ring and close it.
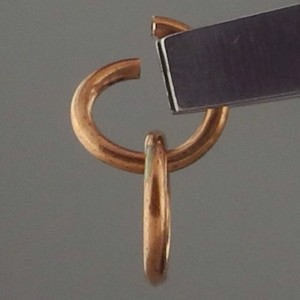

- Set down the pliers in your left (non-dominant) hand and use your fingers to turn the dangling ring to the left.Use the pliers, still holding the newly closed ring, to slide it sideways, behind the previous ring. Keep holding the rings.
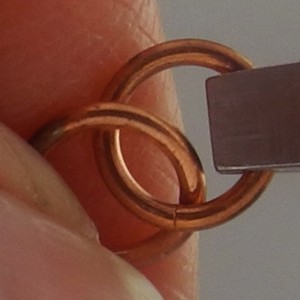

- Insert a large ring (front to back) through the center of the previous rings.
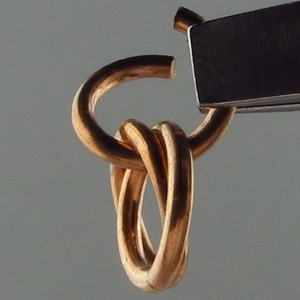

- Close it. Turn the dangling rings to the left. Slide the new ring sideways so the top of the new ring sits behind the previous ring. Keep holding the rings.
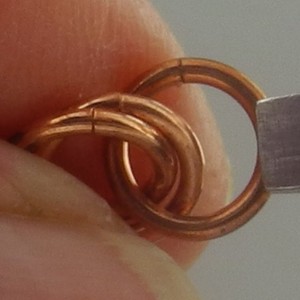

- Pick up a medium ring, insert it through the center of the Möbius ball and close it. This ring locks the Möbius rings in place. You have completed one Möbius component.
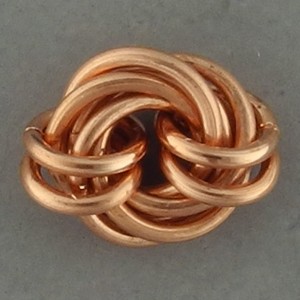

- Make the Möbius Components – Set out your A & B rings.Make rows of 1 closed large ring, 2 open large rings, and 1 open medium ring. Review the Möbius weave instructions. Repeat steps 1-5 to make 25 Möbius components.
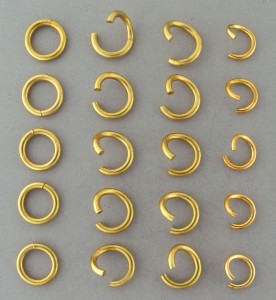

- Link the Möbius Components – Lay out the Möbius balls to form a heart shape. Start at the bottom with one ball. The next row has 2 balls, then 3, 4, 5, and the long top row has 6 balls. You will have 4 balls left over, and these will create the heart shape at the top corners. See the main photo as your guide.
- Start by joining 2 balls together. Pick up one ball and re-open the medium locking ring with your pliers. Insert that ring through the center of a second ball, and re-close the ring.
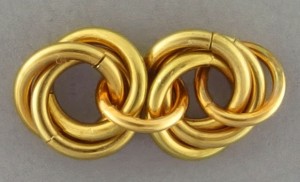

- Add a third ball using the same strategy. TIP: Open the locking rings fairly wide when connecting 2 Möbius balls together.
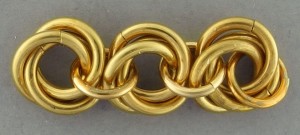

- Arrange the 3 balls into a triangle shape. Use the end locking ring to join the two end balls together to make this shape. These are the first two rows.
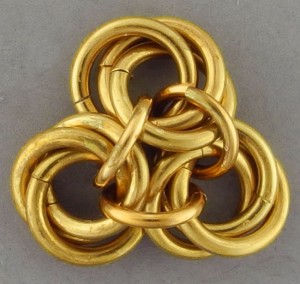

- Repeat Steps B & C to make a row of 3 Möbius balls.When building a shape, the rule is that each Möbius gets connected to every other Möbius it touches.Open more locking rings and start to connect your row of 3 balls to a row of 2 balls.Notice that each Möbius in row 2 is attached to 2 balls of row 3.
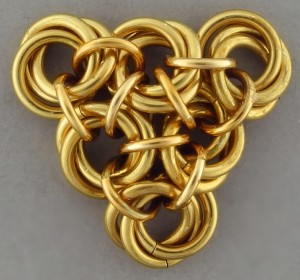

- Make a strip of 4 Möbius balls and add it to your heart. Notice that each Möbius in row 3 is attached to 2 balls of row 4. Continue to add the Möbius balls for rows 5 and 6.
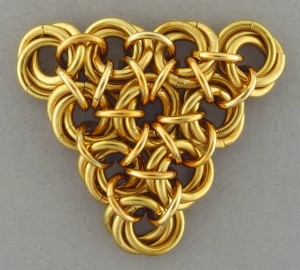

- Join the remaining 4 Möbius balls into 2 pairs. Complete the heart shape by adding one pair at the upper left and the other pair on the right. Note: each pair will sit above the 3 balls at each side of Row 6.
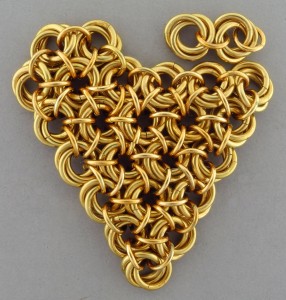

- Stabilize the Edges of the Heart:All of the Möbius balls are connected to each other with a single locking ring. In this step we are going to double up the locking rings all around the outside edges of the heart.Open 17 of the medium rings and insert them one-by-one between each pair of Möbius balls around the outside edges.
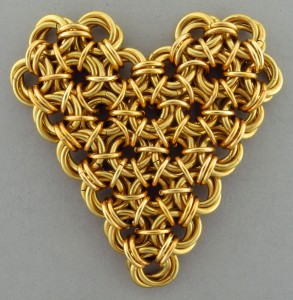

- Options to help you finish your project – Plan the Side Chains:
One option is to make long chains of Möbius balls linked together with pairs of locking rings. See the cover photo. My necklace has 27 Möbius balls in each side chain. Each side chain is 9.25″ long. I used 27 x 2 x 3=162 large rings, and 27 x 2 x 2=108 medium rings. - Another option is to use bead stringing techniques to make 2 side chains. This requires beads, flexible beading wire, crimps, wire protectors, and crimp covers. Use 2 D rings for adding beaded side chains.
- Other options include side chains made with seed beads (example a peyote or bead-crochet tube). Or Viking knit chains. Or Kumihimo. Or leather.

- Attach a Clasp – I haven’t chosen a clasp yet, but it could be a brass magnet, box, toggle, lobster, fold over, or S-hook clasp. Choose one that fits the scale and look of the side chains you make.

- Explore and Experiment: Make a Bracelet & Earrings – You could make a matching Möbius bracelet (and you could add embellishments next to the clasp to match those you used for the heart.)Similarly, you can add a Möbius (or two or three) to an ear finding – along with a dangling charm or bead.
Congratulations! You’ve made your first Petal Maille Pendant!
I hope you enjoyed this pattern from Marilyn! Check back for more great tips or articles from our new contributors!
Happy Wrapping!
![]()






0 comments