


- NEW DVD Series – Stone Setting with Bezels
- Tube Set Charm by Kim St. Jean
- Prong Basket Pendant by Kim St. Jean
- NEW DVD Series – Stone Setting with Cold Connections
- New DVD Series – Stone Setting with Wire
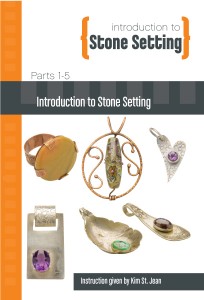
- NEW DVD Series: Introduction to Stone Setting by Kim St. Jean
- Featured Tool: Bracelet Bending Plier
- NEW Dvd by Eva Sherman
- Fun, Fast Fold Forming DVD Series
- Double Band Ear Cuff from Alex Simkin
Prong Rivets Ring by Kim St. Jean

by Judy Ellis, Wire-Sculpture.com
Daily Wire Jewelry Tip July 20th, 2015
Highlights of the Free Cold Connections Lesson: Prong Rivets Ring
You know, I’ve got a drawer filled with odds ‘n ends that I’ve never found the right project for. Some irregular, freeform stones – I mean REALLY irregular, where wicket prongs might be my only hope – some treasures I haven’t decided how to set yet, and at the back of my drawer I’ve got a bag of large, round, glass pebbles, like you’d put in a potpourri or fish bowl. They’re in some neat colors and just wider than one of my fingers – so they’d be perfect for a ring.
This riveted ring from Kim is JUST the solution I’ve been looking for! And with no torches to light in this lesson, I can experiment and play without pickling or soldering. Let’s check it out!
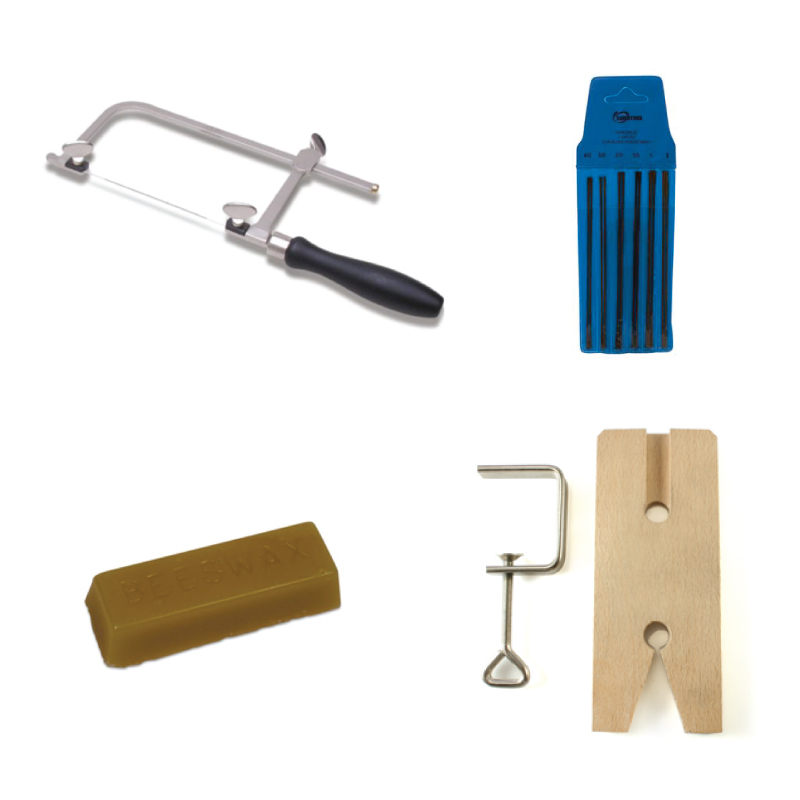
Ok, to get started making this fabulous riveted ring, you’ll need the following:
Tools:
- Template
- Metal shears
- Pencil paper ruler marker glue stick
- V-slot bench pin
- Jeweler’s saw with 3/0 sawblade
- Beeswax
- Bowl of water
- Bench top buffing machine with medium abrasive buffs
- Sanding sponge
- Mill bastard file
- Round bail making pliers, such as Wrap & Tap
- Steel ring mandrel
- Spring-loaded punch
- Metal punch to match your rivets (1.5mm used)
- Transfer punch
- Chasing hammer
- Cross locking tweezers
- Liver of Sulfur
- Brush
- Steel wool
- Optional: Bench Block and Texturing Hammer, Clothespin
CLICK HERE to see our Basic Sawing Kit – a perfect companion to this video!
Materials:
- Stone such as 25mm cabochon
- Patterned wire
- 24-gauge copper sheet
- 1/16″ tube rivets (eyelets)
Here are some of the parts I HAD to pause the video to take it all in.
- I love watching Kim think through her design like at 5:52, sketching out her piece and then going back and refining and refining until the prongs and design are the right measurements. That old saying applies to jewelry just like sewing and hair: measure twice, cut once!

- At 20:48, discover the best instruction I’ve ever seen on how to cut out shapes with a jeweler’s saw: at this point, she’s already gone over getting started with surefire tools back at 9:20. Then she shows you how to pause your sawing in case the phone rings, up to cutting out intricate corners and ripples with more accuracy and less work than I ever thought possible! Kim even covers when to stay with a 3/0 sawblade, and when to move to a 5/0 or 6/0 sawblade.

- We looked at the bench top buffer last time, and Kim goes into even MORE detail on getting the most out of this awesome jewelry tool at 32:52. She covers what this tool IS and IS NOT for – and some really great tips on using it properly! Then at 41:58 Kim goes over her favorite metal files to smooth the piece. I really appreciated this because I have a set of files like that but never experimented enough to find out what worked best!
- Making a Ring Shank: I’ve made ring shanks out of wire, but never like this! Kim starts at 44:08 and goes over everything you need to know about making a ring shank with a wider material.
- Then, you’ll see how to rivet through two thicker pieces of metal. Kim explains at 51:36 why you always must put 2 rivets in a piece: if you just have 1 rivet joint, the piece can spin, which weakens the rivet joint – and can even open & lose the rivet!

I love this helicopter punch tool – It works so much better for me than the plier version.
- And at the end, at 1:13:20, when it’s time to set the stone, Kim shares one of my most favorite tips: use a clothespin to form the prongs over the edge of the stone! I love this because a wooden clothespin doesn’t mark the metal OR the stone. And by the end of the project, I don’t want to just use my fingers – I love having a tool there to make my life easier. You can even press the ends of the prongs over the face of the stone with the clothespin and no harm done. Kim shows another prong-finishing technique afterward that I can’t believe I never tried before!

OK – I know what I’m making for my next project – how about you? I’m excited to see what you make from this project, so make sure and post it on our Facebook page or send me an email with a picture of how it turns out for you!
If you haven’t picked up your Free 5-DVD Stone Setting Series yet, CLICK HERE to order your copy today, $0.00, just pay $9.95 shipping.

Happy Wrapping!
![]()
Click to Receive Daily Tips by Email
Related Posts


Wire Jewelry Ideas
-
 See Yourself as a Creative Thinker-Part IV By Karen Meador, PhD
Wire Jewelry Article for September 27th, 2017 If...
- September 27, 2017
-
 See Yourself as a Creative Thinker-Part III By Karen Meador, PhD
Wire Jewelry Article for September 20th, 2017 If...
- September 20, 2017
-
 See Yourself as a Creative Thinker-Part II By Karen Meador, PhD
Wire Jewelry Article for September 13th, 2017 If you...
- September 13, 2017
-
 See Yourself as a Creative Thinker By Karen Meador PhD
Wire Jewelry Article for September 6th, 2017 This is...
- September 6, 2017

Design & Inspiration
-
 Free Pattern: Smile Cluster Necklace by Karen Meador
by Judy Ellis, Wirejewelry.com Wire Jewelry Pattern for August...
- August 7, 2017
-
 Free Pattern: Long crystal round maille earrings by Kylie Jones
by Judy Ellis, Wirejewelry.com Wire Jewelry Pattern for August...
- August 3, 2017
-
 Free Pattern: Stone Twist Wrap by Karen Meador
by Judy Ellis, Wirejewelry.com Wire Jewelry Pattern for July...
- July 31, 2017
-
 Free Pattern: Floating Bead Earrings By Kimberly Newman
by Judy Ellis, Wirejewelry.com Wire Jewelry Pattern for July...
- July 27, 2017
Featured Tools
-
 Get to Know Your Hand Tools – Tube-Cutting Jig By Helen I. Driggs
by Judy Ellis, Wirejewelry.com Wire Jewelry Tip for August...
- August 4, 2017
-
 Wire Jewelry Video: Using Punch Pliers by Judy Freyer Thompson
by Judy Ellis, Wirejewelry.com Wire Jewelry Tip for August...
- August 2, 2017
-
 Wire Jewelry Video: Aligning a Hole Punch by Judy Freyer Thompson
by Judy Ellis, Wirejewelry.com Wire Jewelry Tip for July...
- July 26, 2017
-
 Get to Know Your Hand Tools – Wire Cutters – Helen I. Driggs
by Judy Ellis, Wirejewelry.com Wire Jewelry Tip for July...
- July 25, 2017
0 comments